


Take Your Visual HTML Editor to the Next Level with AI Enhancements

We see AI everywhere these days, but what makes it so valuable in practical applications? For one, removing the dreaded “red eye” effect from photos. Another example is automatically generating some relevant tags for an image after uploading it. These features are just a glimpse into how AI can take images to the next level. In this blog post, we’ll explore how you can easily incorporate AI enhancements like red eye removal and auto image tagging into your visual HTML editor using Froala v4.4, Filestack, and React 18. Let’s dive in!
Key Takeaways
- Images and applications greatly benefit from AI enhancements
- Red eye removal fixes the “red eye” effect from photos taken in low-light conditions
- Auto image tagging gathers descriptive tags that correspond to an image’s general features
- Froala makes implementing both red eye removal and auto image tagging much easier
- Explore more AI features like OCR and image sentiment detection with Froala and Filestack
What Are AI Enhancements?
AI enhancements refer to tools or processes that use machine learning and computer vision to analyze and improve images or other data. These features streamline processes that would normally take plenty of effort and time. This may sound daunting, but thankfully, ready-made AI tools exist today. This means that now’s a great time to start incorporating these into your applications (if you haven’t already). Some examples include:
- Red eye removal: Deals with fixing the “red eye” effect caused by low-light photography (e.g., using flash in a dark setting). By removing such unwanted effects, you can delight your users by making their pictures look a lot cleaner.
- Auto image tagging: Analyzes an image and generates descriptive tags that highlight its key features. This greatly helps marketers, advertisers, e-commerce platforms, and more.
- Image SFW checking: Scans an image and determines whether it’s safe for work (SFW) or not. Perfect for community applications, social media platforms, or other user content-heavy applications.
- Image sentiment analysis: Detects emotions from images (e.g., happy, sad, frustrated, confused). This is a flexible tool for a wide range of users.
Filestack already has some APIs that help with implementing most of these enhancements. Moreover, Froala also natively comes with Filestack, making the implementation process even easier when using a WYSIWYG editor. Let’s see how we can do that in the next section.
How to Include AI Enhancements in Your Visual HTML Editor
Set up Your Visual HTML Editor
First, create a React app, and then navigate to your project’s directory.
npx create-react-app my-froala-editor-app
cd my-froala-editor-app
Afterwards, run the following command to install the latest version of Froala:
npm install react-froala-wysiwyg
Froala v4.4 comes with some cool updates, including support for React 18 and Angular 19. This time, we’ll use the former. Now that you have Froala in your project, create a new folder called “components” under the “src” directory. Under this new folder, create a new file called “FroalaComponent.jsx” and add the following code:
FroalaComponent.jsx
import React, { useEffect, useState } from 'react';
import 'froala-editor/css/froala_style.min.css';
import 'froala-editor/css/froala_editor.pkgd.min.css';
import FroalaEditorComponent from 'react-froala-wysiwyg';
import 'froala-editor/js/plugins.pkgd.min.js';

function FroalaComponent() {
    const [tags, setTags] = useState([]);

    const config = {
        filestackOptions: {
            uploadToFilestackOnly: true,
            filestackAPI: 'YourFilestackAPIKey',
            pickerOptions: {
              accept: ["image/*"],
              fromSources: ["local_file_system"],
            },
        },
        events: {
            'filestack.uploadedToFilestack': function (response) {
                if (response && response.filesUploaded[0].handle) {
                    const fileHandle = response.filesUploaded[0].handle;
                    // This is where we'll handle the red eye removal and image tagging AI enhancements
                    performEnhancements(fileHandle, this, setTags); // file handle, the editor instance and the setTags are passed as parameter
                } else {
                    console.error("Image upload failed, no URL found in response", response);
                }
            }
        },
        heightMin: 500,
        width: 1000
    };

    useEffect(() => {
        // import Filestack scripts
        const filestackScript1 = document.createElement('script');
        filestackScript1.src = 'https://static.filestackapi.com/filestack-js/3.32.0/filestack.min.js';
        filestackScript1.async = true;
        document.body.appendChild(filestackScript1);

        const filestackScript2 = document.createElement('script');
        filestackScript2.src = 'https://static.filestackapi.com/filestack-drag-and-drop-js/1.1.1/filestack-drag-and-drop.min.js';
        filestackScript2.async = true;
        document.body.appendChild(filestackScript2);

        const filestackScript3 = document.createElement('script');
        filestackScript3.src = 'https://static.filestackapi.com/transforms-ui/2.x.x/transforms.umd.min.js';
        filestackScript3.async = true;
        document.body.appendChild(filestackScript3);

        const filestackStylesheet = document.createElement('link');
        filestackStylesheet.rel = 'stylesheet';
        filestackStylesheet.href = 'https://static.filestackapi.com/transforms-ui/2.x.x/transforms.css';
        document.head.appendChild(filestackStylesheet);

        return () => {
            document.body.removeChild(filestackScript1);
            document.body.removeChild(filestackScript2);
            document.body.removeChild(filestackScript3);
            document.head.removeChild(filestackStylesheet);
        };
    }, []);

    return (
        <div>
            <div className="editor">
                <FroalaEditorComponent tag='textarea' config={config} />
            </div>
            <div id="image-tagging-results">
                <h3>Image Tagging Analysis:</h3>
                <ul>
                    {tags.map(([key, value], index) => (
                        <li key={index}>
                            {key}: {value}
                        </li>
                    ))}
                </ul>
            </div>
        </div>
    );
}

export default FroalaComponent;

// Placeholder Function
async function performEnhancements(fileHandle, editorInstance, setTags) {
    // We'll define this function in detail in the next step.
}
The code above handles the editor setup, including the necessary Froala options, Filestack options, scripts, and events. On a successful upload, we’ll call the “performEnhancements” function, which takes both the uploaded file’s handle, the editor instance and the setTags as parameters. However, we’ll discuss this further later on. For now, note that the FroalaComponent includes both the editor and a space where we’ll load the image tags. When you’re done with the editor setup, go to the “App.js” file and replace the default code with:
App.js
import './App.css';
import FroalaComponent from './components/FroalaComponent';

function App() {
  return (
    <div className="App">

      <FroalaComponent />
    </div>
  );
}

export default App;
This calls the FroalaComponent in your application. By now, you should see the editor when you run the application. And while you’re free to explore its features, we’re not quite done yet. It’s time to add some AI enhancements to our React application.
Add Red Eye Removal
Remember the “performEnhancements” function in FroalaComponent? Let’s create it now:
FroalaComponent.jsx
async function performEnhancements(fileHandle, editorInstance, setTags) {
  // Red Eye Removal
  const redEyeURL = `https://cdn.filestackcontent.com/redeye/${fileHandle}`;
  editorInstance.html.insert(
    `<img src="${redEyeURL}" alt="Red Eye Removed Image" style="display: block; margin: 20px auto; width: 302px; height: 190.23px;" />`
  );
}
Red eye removal requires just the Filestack API (“redeye”) and your file handle. To start off, create the URL by appending these requirements to the Filestack CDN. We’ll call that “redEyeURL.” Next, we can insert the URL directly into the editor to display it. If you need to store this URL or use it elsewhere, you can declare it as a constant or variable. That’s it for red eye removal. Let’s move on to how you can generate image tags automatically.
Handle Auto Image Tagging
In the same file (and “performEnhancements” function), add the following code:
FroalaComponent.jsx
// Auto Image Tagging
  const policy = "YourFilestackPolicy";
  const signature = "YourFilestackSignature";
  const autoTagURL = `https://cdn.filestackcontent.com/security=p:${policy},s:${signature}/tags/${fileHandle}`;

  try {
    const response = await fetch(autoTagURL);
    const tagData = await response.json();
    const tags = tagData?.tags?.auto;

    if (tags) {
      setTags(Object.entries(tags));
    } else {
      console.warn("No tags found for image.");
    }
  } catch (error) {
    console.error("Failed to fetch image tags:", error);
  }
Here is the complete “performEnhancements” function to replace the placeholder in the FroalaComponent.jsx file.
FroalaComponent.jsx
async function performEnhancements(fileHandle, editorInstance, setTags) {
  // Red Eye Removal
  const redEyeURL = `https://cdn.filestackcontent.com/redeye/${fileHandle}`;
  editorInstance.html.insert(
    `<img src="${redEyeURL}" alt="Red Eye Removed Image" style="display: block; margin: 20px auto; width: 302px; height: 190.23px;" />`
  );

  // Auto Image Tagging
  const policy = "YourFilestackPolicy";
  const signature = "YourFilestackSignature";
  const autoTagURL = `https://cdn.filestackcontent.com/security=p:${policy},s:${signature}/tags/${fileHandle}`;

  try {
    const response = await fetch(autoTagURL);
    const tagData = await response.json();
    const tags = tagData?.tags?.auto;

    if (tags) {
      setTags(Object.entries(tags));
    } else {
      console.warn("No tags found for image.");
    }
  } catch (error) {
    console.error("Failed to fetch image tags:", error);
  }
}
You can get both the policy and signature by generating them under the “Security” tab of the Filestack dashboard. You’ll need these for the auto image tagging feature. This time, instead of appending just the API keyword, add the security keywords, followed by the “tags” part and the file handle. Next, fetch a result from the auto tagging URL and convert it into JSON format. You’ll end up with an object of tags. Extract the data (key-value pairs, e.g., “face: 98, human: 99”) and set the tags into our displayable constant. All that’s left now is to run the application.
Upload an Image Using the Visual HTML Editor
In your CLI, run “npm start” to view the application. Click on the Filestack upload icon, which brings up the Filestack uploader UI. Choose an image that contains some form of red eye effect and upload it:
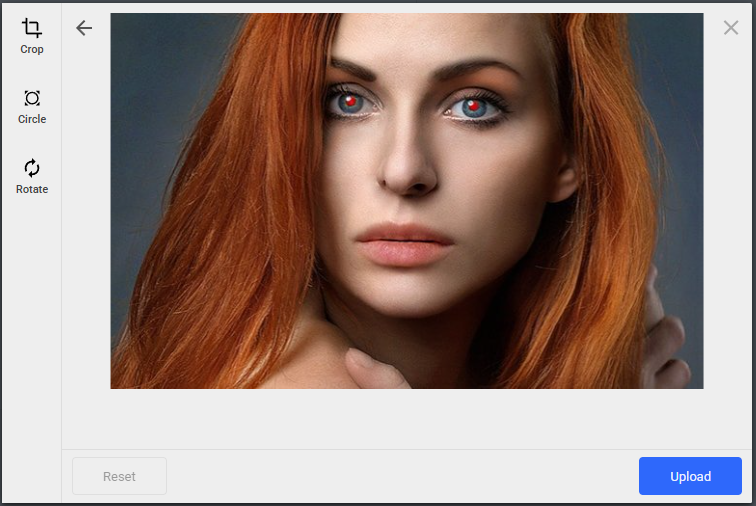
After clicking the upload button, you should see the new, enhanced image together with the results of the image tagging process.

From the result of the image tagging analysis, the uploaded image contains a portrait of an adult woman’s face. All the tags seem correct and accurate. Furthermore, the red eye effect from the original photo has disappeared, cleanly, I might add. And all it took to implement both AI enhancement features were a few lines of code.
Troubleshooting Common Issues When Adding AI Enhancements
Even with a solid setup, a few things can go wrong. Below are some common implementation issues developers face when integrating AI image enhancements into a visual HTML editor—and how to fix them.
Image Upload Works, but Enhancements Don’t Trigger
Solution:
- Ensure the filestack.uploadedToFilestack event is correctly implemented inside the events object.
- Double-check the spelling of “filestack.uploadedToFilestack”—it’s case-sensitive.
- Confirm the performEnhancements function is being called with all three parameters: fileHandle, editorInstance, and setTags.
Red Eye Image Not Displaying in the Editor
Solution:
Make sure you’re inserting the correct red eye URL format:
https://cdn.filestackcontent.com/redeye/<fileHandle>
- Check your browser’s developer console for broken image links or CORS issues.
- If the original image doesn’t have a visible red eye, the enhancement may result in no visual change.
Solution:
- Confirm you’ve added your Filestack security policy and signature correctly in the autoTagURL.
- Make sure the image is clear and contains recognizable elements (faces, objects, etc.).
- Ensure your Filestack account has “tags” transformation enabled.
Solution:
- Verify that setTags() is being called inside performEnhancements and that tags is being rendered in your component’s JSX.
- Use console.log(tags) to confirm you’re receiving an array of key-value pairs.
- Ensure you’re mapping the entries with Object.entries(tags) like this:
{tags.map(([key, value], index) => (
    <li key={index}>{key}: {value}</li>
))}
Filestack Scripts Not Loading
Solution:
- Make sure your <script> tags in useEffect have the correct URLs.
- Confirm you are appending them to document.body and cleaning them up correctly on unmount.
- If you’re behind a strict Content Security Policy (CSP), ensure Filestack domains are whitelisted.
Learn more in the official Filestack and Froala documentation.
Wrapping up: Enhance Your Visual HTML Editor with AI Today
Adding AI enhancements like red eye removal and automatic image tagging to your visual HTML editor isn’t just cool—it’s practical and efficient. With tools like Froala and Filestack, you can easily implement these advanced features to significantly improve the user experience in your application. And why stop there? Dive into other powerful AI features like OCR, image sentiment analysis, and SFW detection to take your app to new heights. It is, after all, a great time to include AI in our applications.


No comment yet, add your voice below!