


How to Add Virus Detection Capabilities in Your HTML Editor Software

Today, HTML editor software goes beyond creating clean code or supporting rich text capabilities. It has transitioned into a gateway where users can introduce files, scripts, and external resources into a system. Without proper safeguards, these entry points turn into opportunities for attackers.
Malicious scripts hidden in HTML, infected file uploads disguised as harmless images, or embedded links are potential threats. These attacks are subtle yet powerful enough to compromise entire websites, spread malware, or even steal sensitive user information. With the rise of these vulnerabilities, protecting your infrastructure and users is a top priority.
Thankfully, some of the best HTML editors come with virus and malware detection software. These transform an HTML editor from a simple content tool into a safer environment. For businesses, developers, and content creators alike, this functionality is essential for preserving trust.
In this article, you’ll discover common HTML editor software security risks and some of the benefits that virus detection brings. Additionally, you’ll learn how to implement this using a file management tool from within the editor. Lastly, you’ll see some useful tips that could help you secure your HTML editors further.
Key Takeaways
- HTML editor software is a frequent entry point for malware due to file uploads and embedded scripts.
- Virus detection capabilities protect both end-users and organizations from hidden threats.
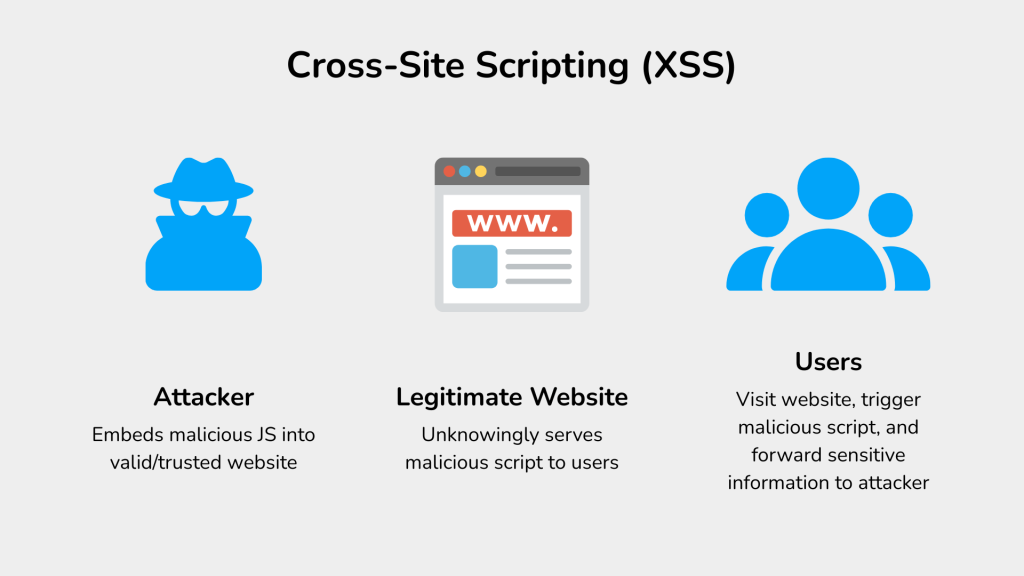
- Cross-site scripting (XSS) and disguised file uploads are two of the most common attack vectors.
- You can use Filestack’s virus detection feature, embedded into your HTML editor, to scan file uploads for any potential threats.
- Regular updates, SSL/TLS connections, and penetration testing help strengthen long-term protection.
Understanding Security Risks in HTML Editors
HTML editors handle a variety of content types, which makes them prime targets for attackers.
Cross-site scripting (XSS) is one of the most common risks for HTML editor software. It involves embedding malicious JavaScript through a web application to a different end user. When unsuspecting users view the content, the script executes, potentially stealing cookies, session tokens, and sensitive information in the browser.
HTML editors allow users to upload their own files, which led attackers to exploit file uploads. For instance, an attacker might disguise an executable file (.exe) as an image or PDF, slipping it past filters. Once it reaches the server, the malicious file could then spread malware across the server or end-user machines.
External resources, such as scripts or iframes from unsafe domains, also present risks. These can redirect users to phishing pages or inject malware into otherwise trusted websites.
The impact of these common security risks is wide-ranging. For example, these could lead to small-scale site defacement, which hinders UX and even endangers your users. These could also cause large-scale data breaches that can damage brand reputation and create legal liability.
Why Virus Detection Matters in HTML Editor Software
Building virus detection directly into HTML editor software addresses these threats before they spread.
Firstly, it protects end-users by preventing them from unintentionally executing harmful code. For example, if an employee accidentally pastes scripts from untrusted sources into a company knowledge base, virus scanning can catch it before publication.
Virus detection can also shield businesses from the costly consequences of a compromised system. These can range from customer distrust to regulatory fines under GDPR, HIPAA, or other regulations. By ensuring that only sanitized, secure content enters the system, organizations also strengthen compliance while preserving their reputation.
Finally, virus detection creates a safer collaborative environment. Teams can focus on editing, formatting, and publishing without worrying about hidden threats lurking in their content.
Core Features of Virus Detection in HTML Editors
Effective virus protection inside HTML editor software relies on multiple layers of defense.
- File upload scanning helps ensure that images, PDFs, or documents don’t contain hidden malware from entering shared content libraries.
- Script validation checks embedded JavaScript, inline events, or external iframes for suspicious behavior. For example, an editor could block inline onload events that might trigger attacks.
- Real-time monitoring continuously scans content for threats, flagging issues as soon as they occur rather than after files reach the server.
- Quarantine & alerts isolate harmful files and notify administrators or security immediately. This ensures fast remediation without disrupting normal content workflows.
Any of these can greatly contribute to your infrastructure’s security, but you can combine these together for better effect. For example, you can integrate quarantine and alerts into file upload scanning to automatically isolate potentially infected files.
Technical Approaches to Implement Virus Detection
There are several ways to integrate virus detection into HTML editor software, each with strengths and trade-offs.
Integration with Antivirus Engines
This is the most direct approach, as this involves using ready-made tools. For example, you can use ClamAV, VirusTotal API, or other proprietary SDKs to scan files before storing them. These APIs act as external security services, which can return a “clean” or “infected” result.
Sandboxing & Heuristic Analysis

This provides advanced protection by executing suspicious files in a controlled environment (sandbox), analyzing behavior instead of signatures. For example, a file that tries to open unexpected network connections would result in a “malicious” flag. As a result, this method helps identify even new and unknown threats. Think of sandboxing like a safe play area for testing suspicious files.
Heuristic analysis uses rules and algorithms to predict whether a file is malicious based on its structure, instructions, or resemblance. For example, if a program has obfuscated code, tries to self-modify, or calls suspicious APIs, heuristics might flag it even before execution.
Signature-based Scanning vs. Behavior-based Detection
Signature-based scanning matches files against known malware fingerprints. It’s fast, but it’s limited by zero-day threats. By contrast, behavior-based detection identifies anomalies in how a file or script acts. A robust system often combines both methods.
Note that behavior-based detection is different from sandboxing and heuristics in that it watches live or real-time behavior of the file on a system. In contrast, sandboxing and heuristics occur in simulations or predictions (pre-check instead of live).
Content Sanitization
This approach helps ensure that only clean or safe HTML survives by stripping out unsafe HTML, JS, and inline events. Tools like DOMPurify or OWASP HTML Sanitizer can help keep your website safe from XSS attacks.
Note: Sanitization is not just a backup measure. You should include it as a default safeguard even if antivirus scanning is in place. Even better, you can opt to use distraction-free HTML editor software that has built-in XSS protection.
Note: Each of these approaches comes with its own limitations or challenges, such as cost or scalability. It’s important to balance these according to your needs, but in general, security is always a good investment.
Step-by-Step Guide to Adding Virus Detection in HTML Editor Software
Building security into your HTML editor follows a structured process.
1. Define Security Requirements
Decide which content types need scanning: file uploads, embedded HTML (or scripts), or external resources. In most cases, you’ll need to protect against vulnerabilities for all three. In this example, we’ll focus more on protecting against malicious file uploads through Filestack’s virus detection feature.
To get started, ensure that you have a Filestack account with the Virus Detection feature active. You should also have access to Filestack Workflows, which lets you automate file processing and chain tasks together.
Furthermore, you’ll need Filestack’s Webhooks. This allows you to add endpoints to which Filestack will send the result of the virus detection task. This guide also uses Beeceptor, which creates a mock endpoint for webhook or API simulation.
Lastly, you’ll need Froala’s v4.3 or higher, as it natively contains Filestack in the editor.
2. Integrate File Upload Security
We want the application to work so that it doesn’t store suspicious or malicious uploads. This also means that we’ll store safe files normally. To do this, log into your Filestack account through the Dev Portal.
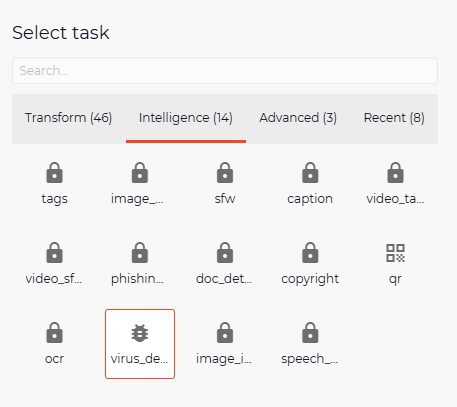
After logging in, click the “Workflows” tab from the menu and click “Create New.” After naming your workflow, click the plus button, and from the “Intelligence” tab, choose “virus_detection.” This creates a new virus detection task in your workflow.
Afterwards, create another task by searching for “virus_detection” and adding a new condition through a button above. Set the path to “infected,” the condition to “eq,” and the value to “false.” This makes the workflow store the file if there are no viruses present (the infected field is set to false).
You could also use the same logic to create a condition for removing infected files (the infected field is set to true).
Next, open Beeceptor and create a mock endpoint or server. Go back to Filestack’s dashboard, click “Webhooks” under the Configuration tab, and add the URL of your endpoint. Don’t close your Beeceptor tab yet (if you’re using it), since you’ll revisit this after uploading an image.
Once that’s settled, go to your JavaScript file and paste the following code. Make sure that you have an element in your DOM that has the “#froala-editor” identifier.
new FroalaEditor('#froala-editor',{
    filestackOptions: {
        filestackAPI: 'YourAPIKey',
        uploadToFilestackOnly: true,
        pickerOptions: {
            fromSources: ['local_file_system'],
            storeTo: {
                workflows: ["yourWorkflowID"]
            }
        }
    },
    toolbarButtons: {
        'moreRich': {
            'buttons': ['openFilePickerImageOnly', 'openFilePicker', 'insertLink', 'insertTable', 'emoticons', 'specialCharacters', 'insertHR'],
            'buttonsVisible': 3
        },

        'moreText': {
            'buttons': ['bold', 'italic', 'underline', 'fontFamily', 'fontSize', 'textColor', 'backgroundColor', 'clearFormatting']
        },

        'moreParagraph': {
            'buttons': ['alignLeft', 'alignCenter', 'formatOLSimple', 'alignRight', 'alignJustify', 'formatOL', 'formatUL', 'paragraphFormat', 'paragraphStyle', 'lineHeight', 'outdent', 'indent', 'quote']
        },
        'moreMisc': {
            'buttons': ['undo', 'redo', 'fullscreen', 'selectAll', 'html', 'help'],
            'align': 'right',
            'buttonsVisible': 2
        }
    },
    events: {
        'filestack.uploadedToFilestack': function (response) {
            console.log(response.filesUploaded[0]);
        },
        'filestack.uploadFailedToFilestack': function (response) {
            console.log(response);
        },
    },
    heightMin: 500,
    heightMax: 1000
});
This code configures Froala Editor as well as the natively integrated Filestack features. Update the fields with your actual API key and Filestack Workflow ID. You can also change, add, or remove different features and plugins here, since Froala follows the standard modular architecture in HTML editors.
3. Run the Application
Using a browser, run your application. Afterwards, click the Filestack icon to upload a file.
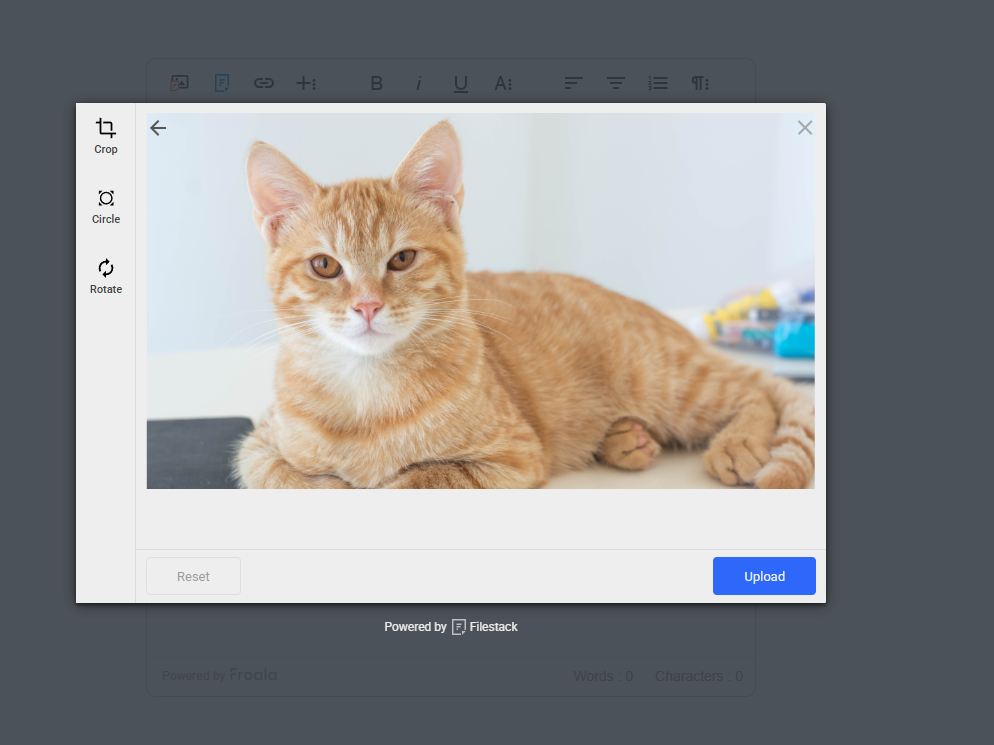
Should the file contain any viruses, the virus detection workflow will remove it or not store it. Otherwise, it will store it normally. This example shows the upload of a harmless picture of a cat. Thus, the workflow should allow the storing of this image.
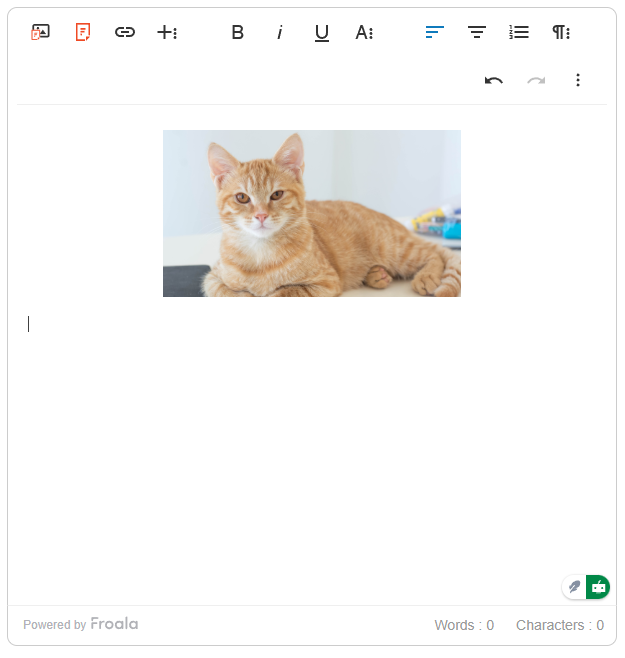
After the upload, the file appears on the editor. This tells you that the file is safe and doesn’t contain any viruses or malware. If you open the browser console, you’ll also see the following file metadata from the uploaded file:

This shows the file’s name, handle, path, and other information. More importantly, we can see that its status is “Stored,” which means that it’s a safe and valid file. From here, you can implement other security measures as well as file processing features (e.g., content safety, image tagging).
Now, go back to your Beeceptor webhook endpoint (or your actual endpoint). You should see a request from Filestack, which may look similar to the following image:
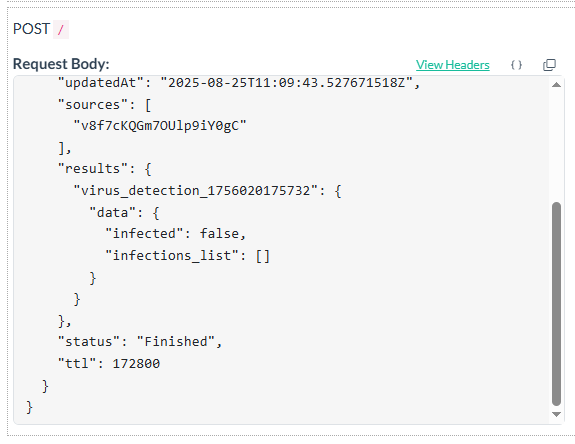
From the Filestack request, you’ll notice the “virus_detection” workflow result, which contains “infected” and “infections_list” properties. Since the “infected” property is false and the list of infections is empty, the file doesn’t contain any viruses.
Best Practices for Secure HTML Editor Development
Adding virus detection is powerful, but you should maintain it with best practices. Here are some effective and common tips to further secure your application.
- Keep antivirus signatures up-to-date so your system recognizes the latest threats.
- Limit accepted file types to reduce risk. Allow only images, PDFs, safe document formats, or only the file formats that you need.
- Use SSL/TLS encryption for secure communication with antivirus APIs.
- Sandbox the HTML editor from the underlying operating system to contain and isolate potential exploits.
- Educate end-users with prompts and warnings about safe file handling. At the same time, check the file sizes, file types, and other metadata of all uploads.
- Enable real-time threat alerts for both users and administrators.
- Run regular penetration tests to validate that your defenses hold up against evolving threats.
Note: Even the most advanced scanning system won’t stop every possible threat. Combine virus detection, sanitization, user training, and other methods to create a layered security strategy.
Conclusion
In HTML editor software, you can’t think of security as an afterthought. With users constantly uploading files, pasting external code, and embedding links, actions can turn into possible entry points for malware. Thus, virus detection is vital to secure HTML editors.
By integrating virus detection, sanitization, and real-time monitoring, editors evolve from simple text tools into secure environments that protect both businesses and end-users. For teams building, customizing, or integrating HTML editors, it’s clear that secure editing is better editing.
Looking to enhance your HTML editor with security features? Explore integration-ready tools and start building a safer editing experience.


No comment yet, add your voice below!