


How to add Froala HTML Editor Software in Django in 2025

Django is a powerful Python web framework that helps developers build web applications quickly and efficiently. Froala 4.4 release adds support for the popular Python framework, Django 5.
Integrating Froala HTML Editor Software into a Django project allows users to create and edit rich text content within the application. By combining the flexibility of Froala and the rapid development capabilities of Django, you can create dynamic, user-friendly web applications that meet the evolving needs of your audience.
In this step-by-step guide, you’ll learn how to integrate the Froala HTML Editor Software into a Django form, allowing your users to create and edit rich text content within your application. Whether you’re building a blog, a content management system, or any other web application, this Django HTML editor integration will enhance the user experience and unlock new possibilities for your project.
Prerequisites
Being a Python web framework, Django requires Python. We’re assuming:
- You are familiar with Python and have it installed on your computer. If not, please install python and come again.
- You have Django installed already.
Versions Used in This Tutorial
- Froala Editor V4.4
- Python V3.13.1
- Django V5.1.5
Step 1: Getting started
From the command line, cd into a directory where you’d like to store your code and create a new directory named froaladjangotutorial.
mkdir froaladjangotutorial
Then, run the following command to bootstrap a new Django project:
django-admin startproject myapp froaladjangotutorial
This will create a project called myapp inside the froaladjangotutorial directory.
Step 2: Creating a Demo app
To create your app, jump into the created directory:
cd froaladjangotutorial
Type the following command:
py manage.py startapp demos
That’ll create a directory demos which will contain our demo code.
Step 3: Install Froala
To begin, you’ll need to install the Froala Django package. You can do this using pip.
pip install django-froala-editor
After successfully installed, open myapp/settings.py and add froala_editor into the INSTALLED_APPS array.
# Application definition

INSTALLED_APPS = [
    'django.contrib.admin',
    'django.contrib.auth',
    'django.contrib.contenttypes',
    'django.contrib.sessions',
    'django.contrib.messages',
    'django.contrib.staticfiles',
    'froala_editor'
]
Then open the myapp/urls.py file and include the Froala Editor URLs.
from django.contrib import admin
from django.urls import include,path

urlpatterns = [
    path("demos/", include("demos.urls")),
    # Froala Editor URLs
    path('froala_editor/', include('froala_editor.urls')),
    path('admin/', admin.site.urls),
]
Step 4: Create a form with a Froala
Create a new file demos/forms.py and add the following code:
from django import forms
from froala_editor.widgets import FroalaEditor

class FroalaForm(forms.Form):
    content = forms.CharField(widget=FroalaEditor)
In the above code, we've created a Django form with a FroalaEditor widget.
Step 5: Configure Froala
You can also customize the editor’s appearance and behavior by passing various options to the FroalaEditor widget.
For example, to initialize the Froala Editor with an inline toolbar, you can use the following code:
from django import forms
from froala_editor.widgets import FroalaEditor

class FroalaForm(forms.Form):
    content = forms.CharField(widget=FroalaEditor(options={
      'toolbarInline': True,
    }))
This will create a Froala Editor instance with an inline toolbar, allowing users to format the content as needed. You can further customize the editor by modifying the options passed to the FroalaEditor widget.
Step 6: Create a template to render the form
You’ll need to configure the Froala Editor in your Django templates. In the demos app, create a new file called froala_form.html in the /templates directory. In this file, you’ll add the necessary HTML and Django template tags to integrate the Froala Editor.
<!DOCTYPE html>
<html>

<head>
    <title>Froala Editor</title>
    {{ form.media }}


</head>

<body>
    <h1>Froala Editor</h1>
    <form method="post">
        {% csrf_token %}
        {{ form.as_p }}
        <button type="submit">Submit</button>
    </form>

</body>

</html>
Make sure to update your settings.py to include the templates directory in the TEMPLATES setting:
import os

# ...existing code...

ROOT_URLCONF = 'mysite.urls'

TEMPLATES = [
    {
        'BACKEND': 'django.template.backends.django.DjangoTemplates',
        'DIRS': [os.path.join(BASE_DIR, 'demos', 'templates')],
        'APP_DIRS': True,
        'OPTIONS': {
            'context_processors': [
                'django.template.context_processors.debug',
                'django.template.context_processors.request',
                'django.contrib.auth.context_processors.auth',
                'django.contrib.messages.context_processors.messages',
            ],
        },
    },
]
Step 7: Update the view to render the template
Update your demos/views.py file to render the form in the template:
from django.shortcuts import render
from .forms import FroalaForm

def index(request):
    if request.method == 'POST':
        form = FroalaForm(request.POST)
        if form.is_valid():
            # Process the form data
            pass
    else:
        form = FroalaForm()

    return render(request, 'froala_form.html', {'form': form})
Step 8: Map The URLs
Define a URLconf for the demos app by creating a file demos/urls.py with the following content:
from django.urls import path

from . import views

urlpatterns = [
    path("", views.index, name="index"),
]
The next step is to configure the global URLconf in the myapp project to include the URLconf defined in demos.urls.
To do this, add an import for django.urls.include in myapp/urls.py and insert an include() in the urlpatterns list, so you have:
from django.contrib import admin
from django.urls import include,path

urlpatterns = [
    path("demos/", include("demos.urls")),
    path('admin/', admin.site.urls),
]
Step 9: Test the demo app
Verify the demo app is working with the following command:
python manage.py runserverYou can now access the demo app by visiting `http://127.0.0.1:8000/demos/` in your web browser. This will display the form you created, including the Froala Editor.
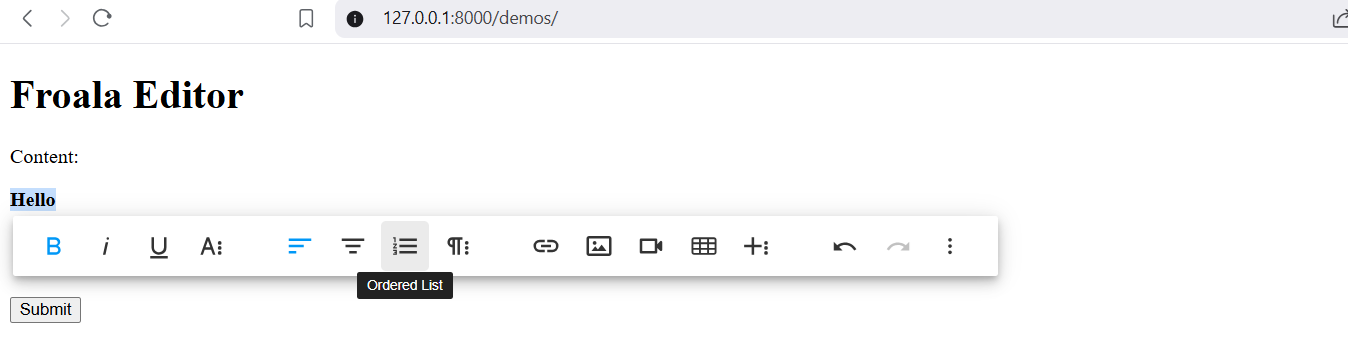
With the Froala Editor integrated into your Django application, users can now create and edit rich text.
Learn more in the official Froala documentation and Django documentation.
Troubleshooting: Common Django–Froala Integration Issues
1) Editor doesn’t appear (just a plain textarea)
Symptoms: No toolbar, no styling; browser console shows 404s for CSS/JS.
Checks & Fixes:
- Ensure the app is installed: add ‘froala_editor’ to INSTALLED_APPS.
- Include form media in the template:
{{ form.media }} - Place it inside <head> or before </body>.
- Don’t mix CDN and local assets from different versions. Use the assets that ship with django-froala-editor (recommended) or keep all Froala files on the same version.
2) 404 on /froala_editor/…URLs
Symptoms: Toolbar icons missing; media uploads or plugins fail; 404 for paths under /froala_editor/.
Fix: Make sure you included Froala’s URL patterns in your project URLs:
# myapp/urls.py
from django.urls import include, path

urlpatterns = [
    path("demos/", include("demos.urls")),
    path("froala_editor/", include("froala_editor.urls")),  # required
    path("admin/", admin.site.urls),
]
3) Static files load in dev but not in production
Symptoms: Works locally, breaks after deploy (no CSS/JS).
Fixes:
- Set static settings and collect static assets:
STATIC_URL = "/static/"
STATIC_ROOT = BASE_DIR / "staticfiles"
- Then run:
python manage.py collectstatic
- Make sure your web server (e.g., NGINX) serves STATIC_ROOT.
4) Images/files don’t upload from the editor
Symptoms: The Upload button shows errors, 403, or 404 on upload endpoints.
Checks & Fixes:
- Ensure Froala’s upload endpoints are enabled by including froala_editor.urls (see #2).
- Configure media settings and URL patterns:
MEDIA_URL  = "/media/"
MEDIA_ROOT = BASE_DIR / "media"
- In your project URLs (development only), serve media:
from django.conf import settings
from django.conf.urls.static import static

urlpatterns += static(settings.MEDIA_URL, document_root=settings.MEDIA_ROOT)
- CSRF: If you see 403 CSRF errors on upload, ensure your template includes {% csrf_token %} in forms, and that AJAX requests include the CSRF token (Django’s default CSRF cookie + header).
5) “Toolbar icons missing,” but editor loads
Symptoms: Editor renders; icons appear as empty squares.
Fix: Font files (e.g., .woff, .ttf) not served correctly. Verify your static files setup (see #3) and that icon/font MIME types are allowed on your server/CDN.
Security Best Practices for Rich Text Input
When integrating HTML Editor Software like Froala into Django, it’s important to handle user-generated content securely:
- Sanitize input server-side: Use libraries like bleach to remove unsafe tags, scripts, and attributes before saving or rendering.
- Limit editor features: Configure Froala to allow only the formatting and media options your app supports.
- Validate uploads: Check file type and size, and scan for malware if image or document uploads are enabled.
- Apply CSP (Content Security Policy): Restrict scripts and assets to trusted sources using tools like django-csp.
- Enforce Django security settings: Always use HTTPS, secure cookies, CSRF protection, and set headers like X_FRAME_OPTIONS = “DENY”.
Example: Sanitizing Rich Text with bleach
import bleach

def sanitize_content(content):
    allowed_tags = ['p', 'b', 'i', 'u', 'ul', 'ol', 'li', 'a', 'blockquote', 'br']
    allowed_attrs = {'a': ['href', 'title']}

    return bleach.clean(content, tags=allowed_tags, attributes=allowed_attrs, strip=True)

# Usage in a Django view
if form.is_valid():
    raw_content = form.cleaned_data['content']
    safe_content = sanitize_content(raw_content)
    # Save safe_content to the database
This ensures only safe HTML tags and attributes are stored, reducing risks like XSS (Cross-Site Scripting).
Conclusion
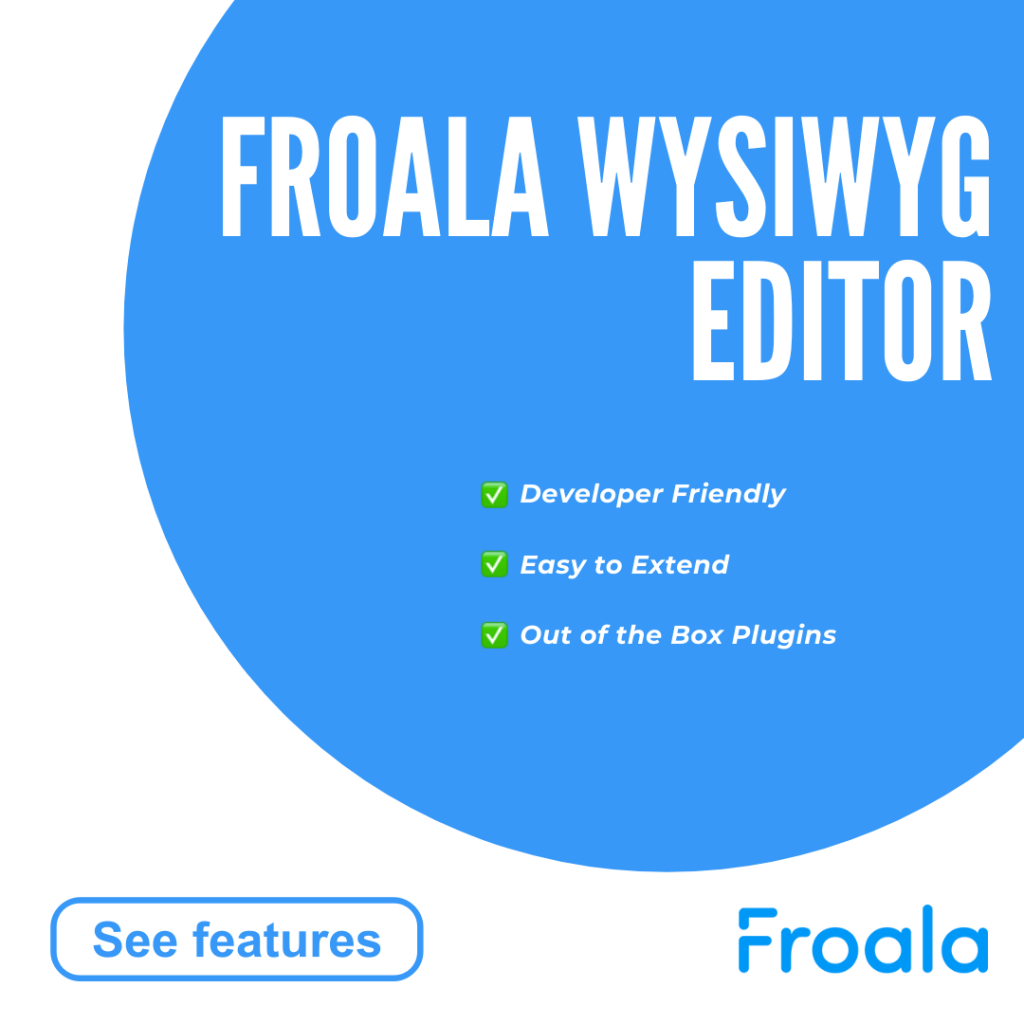
Integrating the Froala WYSIWYG Editor into your Django application is a powerful way to enable rich text editing for your users. By following the steps outlined in this article, you can quickly add a feature-rich text editor to your Django forms.
The Froala Editor provides a wide range of customization options, allowing you to tailor the editor to your specific needs. Whether you want an inline toolbar, custom buttons, or advanced formatting options, the Froala Editor has you covered.
Now that you know how to add the Froala Editor to your Django project, why not give it a try? Start by creating a new Django project and follow the steps in this guide. Before long, you’ll have a dynamic, user-friendly text editing experience integrated into your web application.


No comment yet, add your voice below!