Days
Hours
Minutes
Seconds
x
Skip to content

Top 10 AI Features for Modern WYSIWYG Editors

icon

A WYSIWYG editor serves as the backbone of most modern content-centric web applications. And as artificial intelligence (AI) continues to advance, its role in editing has grown stronger. Developers now integrate AI into WYSIWYG editors to assist with writing, suggest ideas, or even understand and analyze visual content.

As a result, end users of these AI-powered editors get more productivity, creativity, and convenience. From email builders and blogging platforms to LMS (learning management systems), these editors help people make content faster.

This article explores ten AI features for WYSIWYG editors that improve writing quality, user experience, and even code. For each feature, youโ€™ll also see a practical example of how they enhance both developer and user workflows.

Key Takeaways

  • AI enhances a WYSIWYG HTML editor by combining creativity, accessibility, and efficiency in one intelligent workspace.
  • Text-centric AI features improve writing clarity, tone, grammar, and flow directly in the editor.
  • Media-centric AI features make images safer, more accessible, and context-aware through NSFW detection, OCR, and sentiment analysis, respectively.
  • Editors with code view and AI features help developers refactor, debug, and maintain cleaner code right inside the editor.
  • Smart editing amplifies creativity, helping users create faster and with greater confidence.

Smart Text Rewriting

Smart text rewriting lets users rephrase sentences to improve tone, clarity, or grammar. It uses natural language processing (NLP), a subset of AI, to understand context and meaning before suggesting alternatives.
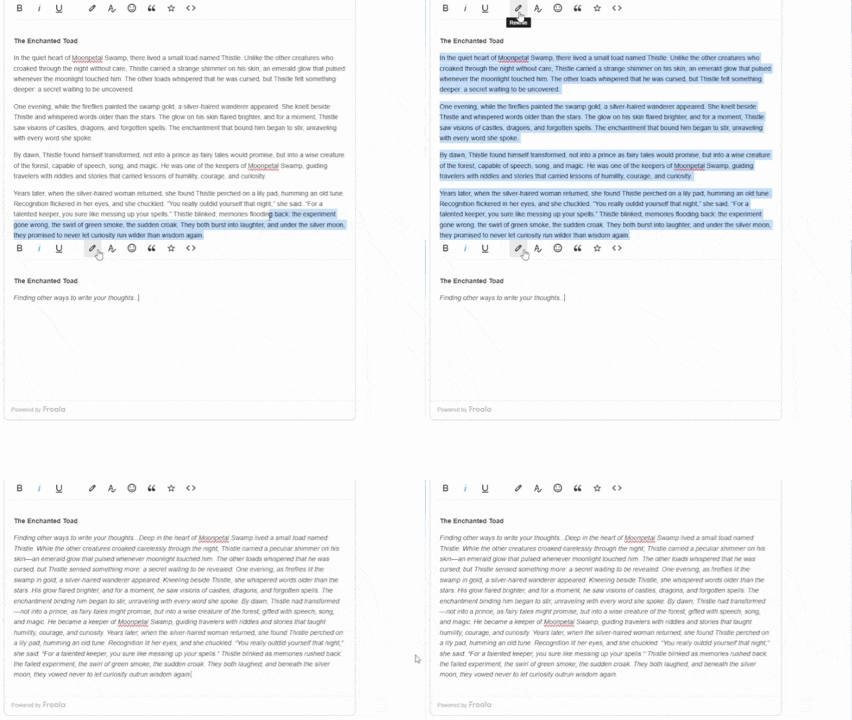
A GIF that demonstrates smart text rewriting through AI.

For example, a user can highlight a long, repetitive paragraph and ask the AI to make it concise. The model rewrites it while keeping the intended message intact. This helps save time during editing and helps maintain a consistent writing voice across multiple sections.

Rewriting tools are valuable for marketing teams, content editors, and students. With some highlighting and a button click, they can turn rough drafts into polished versions quickly.

Tip: Always give control over the AI output. A simple โ€œReplaceโ€ or โ€œDiscardโ€ button builds trust and prevents over-automation.

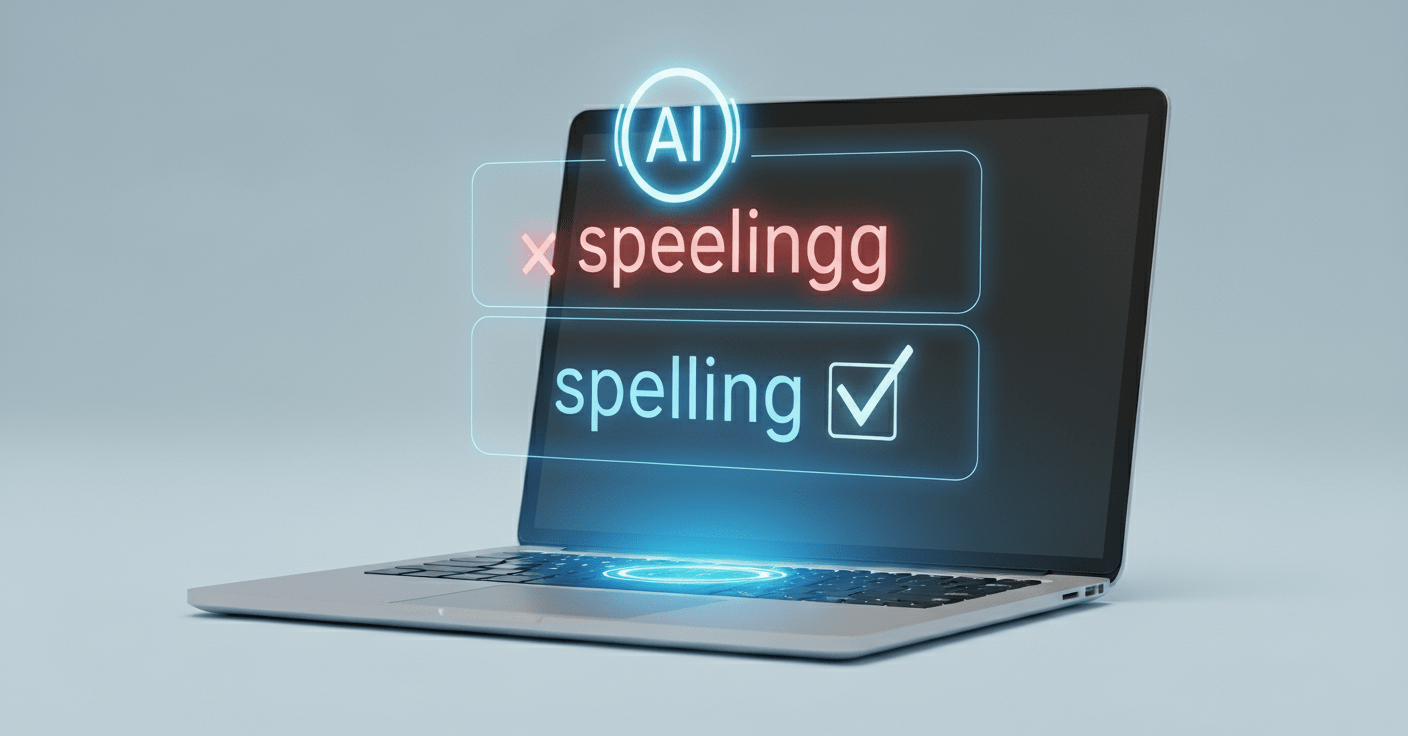
Grammar and Spelling Correction

AI-based grammar and spelling checkers help improve content accuracy without requiring the user to leave the editor. Trained AI models can detect grammar issues, word misuse, or punctuation errors in real time or through a button click. For better accuracy, set the modelโ€™s temperature to 0 (less variation, more focused, and more consistent).
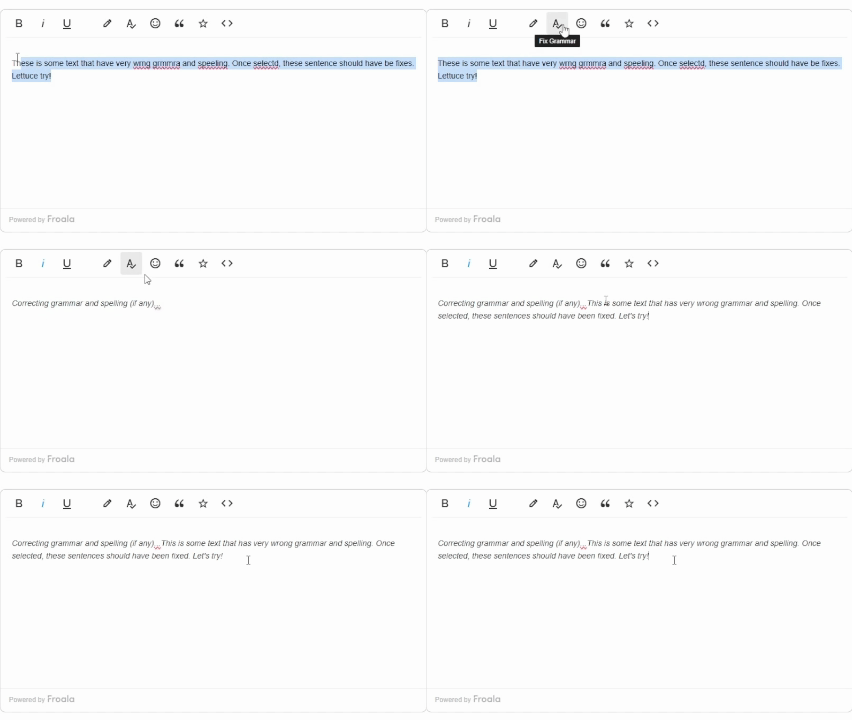
A GIF demo that shows an in-editor AI fixing a sentence with incorrect grammar and spelling.

Unlike rule-based checkers, AI systems consider sentence context. For example, they recognize the difference between โ€œtheirโ€ and โ€œtheyโ€™re,โ€ which traditional checkers might miss. Some WYSIWYG editors show underlined words with suggestions, while others display correction popups when a user hovers over the text.

This feature benefits ESL (English as a Second Language) users who need language guidance without switching tools. Additionally, it helps professional writers maintain consistency across long documents.

Tone and Style Adjustment
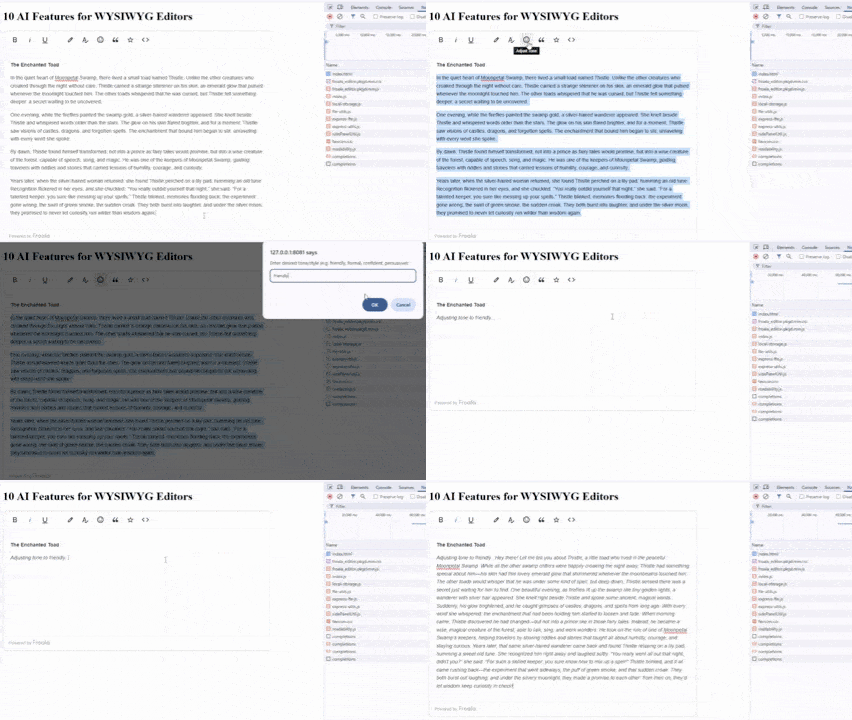
In this GIF, the user asks the in-editor AI to rewrite the block of text in a friendly tone.

Tone and style greatly affect how readers interpret content. AI can analyze existing text and adjust its tone to fit specific audiences.

For instance, an email-based customer support agent can task the editor to make a message sound โ€œpolite yet direct.โ€ Meanwhile, a content marketer might request โ€œfriendly and persuasive.โ€ The AI rewrites sentences based on sentiment analysis and stylistic models, keeping the message intact but adapting its delivery.

Tone control adjustment is useful in customer service, branding, and corporate communication. It helps organizations maintain consistent voice and professionalism across all published materials.

Note: You can combine tone and style adjustment together with smart text rewriting for better content production. That way, AI can rewrite your usersโ€™ text with the right tone in mind.

Content Summarization
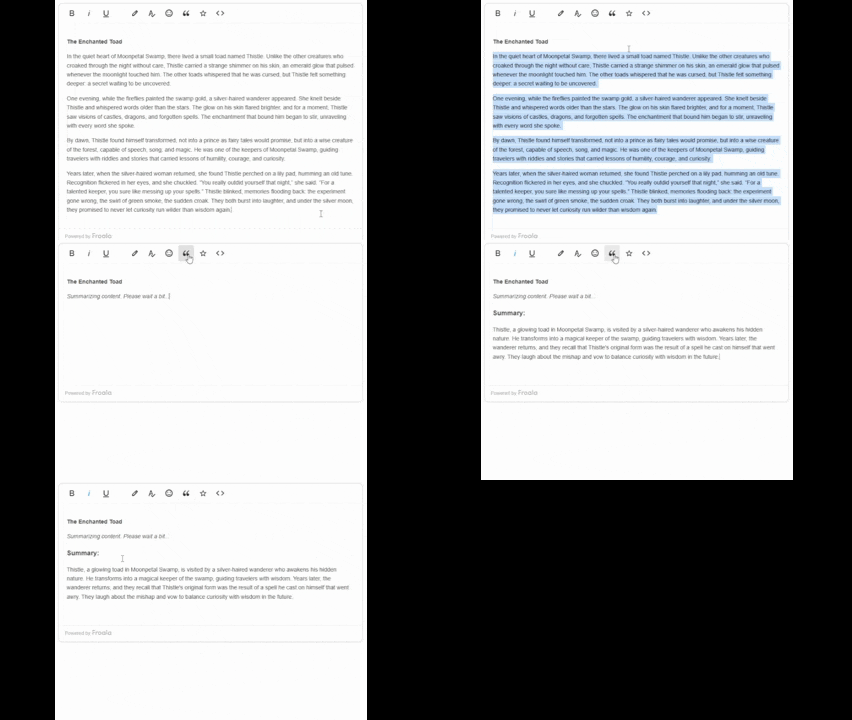
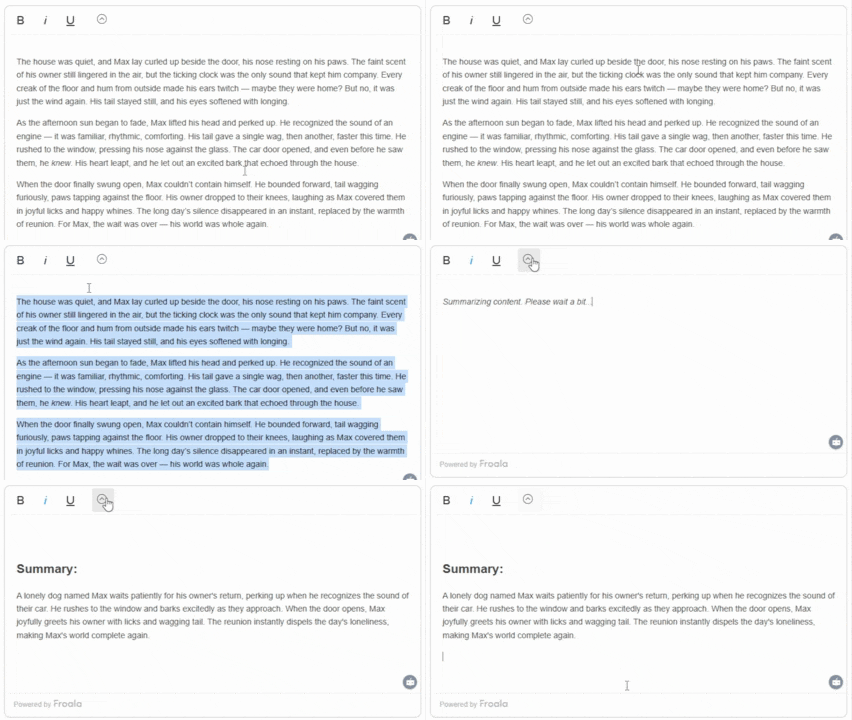
A GIF that shows how AI in editors can summarize long blocks of text.

Writers often deal with lengthy drafts, documents, or meeting notes. Content summarization helps them condense large texts into concise, readable versions.

Using AI-driven NLP, WYSIWYG editors can identify the most important points and reconstruct them into shorter summaries. Usually, users can choose between brief summaries (one paragraph) or detailed versions (a few key points).

This is ideal for editors, documentation writers, or students who need quick overviews without reading entire documents. It also enhances collaboration by letting teams review key information faster.

Tip: Provide a โ€œCompareโ€ view that shows both the full text and the summary side by side for transparency. Furthermore, always encourage your users to still scan the full text for professional or critical information.

Headline and Title Generation
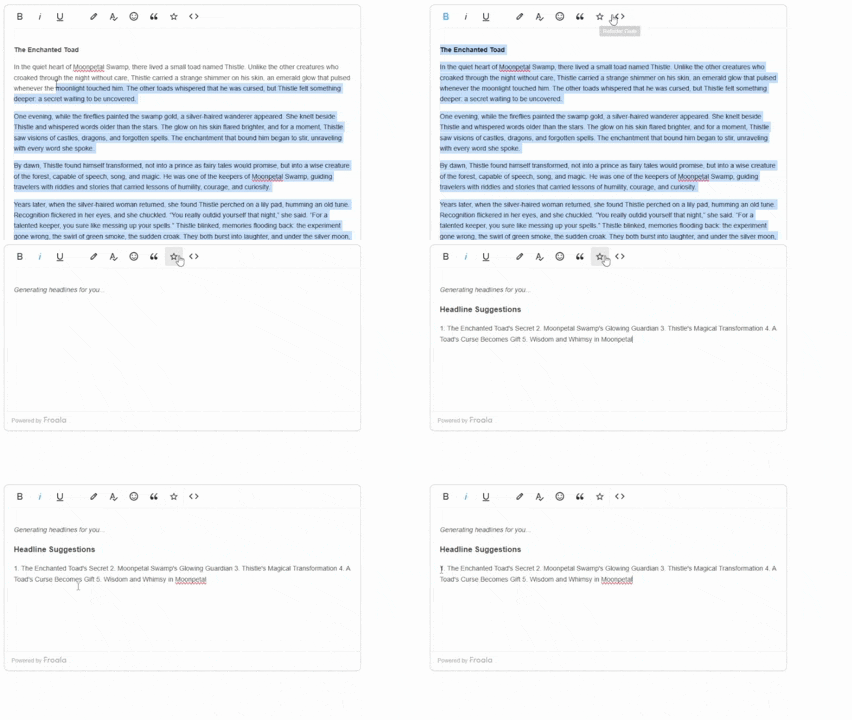
A GIF that shows an in-WYSIWYG editor AI generating a few headline ideas for text.

Titles influence how content performs online. AI headline generation tools can produce creative and SEO-friendly titles based on existing text.

By analyzing tone, length, and keyword usage, AI suggests catchy options that align with audience intent. For example, if your post discusses digital privacy, AI might suggest โ€œ5 Simple Ways to Protect Your Online Identity.โ€

This feature helps bloggers, journalists, and marketers brainstorm ideas faster while improving click-through potential.

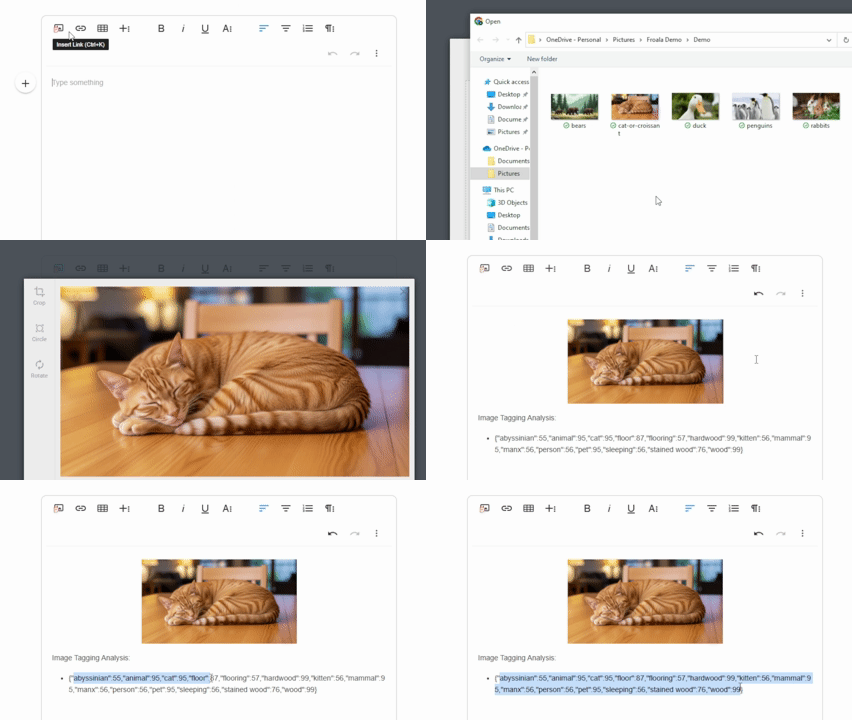
Auto Image Captioning and Alt Text Generation
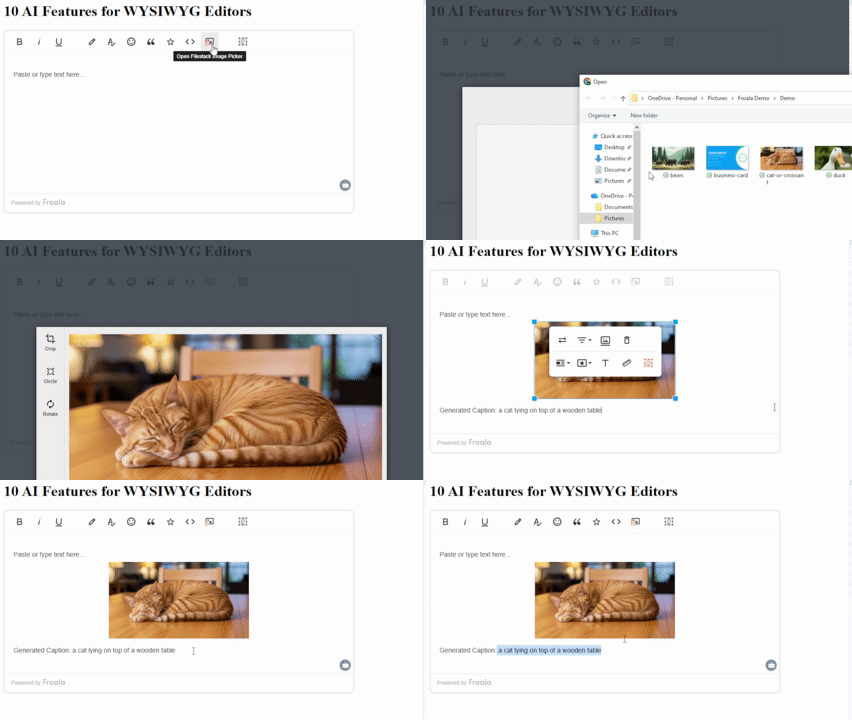
This GIF demonstrates how AI can generate captions for images. After an image of a cat lying down on a table is uploaded, the AI adds the caption to the editor's editing space.

Accessibility and SEO both depend on proper image descriptions. AI can automatically generate alt text (used by screen readers) and captions when users upload images.

Using computer vision, the AI identifies objects, settings, or actions within an image and describes them in natural language. For example, it can generate โ€œA group of people discussing around a laptopโ€ as alt text for a meeting photo.

This saves time for content creators while supporting users who use assistive technologies like screen readers.

Tip: Encourage users to review and approve captions before publishing. As with everything AI, this helps ensure accuracy and gives the decision to the users instead of the AI.

Content Safety Checking
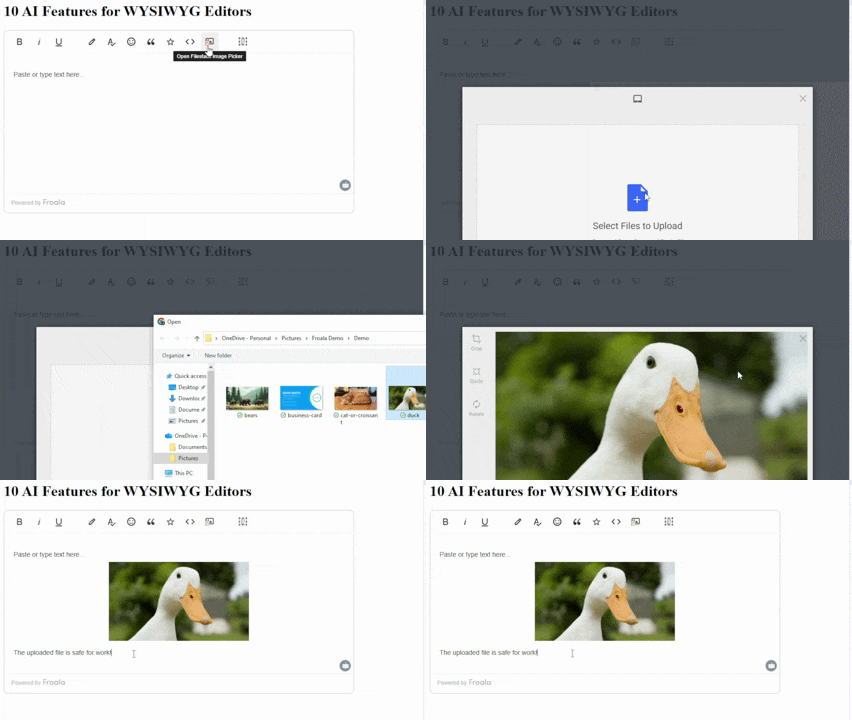
This GIF shows an image of a duck being uploaded. Afterwards, the AI in the editor deems it safe for work.

Content moderation matters for public-facing and professional platforms. AI-based safety checkers can analyze uploaded media for sensitive or inappropriate material.

For images or videos, AI can identify explicit or unsafe visuals. When flagged, the system can alert users or block content submission automatically.

This feature protects both users and platform owners from compliance or reputation issues. Itโ€™s especially helpful for community platforms, forums, corporate tools, and e-learning portals.

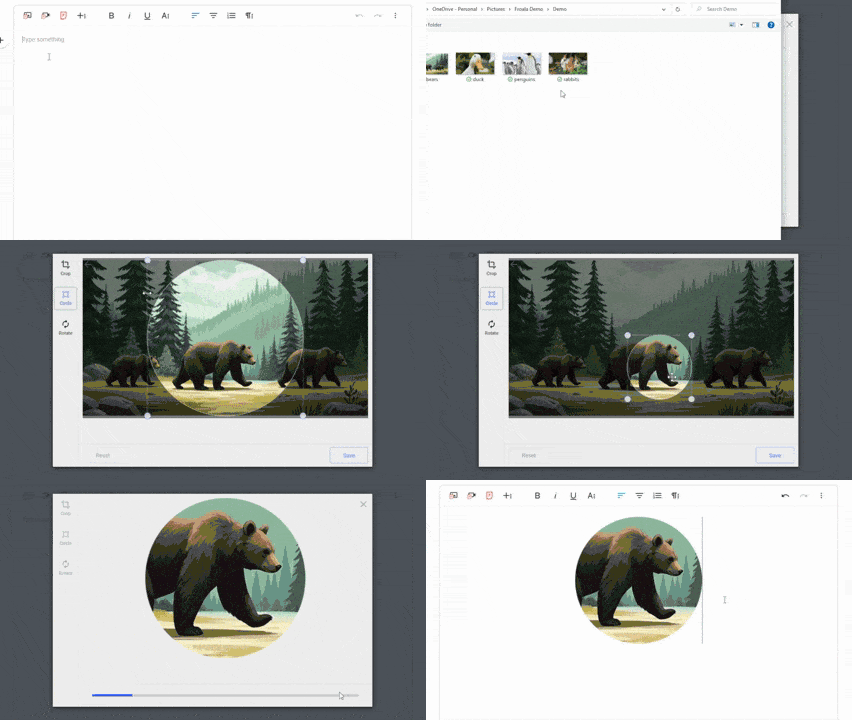
AI-Based Optical Character Recognition
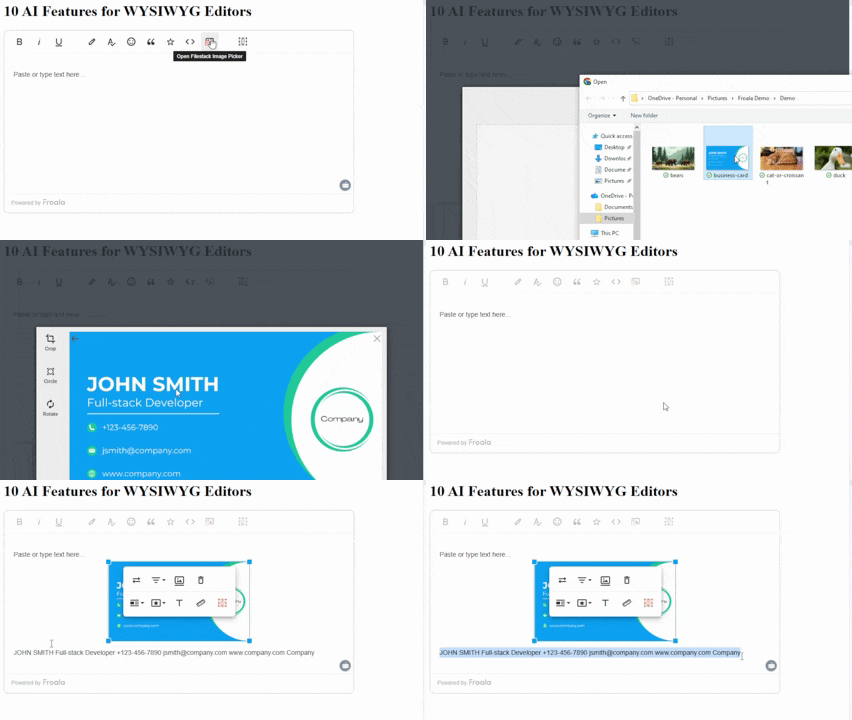
This GIF demonstrates how in-editor AI can "read" text from images using OCR.

Optical character recognition (OCR) converts text from images into editable digital content. AI-based OCR takes this further by improving recognition accuracy and understanding complex layouts.

Traditional OCR systems rely on pattern recognition, which involves comparing patterns from an image to a database of known letters and numbers. It also doesnโ€™t inherently learn or adapt, requiring manual reconfiguration for new fonts or layouts. Thus, while it did the job back then, itโ€™s significantly less accurate with complex scenarios (handwriting, different languages).

On the other hand, modern OCR uses deep learning and machine learning (subsets of AI) to interpret context. It can read text from IDs, invoices, or handwritten notes with better precision.

For example, uploading scanned documents into WYSIWYG editors could instantly extract names, addresses, or serial numbers. Developers can integrate this for document processing or onboarding systems that require form data extraction.

Image Sentiment Analysis
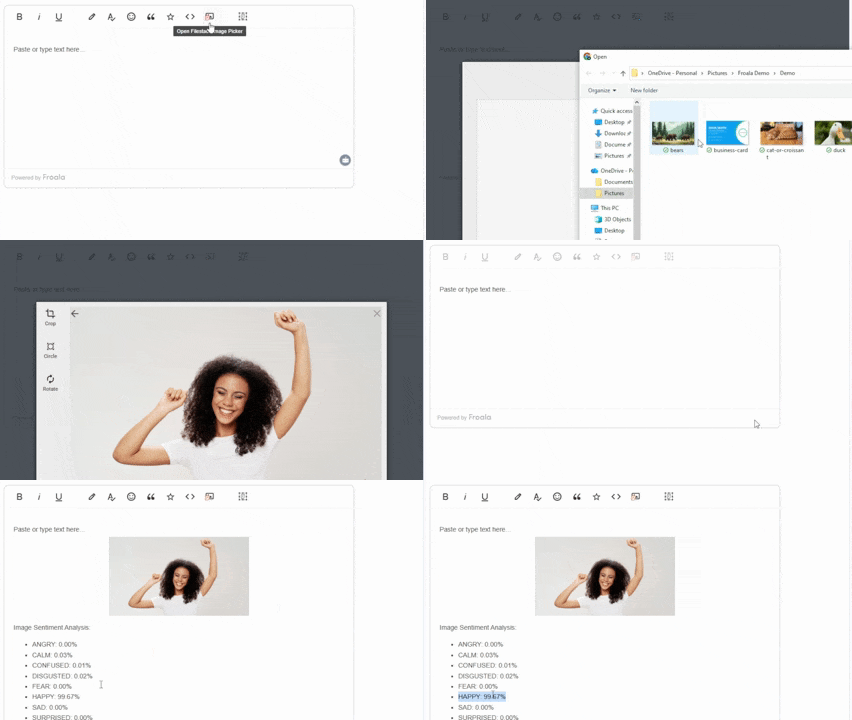
In this GIF, the user uploads an image of a person smiling. The AI then outputs a list of emotions with corresponding values. Happy, with a score of 99%, was the highest emotion.

Images carry emotional cues that influence audience perception. Image sentiment analysis allows AI to interpret these emotions and represent them through values like {joy: 80, calm: 70, anger: 5}.ย 

This helps marketers and designers test whether visuals match the brand mood or campaign tone. For example, an AI might detect that a photo conveys โ€œtrustโ€ and โ€œoptimism,โ€ helping teams choose visuals aligned with their goals.

It also assists in A/B testing, where marketers can compare emotional resonance between different versions of an image.

Code Refactoring
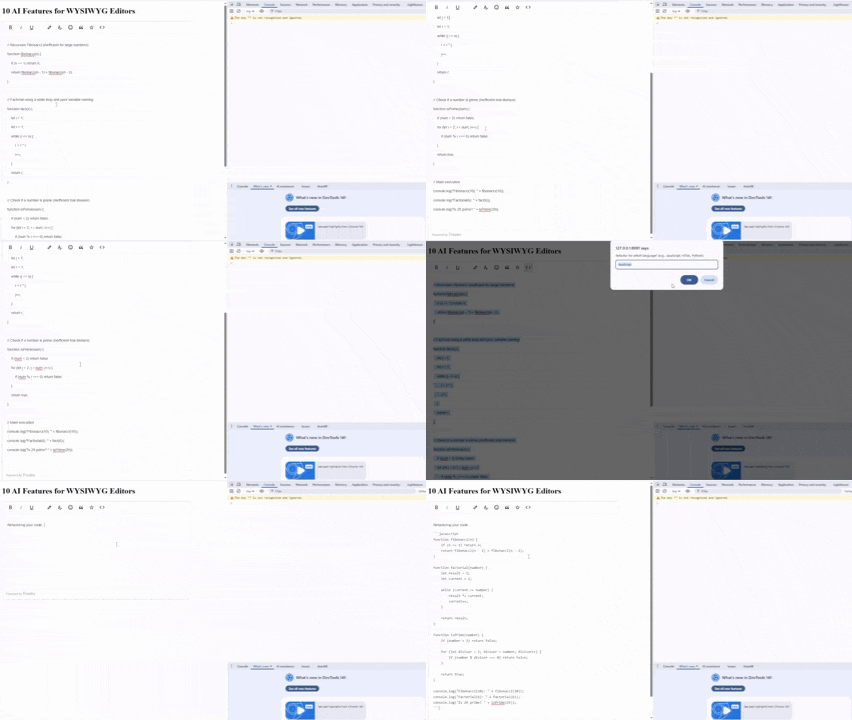
A GIF that shows an in-WYSIWYG editor AI refactoring code.

Many WYSIWYG editors include a โ€œcode viewโ€ mode for developers. AI can make this mode smarter through code refactoring, where it reviews and edits code for better readability and maintainability.

The AI scans syntax and logic, detecting redundant lines or inefficient structures. It then proposes cleaner, optimized versions. For example, it might find unused variables, poorly named constants, or duplicated functions and recommend merging them.

This feature benefits developers, educators, and students learning programming best practices. It significantly helps with code readability and reduces maintenance overhead.

Conclusion

AI has transformed how WYSIWYG editors support end users. From smarter writing tools to accessibility-focused features, these capabilities make content creation faster, clearer, and more inclusive.

Developers can start small, adding one or two AI features like text rewriting or auto-captioning, and expand over time. Each addition improves user experience and strengthens the editorโ€™s overall functionality.

However, note that AI doesnโ€™t and shouldnโ€™t replace creativity. Instead, it amplifies it, helping writers, designers, and developers produce meaningful content with the editors they already love using.

If you need to see the demos above in action and to help you get started with implementing these ten AI features for WYSIWYG editors, visit this GitHub repository.

Joingy: Random Video Chat Roulette Stranger Cam Chat

Available 24/7, OmeTV is devoted to serving to folks connect, make new pals, and revel in seamless video chats. Welcome to the new Omegle (oh-meg-ul) รขโ‚ฌโ€œ an exciting way to connect with new folks. On Omegle, we randomly pair you with another consumer, supplying you with an opportunity to have a one-on-one dialog. All video chats are utterly anonymous, however youรขโ‚ฌโ„ขre free to share private particulars should you choose.

In shorter than another you’ll be connect and keen to start video chatting with an attractive girl or a contemporary guy on chatroulette. We structurethe webcam roulette so that itรขโ‚ฌโ„ขs inclusive by design. If you identify with the LGBTQ+community, then our interest matching device could additionally be helpful. With Omegle gone after 14 years of existence, the famous site that addresses the necessity to interact with unknown individuals through computer-mediated video chats is bidding adieu. The information shocked many as the site had gained infamy notably because of its infamous status for its unpredictable and sometimes corrupt exchanges at times.

The customers can determine on the tone of dialog (via call, omegle text or video call) inside the consolation of their laptop device. The uncertainty and the element of disappearance in omegle video call is considered one of its greatest sights for the users, as you by no means know who your dialog companion may be next. Joingy seeks to be a free cam chat alternative that solves the commonissues of its peers. At the forefront is our webcam roulette, constructed for speed andstability.

Bazoocam is a free online platform that enables users to immediately interact with strangers and begin conversing to have the ability to meet prospective new friends who’ve related interests. This random dialog possibility has shown to be an effective means of forming long-lasting connections. Since its launch in 2010, Bazoocam has grown in popularity as an various to conventional online dating and social media platforms. The website is available in a number of languages, and its primary function is a random video chat choice that matches customers primarily based on widespread interests or different factors. This permits customers to have real-time conversations with folks they might not have met otherwise. Bazoocam additionally supplies text chat, group chat rooms, and games for users to interact with each other. ChatHub’s real-time video chat platform allows you to make new pals from throughout the world!

Once you’re logged in, you can begin chatting with different users by clicking on their names and profiles. After 14 years operating beneath the motto รขโ‚ฌล“Talk to strangers! รขโ‚ฌย the popular video chat site, Omegle, has officially shut down, according to its founder, Leif K-Brooks. In 2023, omegle online sailed away throughout the wave, for good. The platform that brought its founder to fame has now become the subject of misuse and scrutiny, and this has pushed the founder to make the hardest choice. The famed web privateness keeper and gatekeeper to freedom of the web is now not operational.รขโ‚ฌย Nostalgia and mixed feelings are silted as an alternative. Internet whizzes who grew up online, Omegle to them was a hymn of initiation.

Aside from being fun and exhilarating, by no means knowing who was going to pop up subsequent, Omegle was a spot the place individuals from across the world were able to connect. Brooks opened the site when he was 18 as a method of building a way of รขโ‚ฌล“social spontaneityรขโ‚ฌย on the Internet that รขโ‚ฌล“didnรขโ‚ฌโ„ขt exist elsewhereรขโ‚ฌย. Over the years, itรขโ‚ฌโ„ขs become a source of some iconic Vines, some chaos reminiscences and even friendships and marriages. He compared shuttering the site to closing off Central Park as a result of crimes are sometimes dedicated there.

Omegle video chat Talking to folks in real-time on omegle video call not only offers them an idea about each other but in addition promotes a robust sense of being รขโ‚ฌหœin the roomรขโ‚ฌโ„ข with the other party. It facilitates using facial expressions, physique language and intonation and so contributes to making digital conversations more pure. Chatroulette is an internet chat website that matches random customers with a selection of two different customers for webcam talks. Visitors to the web site initiate a web-based chat (audio and video) with another visitor. At any time, both consumer may abandon the present conversation by creating a new random connection. Our live random video Ome TV chat renders you the fastest method to get data with online folks. Accept the informal chat in the comfort at your house – each you require is a webcam hook up with your pc.

We are dedicated to providing a safe and pleasant environment for our users, and we’re all the time working to enhance our service. For the most effective experience and your security, we extremely recommend reading our pointers. OmeTV offers a free cam chat experience the place you’ll have the ability to meet strangers, get pleasure from random video chats, and communicate with pals. Omegle is a popular online chat service that permits customers to fulfill new people from everywhere in the world. However, there is no method to know for positive if the folks you meet online are safe. So, before you start chatting with anybody on Omegle, make certain to use frequent sense and check out the safety suggestions below.

Break via geographical obstacles and interact with a various global neighborhood. Monkey’s platform fosters cross-cultural interactions that broaden views and spark meaningful exchanges with individuals worldwide. Instead of video, the text chat rouletteremains obtainable for all users. Explore our รขโ‚ฌล“Interestsรขโ‚ฌย function by listing matters youรขโ‚ฌโ„ขd like to talkabout on Joingy. Add a couple of keywords, then weรขโ‚ฌโ„ขll pair you with people currently online who share your similar pursuits. We have millions of customers, and at any given moment there are hundreds online.

Any rule violation will led to everlasting ban from our site. When you like the strangerรขโ‚ฌโ„ขs thumbnail image, youรขโ‚ฌโ„ขd click on on the strangerรขโ‚ฌโ„ขs thumbnail image and provoke a dialog. In a post on the Omegle site รขโ‚ฌโ€ unusually started with a quote from C.S. The chat website skilled a bit of a revival during the pandemic, but now it is gone offline for good. In his assertion, K-Brooks mentioned that a war was being waged รขโ‚ฌล“against the Internetรขโ‚ฌย under the banner of kid safety. Nonetheless, Garcia did make sure to point out he is unhappy about Omegle being gone.

With lots of of thousands online anytime, OmeTV supplies infinite alternatives for connection. Escape boredom and experience the best various to Omegleรขโ‚ฌโ„ขs random video chat, all freed from charge. This website is popular for its random video chat function, making certain a secure experience when using the official app or website. Omegle additionally has a wide selection of features that make it an fascinating and fun online experience. For example, you presumably can view random usersรขโ‚ฌโ„ข profiles for a quick laugh or see what people are saying about specific subjects. Additionally, Omegle presents users the power to save their chats for later viewing. For your safety, it’s suggested to chat with strangers anonymously.

In order to do so, click on on the Country dropdown menu close to the top of the display and select a country that you simply wish to meet folks from. You can either select to fulfill individuals from one country at a time or you presumably can view all users randomly. Since joining Mashable in 2021, they have reported extensively on meme creators, content moderation, and the nature of online creation underneath capitalism. In 2022, Omegle filed over 608,000 reports to NCMEC, while Instagram submitted more than 5 million and Facebook submitted over 21 million. Its cultural resonance ebbed and flowed, with a model new burst of popularity on TikTok and YouTube in 2020. Omegle is a good way to meet new pals.When you use Omegle, we pick someone else at random and let you talk one-on-one.

The website was based in 2009 and can terminate in November 2023. Procedure for video chatting is easy, and all individuals can join the platform freely. Dive into real-time, personal video conversations that redefine human connections. Monkey’s lightning-fast and spontaneous video interactions create exhilarating encounters, making every conversation feel fresh and authentic. As you enjoy your nameless chat interactions, always be respectful andconsiderate. Engineered for effectivity, the webcam roulette matches strangersinstantly. With consistent updates, we leverage the most recent tech for live 1-on-1 cam chatpairing.

Middle faculty party now entailed a USB connection rather than an Ouija board; we all regretfully waited in entrance of the message field, amazed at our choose among dozens of similar people. It was a useful face, especially when they joked about probably the most diabolic of trading things. Or, it was a weird determine, dressed only in a T-shirt (without a head). On omegle video calls nevertheless, you get to make use of both video and omegle text chat and talk in either. All are the same, nonetheless, every selection has a selected benefit and a downside. Keep your personal data personal and avoid sharing it with anybody in the chat. Note, you have to be at least 18 years old to make use of our service.

He created the net chat experience for random strangers. What makes Omegle popular is that a stranger can go online to the website and begin chatting. There is not any finish to the variety of strangers you can see over here. With a straightforward to use User Interface, folks go browsing to Omegle all the time.

รขโ‚ฌล“There was an pleasure across the platform, as a outcome of it was one thing you had been clearly not supposed to be looking at. Without naming his critics, K-Brooks acknowledged, “The only method to please these people is to cease providing the service.” “Omegle’s product is designed completely to be used the method Fordyce used it รขโ‚ฌโ€œ to obtain youngsters anonymously and with no trace,” it states. For either a sole proprietor or a staff, moderation of the positioning could be onerous, as Omegle’s website has long drawn intense curiosity and thrives on quickly made pairings. Earlier this 12 months, it drew more than 70 million visits in a month.

Our dedication to those core values performs a significant function in making us a topchoice among chat options. Omegle consumer suggestions runs the gamut from optimistic to highly unfavorable, Worrying and abusive messages. Some users claim they get to interact with individuals of different cultures or study another culture or even make new friends. That is why, regardless of evident shortcomings, Omegle can have some professionals listed below that designate why people come there. First and foremost, it offers a primary and costless platform to work together with individuals you donรขโ‚ฌโ„ขt know in several components of the globe.

ChatHub has made it a lot simpler to create a worldwide group in which anybody can secretly meet new folks and communicate in real time with those they already know. The ChatHub staff is continually working to enhance the app’s functionality and feature set in a wide selection of methods. They are creating cutting-edge technology to supply consumers with a superb user experience while matching, video chatting, or using real-time messaging providers to satisfy their wants. It has received the belief of hundreds of strangers across this world. Moreover, you can access the web site from wherever you want.

By eliminating the necessity for registration or profile setup, Omegle encourages spontaneous, nameless exchanges, selling privateness and freedom in every interaction. Omegle is a free online chat service that allows customers to join with strangers without the want for registration. Users can interact in text or video chats, with the choice to stay nameless or share personal data at their discretion. Emerald Chat is characterised as “Emerald was created to help people meet one another.” In at present’s fast-paced world, it can be tough to meet new people. This is a random video chat app in the social & communications space. There are over 25 Emerald Chat equivalents for numerous platforms, including web-based, Android, iPhone, iPad, and Android Tablet apps. Monkey is the premier platform for live video chat, seamlessly connecting you with new folks both regionally and globally.

Joingy has a foundation ofinstant video chatting, without the necessity for accounts. Enable mic and camera permissions for aneasy, clean broadcast of your live video stream. At Joingy, we urge you to prioritize security throughout your onlineinteractions. If you are feeling uncomfortable with a stranger, disconnectfrom the chat room. Omegle is a free chat room that permits you to connect with millions of individuals.

Froala 4.7 Release with Anchors, Page Breaks, and Word Export

Froala 4.7

You asked for anchor text, page breaks, and export to Word features. We listened and today we are excited to announce our long awaited release, Froala 4.7 is available for download.

With advanced document organization features, your favorite rich text editor is now even more powerful allowing you to create documents with greater precision and efficiency.

With the new anchor text feature, you can easily link to specific sections within your content. The page break option ensures seamless formatting for printed or exported documents, while the export to Word functionality simplifies sharing and collaboration.

In this article, we’ll delve deeper into each of these new features and explore how they can enhance your document creation process. Let’s take a closer look at what makes these updates so impactful.

Anchors, Page Breaks, and Word Export

Introduce Anchors Feature

Anchors are particularly useful for creating tables of contents or linking to specific sections in long documents, allowing readers to jump to specific sections with just a click.

By creating strategic anchor points, writers can improve document readability and structure, making information easier to find and access.

Froala 4.7 introduces a robust anchor feature that lets users:

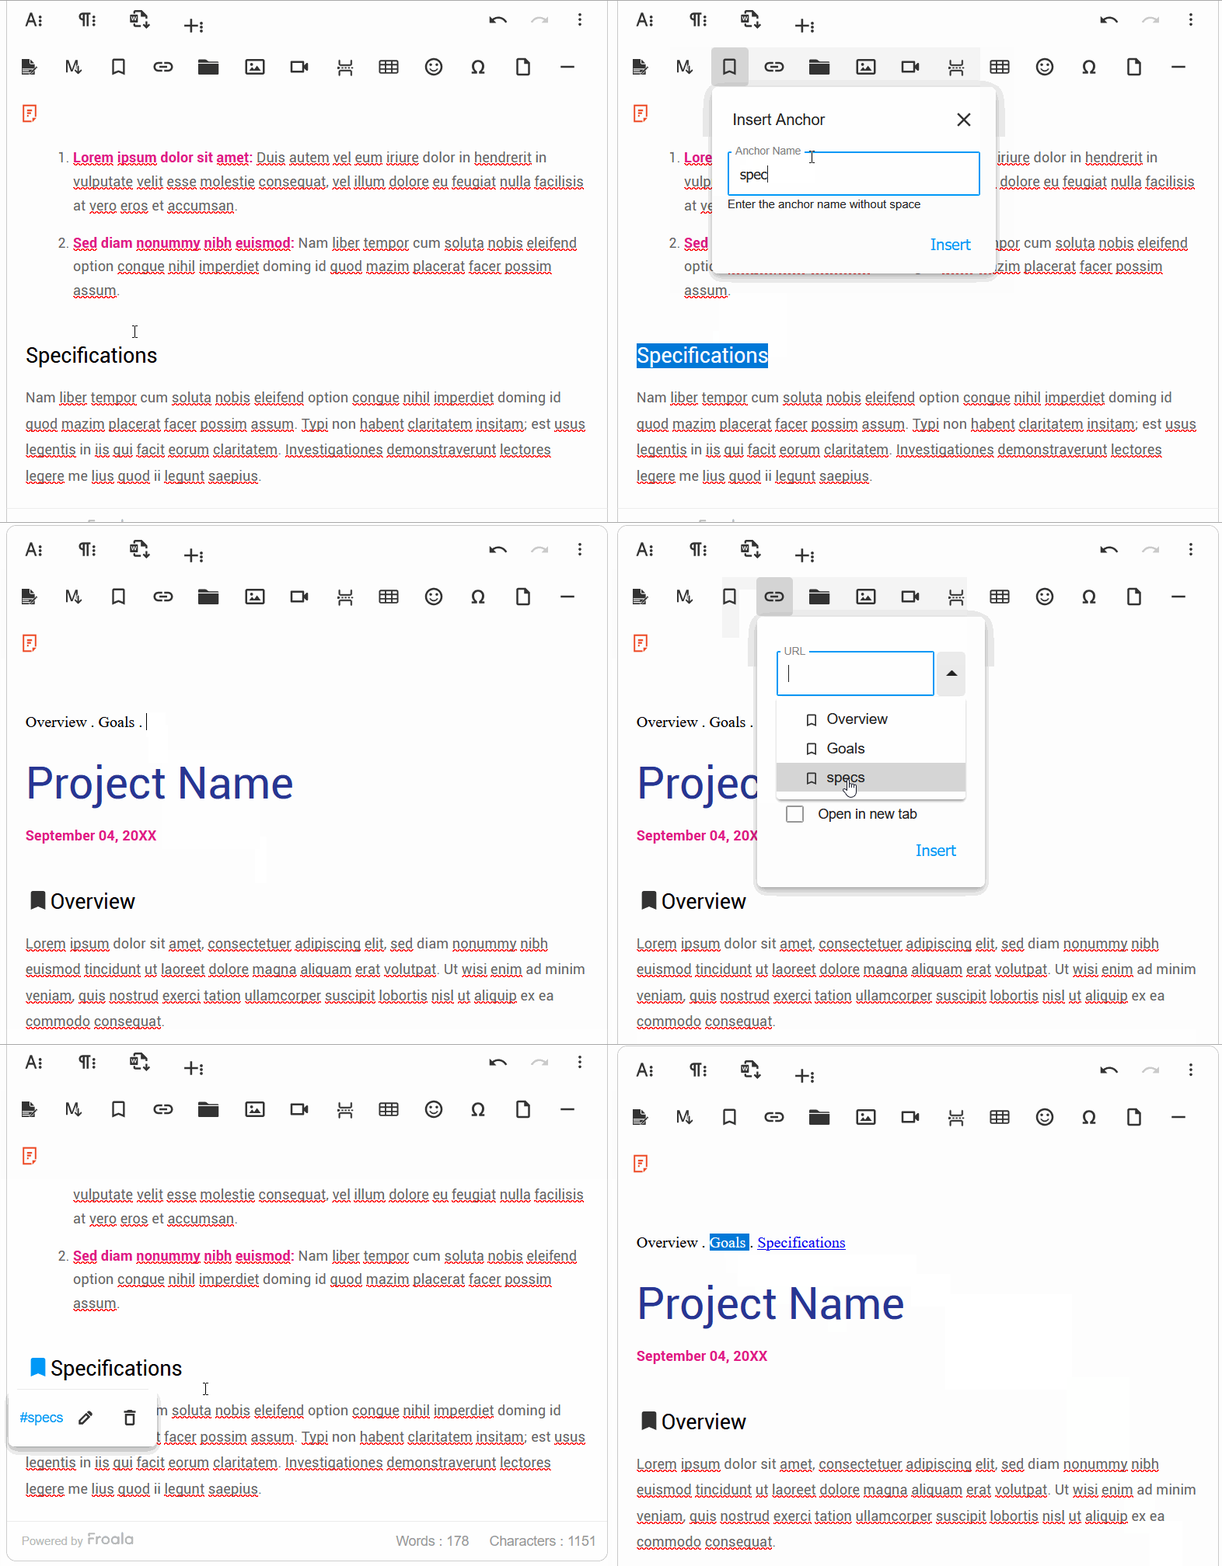
Insert Named Anchor

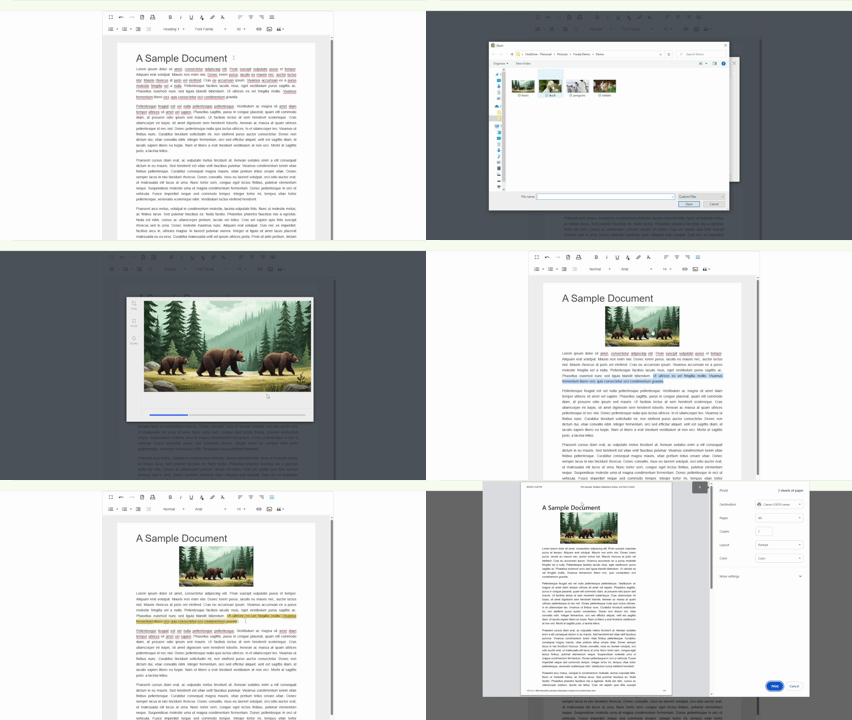
Click the anchor toolbar button to open a dialog box. Enter a descriptive name for the anchor, which will be inserted into the HTML at the cursor’s current location. Anchors are represented with a bookmark icon.

Create Link to an Anchor

To link to an anchor, click the insert link button. You can:

  • Select from a list of existing anchors
  • Manually enter the anchor name (e.g., #introduction)

When clicked, the link will smoothly scroll to the targeted anchor position.

anchors

Pro Tip for Effective Anchor Text Usage

To maximize the utility of anchor text, use clear, descriptive names that reflect the content of the section. For example, instead of generic names like “section1”, use meaningful identifiers like “advanced-features” or “getting-started”. This approach not only improves navigation but also enhances the overall user experience and document structure.

Introduce Page Break Feature

This release enables a user to insert page breaks in the editable area. This is useful for creating print-ready documents or preparing content for export. Page breaks help maintain consistent formatting and improve document readability, especially when dealing with longer texts.

Users can easily insert a page break at any point in their document, ensuring smooth pagination and a professional appearance.

This feature is particularly beneficial for academic papers, reports, and other formal documentation where precise layout is crucial.

We implemented the Page Break feature with precision and user-friendly functionality. Users can access the Page Break option through a dedicated toolbar button, which inserts a non-editable horizontal marker at the cursor’s current position. This marker is visually distinct, allowing easy identification within the document.

Page breaks can only be removed through explicit deletion using Backspace or Delete keys after selecting the page break handle, preventing accidental removal during typing.

Additionally, the implementation guarantees cross-browser compatibility and supports smooth keyboard navigation, making it accessible and consistent across different platforms and devices.

The new pageBreak plugin includes the exportPageBreak option, enabled by default. Disabling it excludes page break elements from the html.get method, offering developers granular control over page break handling during export.

The plugin also features the pageBreak.insert() method and a pageBreak.beforeInsert event, triggered before insertion.

These advanced options provide developers with extensive flexibility in managing page breaks, ensuring intuitive and responsive document editing.

Developers can easily customize page break behavior for web documentation, print preparation, or complex document management, seamlessly integrating the feature into various workflows to cater to diverse user requirements.

Introduce Export to Word Feature

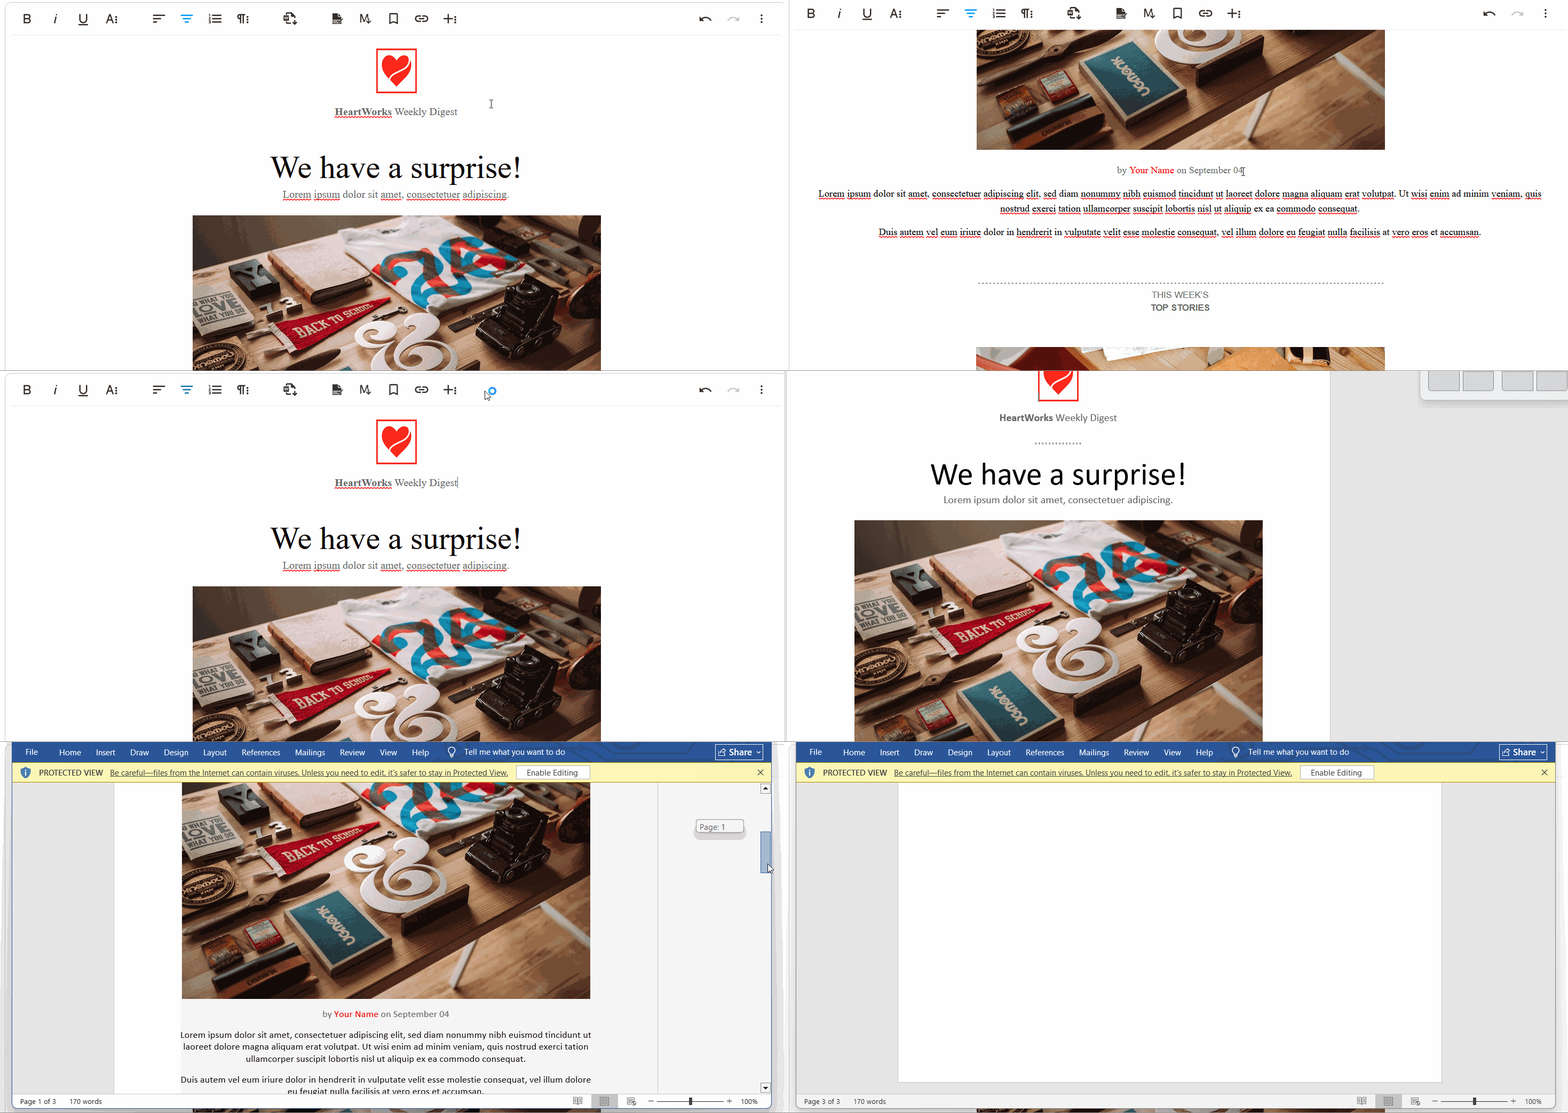
This release enables users to export content from a web-based rich text editor into a well-formatted Microsoft Word document (.docx) while preserving text formatting, images, tables, and styles.

This feature helps streamline document creation workflows by bridging the gap between web-based editing and traditional word processing. Users can now seamlessly transfer their carefully crafted content to Microsoft Word without losing formatting or layout integrity.

The export functionality supports a wide range of document elements, including complex formatting, embedded images, and intricate table structures, ensuring a smooth transition from web editor to professional document preparation.

This feature is particularly beneficial for professionals who frequently switch between web-based editing platforms and Microsoft Word. Researchers, writers, and content creators will appreciate the ability to quickly transfer their work without manual reformatting.

The export feature supports multiple languages and character sets, ensuring compatibility with international document standards.

export to word

The exportToWord plugin lets developers configure a default filename for exported files using theย wordExportFileNameย setting. It also offersย word.beforeExportย andย word.afterExportย events for customizing content before or after the export.

By providing a seamless transition between web editing and traditional word processing, Froala 4.7 empowers users to work more efficiently and maintain document quality across different platforms.

Pro Tip for Export to Word

When exporting documents, ensure all formatting elements are compatible with Word’s document structure. Consider using standard fonts and avoiding complex CSS styling that might not translate perfectly.

Test the exported document in different versions of Microsoft Word to guarantee consistent rendering. Always review the exported file to confirm that critical elements like headings, lists, and embedded media maintain their intended appearance and layout.

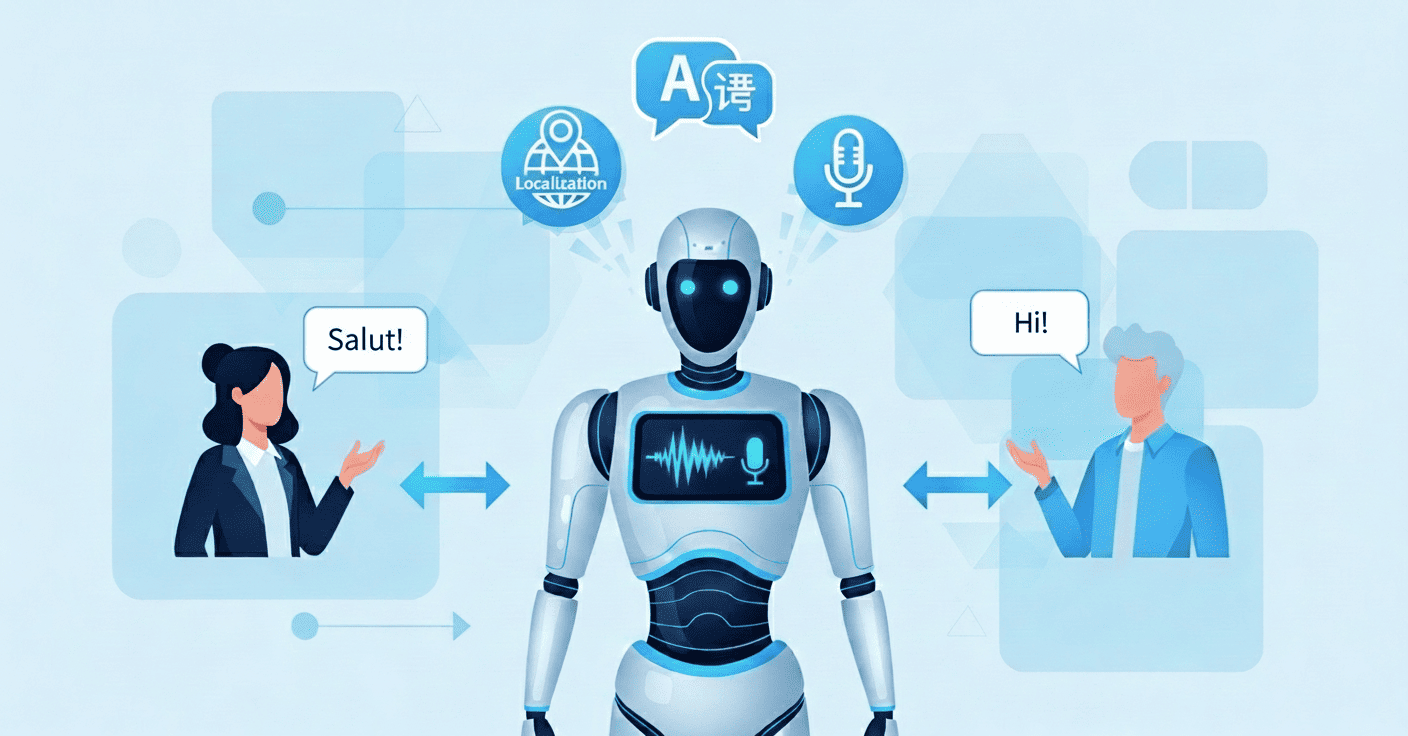
Enable Dynamic Translation for the new Table Cell Popup

Froala 4.6.2 introduced a new table and cell features, including border customization and dimension/sizing options. Input labels, tooltips, and placeholders for these features now utilize the editor’s language system, enabling localization.

The localization feature allows developers to create multilingual interfaces with ease, supporting a global user base. By dynamically translating interface elements, the editor becomes more accessible to international users.

Much Moreโ€ฆ

We have addressed various issues reported by our users to enhance the overall performance and stability of Froala Editor. These include:

  • Inserting an emoji no longer changes the paragraph’s font-family.
  • Enhance plain paste feature to strip out all background color, font family, and formatting from the source.

Please find the complete changelog list here.

How Can I Update?

Update to Froala WYSIWYG Editor 4.7 today and experience enhanced editing features and improvements.

If you are using a plain JavaScript library or other framework, check the get started page to know how to download the latest Froala Editor release and how to include it in your project based on your preferred method.

If you are using a plain JavaScript library or other framework, follow the table below to learn how to download the latest Froala Editor release and include it in your project based on your preferred method.

Method How to download Include in your project
CDN โ€“
<!-- Include Editor stylesheet-->
<link href="https://cdn.jsdelivr.net/npm/froala-editor@4.7.0/css/froala_editor.pkgd.min.css" rel="stylesheet" type="text/css" />

<!-- Include Editor JavaScript file-->
<script type="text/javascript" src="https://cdn.jsdelivr.net/npm/froala-editor@4.7.0/js/froala_editor.pkgd.min.js"></script>
CDN (Always the latest version) โ€“
<!-- Include Editor stylesheet-->
<link href="https://cdn.jsdelivr.net/npm/froala-editor@latest/css/froala_editor.pkgd.min.css" rel="stylesheet" type="text/css" />

<!-- Include Editor JavaScript file-->
<script type="text/javascript" src="https://cdn.jsdelivr.net/npm/froala-editor@latest/js/froala_editor.pkgd.min.js"></script>
NPM
npm install froala-editor
<!--

Replace the {download-folder-path} in the following example with the path to the folder containing the stylesheet file e.g.

../css/froala_editor.pkgd.min.js

-->

<link href="{download-folder-path}/froala_editor.pkgd.min.css" rel="stylesheet" type="text/css" />

<!--

Replace the {download-folder-path} with the path to the folder containing the JS file e.g.

../js/froala_editor.pkgd.min.js

-->

<script type="text/javascript" src="{download-folder-path}/froala_editor.pkgd.min.js"></script>
bower
bower install froala-wysiwyg-editor
NO Package Manager Download Froala WYSIWYG Editor files using the download form here.
Integrated with a Framework Select your preferred framework from 17 different popular frameworks.
Other options Check here for other options for using Froala WYSIWYG Editor in your project.

For Froala Editor Version 2 Users:

Follow this migration guide for step-by-step instructions on upgrading from version 2.

Try The Latest Froala Editor

Explore a variety of examples that demonstrate the functionality of the Froala HTML Editor.

Support and Feedback

We are dedicated to always offering the best possible experience for all our users. We believe this release, meant to enhance Typescript support, is a stepping stone towards that commitment. We encourage you to try this improved Typescript support and give us your valuable feedback. Your input is crucial for delivering continuous enhancement and meeting your evolving needs. Thank you for being a valuable part of our vibrant and growing community.
We would like to hear what you think of the latest release! Join us on our GitHub Community to chat with our product manager, developers, and other members of the Froala team.

Change Log

Get Started

  • You can download and start using Froala in less than five minutes following our get-started guide.

Technical Questions

AI Implementations of WYSIWYG Editors for Vanilla JS

An AI brain floating above vanilla ice cream, representing AI implementations in vanilla JavaScript.

Vanilla JS remains relevant today, even as frameworks like React and Angular dominate the web development landscape. And with the rise of AI-powered features, many developers now explore how to implement AI in vanilla JS-based WYSIWYG editors. These editors can use AI to suggest better phrasing, correct grammar, summarize paragraphs, or generate content drafts in real time.

However, many documentations and tutorials focus primarily on integrating AI into popular JS or TypeScript frameworks. This can give the impression that vanilla JS integrating with AI-powered editors is harder than it really is. In reality, you can achieve the same AI features in a plain JS environment with equal ease.

Thatโ€™s where this discussion comes in. By understanding how plain JS editors can also integrate easily with AI, developers can keep providing intelligent experiences in simpler setups.

Key Takeaways

  • Vanilla JS enables lightweight, framework-free AI integrations.
  • Developers can add smart text and image features using simple API calls.
  • Avoiding framework dependencies and large bundles improves performance and flexibility.
  • You can use vanilla JS for smaller, more static applications or websites. For large-scale apps, frameworks typically provide better structure and scalability.
  • The simplest architecture often leads to the most maintainable AI-enhanced editor.

Why Vanilla JS Still Matters

Vanilla JS remains valuable because it prioritizes performance and control. Without the abstraction layers that come with frameworks, developers decide exactly how and when scripts run. This makes applications faster to load and easier to debug.

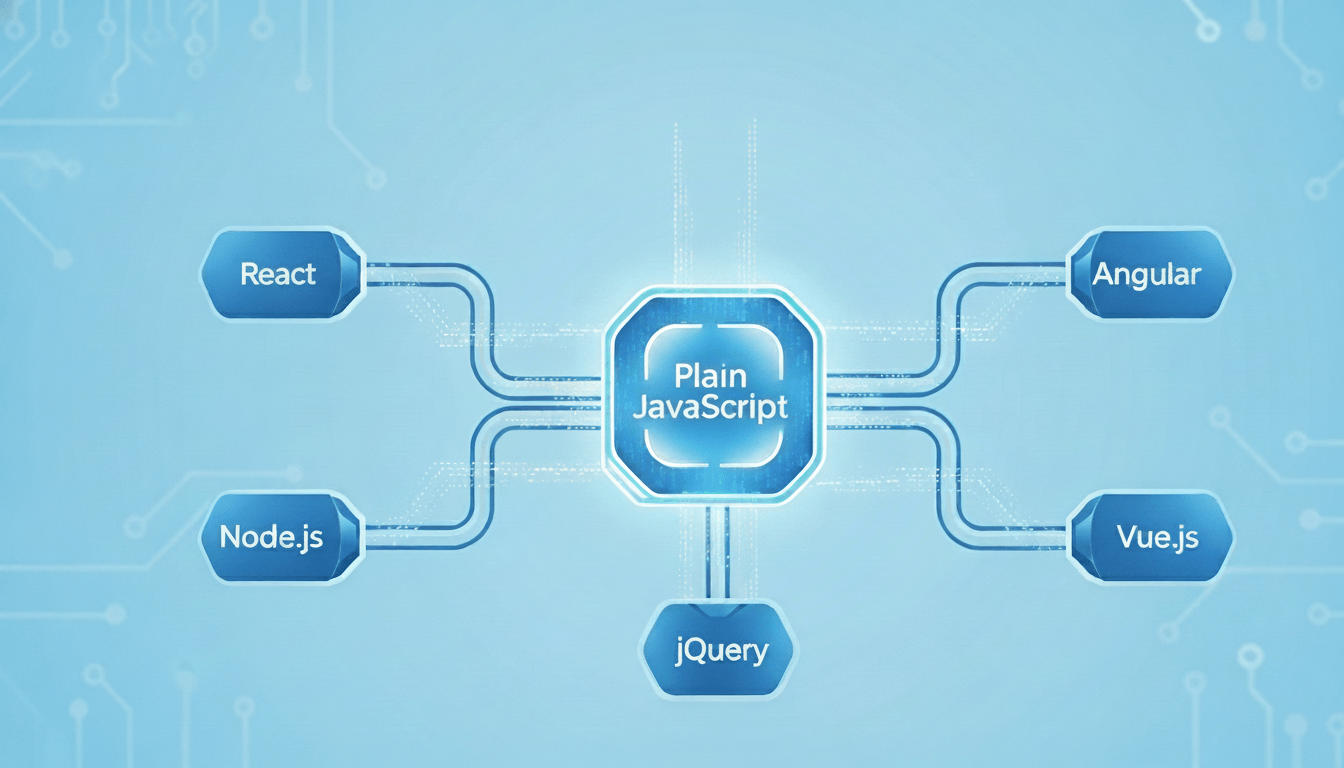
An image that shows plain JavaScript as the foundation of modern front-end frameworks like React, jQuery, Vue.js, and Angular, as well as backend frameworks like Node.js.

Frameworks bundle extra logic to manage states and components. While this helps large-scale apps, smaller ones like websites and editing tools benefit from staying lean. Every additional library increases bundle size, meaning more kilobytes for users to download, which could translate to slower load times.

Vanilla JS also gives full control over how APIs interact with the DOM. You can manage your AI requests, button clicks, and text insertions directly without adapting to framework-specific actions.

Additionally, vanilla JS doesnโ€™t break when frameworks update. Framework lock-ins often force developers to rewrite integrations after major version changes. By staying independent, your editor turns framework-agnostic, making it future-ready and easy to embed across projects.

Remember when Google rewrote AngularJS and produced Angular (2+) because of the formerโ€™s performance and scalability issues? It changed its primary language from JS to TypeScript (JS but with static typing) and transitioned into component-based architecture. This move, while beneficial in the long run, caused several migration challenges and headaches for AngularJS developers.

Tip: If youโ€™re maintaining a small site or lightweight CMS, a vanilla JS editor can cut load times and reduce maintenance costs significantly. Better yet, the best JavaScript WYSIWYG editor solutions integrate well with plain JS and React, Vue, Angular, and other frameworks.

The Problem with Framework Dependencies

Frameworks simplify complex applications, but they can overcomplicate simpler projects. For example, using a React WYSIWYG editor may require wrapping it in components, managing props, and handling state updates. On the other hand, integrating a WYSIWYG editor in vanilla JS might appear simpler.

If your editor relies on React and the React API changes, your integration could break. The same applies if you use AI SDKs for specific frameworks. Developers could spend more time maintaining compatibility than improving features.

Performance could also suffer, as frameworks load virtual DOM engines and internal state systems that simple text editors donโ€™t need. If you need a WYSIWYG editor for a simple application or site, frameworks like React seem like overkill. With vanilla JS, you can achieve the same AI-enhanced results through simpler means.

Note: The discussion above doesnโ€™t mean or imply that using frameworks is bad. In fact, frameworks are excellent tools for developing full-scale modern web applications. Always assess your project requirements first before committing. You can always switch depending on what you need.

AI Features You Can Implement in Vanilla JS WYSIWYG Editors

Adding AI to a vanilla JS editor doesnโ€™t require a full ecosystem. Most features can connect through REST APIs and editor plugins, returning AI responses in real time.

Smart Text Assistance

In-editor AI can refine user input through grammar checks, rephrasing, or tone adjustments. For instance, integrating OpenAI, DeepSeek, or Claude allows a โ€œRewriteโ€ button to suggest clearer or more natural sentences.

All this could happen through a single fetch() call that sends text and retrieves suggestions. The editor simply replaces the selected text with the AIโ€™s response.

Summarization and Auto-Suggestion

An example that shows a WYSIWYG editor plus AI implementation in vanilla JS.

Text summarization in JavaScript WYSIWYG editors

Writers often need quick summaries or title ideas (writerโ€™s block is real). AI summarization tools can process long content and return concise versions. Similarly, an in-editor AI can scan text and recommend headlines based on keywords and sentiment.

You can achieve this by sending editor content through an API endpoint, then inserting the AI-generated summary back into the editor.

Tip: Only trigger API requests when users explicitly click โ€œSummarize,โ€ or โ€œSuggest Headline,โ€ or other editor buttons for AI functionality. This could help avoid unnecessary API costs.

Visual and Accessibility Improvements

Some advanced editors have AI features that can generate alt text (alternative text that describes images). This improves accessibility for visually impaired readers. Some editors can even generate image captions or analyze and enhance image elements from the editor.

For example, in a vanilla JS setup, you can upload an image and send it to an AI service for analysis. Afterwards, you can then inject the generated caption back into the editor.

Code or Syntax Assistance

For developer-centric WYSIWYG HTML editors, AI can serve as a coding assistant. It can explain code snippets, translate them to other languages, or detect syntax errors.

This feature enhances documentation platforms, coding blogs, or repositories by helping authors write more accurate examples with less effort. For example, GitHub Copilot lets developers create, edit, debug, document, and even test code right from their editor.

How Vanilla JS Makes AI Integration Simpler

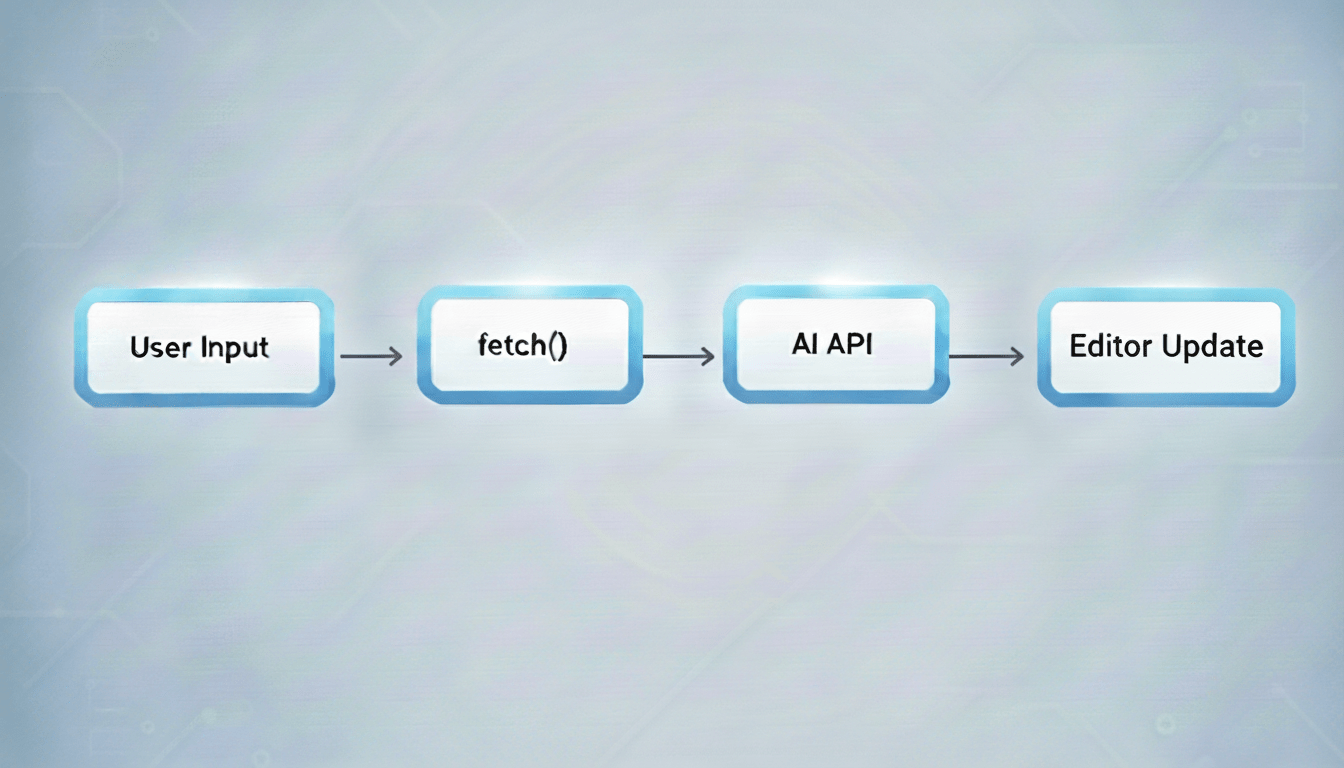
Vanilla JS keeps integrating AI straightforwardly. As said earlier, you can use a basic fetch() or XMLHttpRequest call to communicate with any AI API. These methods donโ€™t require additional libraries.

A process flow that shows how AI integration into JS works. The first step is the gathering of user input, followed by fetching and communicating with the AI API. Lastly, the editor updates its contents with the result of the fetch command from earlier.

If your JavaScript WYSIWYG editor allows it, you can also create your own AI plugin. For example,

  1. The editor detects a text selection.
  2. A โ€œSmart Assistโ€ button triggers an asynchronous function.
  3. That function sends the text to an AI API (like OpenAI) and waits for a result.
  4. The API sends back the result, and the script inserts the revised version into the editor.

Managing state with vanilla JS may not appear as natural as with React, but it is usually simple. Event listeners handle user actions, while native DOM updates ensure everything stays fast and responsive, with no hooks or watchers needed.

If you want to learn more about how you can implement AI in vanilla JS setups, read this article about building a โ€œsummarize textโ€ feature with the DeepSeek API. Or, go straight to the coding part and clone this GitHub repo.

Note: You can further extend this setup with promises, async/await logic, and local caching for even smoother performance.

Best Practices When Adding AI to Vanilla JS Editors

AI integration adds power, but it also requires thorough preparation and responsibility. Take note of the quick tips below to help reduce cost and improve performance.

  • Keep your API calls lightweight. Only send data when necessary, like when a user explicitly requests an AI action. Avoid constant background checks, which can raise latency and cost.
  • Always consider privacy and data security. Never send entire drafts to external APIs unless required. Instead, process small text segments or anonymize sensitive information.
  • Cache AI responses where possible. This helps reduce repetitive API calls and speeds up common tasks like text rephrasing or caption generation.
  • Design modular scripts that users can enable or disable easily. This ensures your AI features donโ€™t interfere with the editorโ€™s core performance.
  • Many JavaScript WYSIWYG editors offer plugin APIs. These let you add custom AI buttons whether youโ€™re using vanilla JS or frameworks.

Conclusion

Creating intelligent editing experiences isnโ€™t limited to framework-centric applications. With WYSIWYG editors that support vanilla JS and various frameworks, you can build AI-powered features that stay light and customizable.

By using plain JavaScript and an AI-capable editor, you can reduce complexity, avoid version lock-ins, and speed up development. Paired with modern AI APIs, plain JS remains an adaptable and viable foundation.

When simplicity meets capability, even plain JavaScript becomes a powerful base for intelligent editing.

Mastering Froala Helpers for Device Detection, URL Safety, and More

Froala Helpers

When building advanced experiences with the Froala WYSIWYG Editor, developers often find themselves writing extra JavaScript to handle things like device detection, scroll behavior, or URL validation.

But hereโ€™s the good news โ€” Froala already provides a built-in solution for that: Helpers.

Helpers are small, smart utilities bundled inside Froala that make your code cleaner, faster, and easier to maintain. In this article, weโ€™ll explore some of the most useful helpers โ€” from detecting mobile devices to keeping your URLs safe.


๐Ÿ”‘ Key Takeaways

  • Froala Helpers provide small yet powerful utilities that simplify editor customization.
  • You can detect devices (mobile, iOS, Android, etc.) to deliver tailored UI experiences.
  • Use scroll helpers to keep toolbars or elements aligned as users scroll.
  • The sanitizeURL() helper adds a vital layer of security for link handling.
  • Helpers make your code simpler, faster, and more consistent across platforms.

Whether youโ€™re fine-tuning the editorโ€™s UX or building a custom plugin, helpers let you focus on features โ€” not boilerplate code.

๐ŸŒŸ What Are Froala Helpers?

Froala Helpers are utility functions accessible via editor.helpers. Theyโ€™re designed to simplify common tasks that developers repeatedly need when customizing the editor or building plugins.

For example, you can:

  • Detects whether the user is on iOS or Android.
  • Check if the editor is being used on a touch device.
  • Get the scroll position of the page.
  • Sanitize URLs before inserting them into the editor.

Instead of writing this logic manually, you can use these helpers directly from the Froala instance.

const editor = new FroalaEditor('#editor', {});

console.log(editor.helpers.isMobile()); // true or false

These small methods pack a big productivity punch โ€” they save time, improve reliability, and help you create smarter editor experiences.

โš™๏ธ Why Froala Helpers Matter

When customizing Froala, developers often deal with:

  • Device-based UI adjustments (e.g., hiding toolbars on mobile)
  • Handling touch versus keyboard input
  • Keeping toolbars visible during scrolling
  • Cleaning URLs to prevent unsafe content

Without helpers, these tasks can be repetitive and prone to cross-browser issues. Froala Helpers provide ready-made, tested, and optimized solutions that work consistently across devices and browsers.

Top benefits include:

  • ๐Ÿง  Simplicity: No need to reinvent the wheel.
  • โšก Performance: Built-in and optimized for speed.
  • ๐Ÿงฉ Consistency: Reliable behavior across all browsers.
  • ๐Ÿ›ก๏ธ Security: Safer URL handling and cleaner code.

๐Ÿ“ฑ Device Detection Helpers

Letโ€™s start with the helpers that detect user devices. These are especially useful when building responsive, adaptive experiences in Froala.

1. helpers.isMobile()

Detects if the user is on any mobile device.

Example:

if (editor.helpers.isMobile()) {

ย ย console.log('Mobile layout activated');

}

Use Case: Load a simplified toolbar or disable certain features on smaller screens for a smoother mobile experience.

2. helpers.isAndroid()

Detects Android devices.

Example:

if (editor.helpers.isAndroid()) {

ย ย console.log('Running on Android');

}

Use Case: Handle Android-specific quirks โ€” for example, adjusting cursor handling or input focus behavior in Chrome on Android.

3. helpers.isBlackberry()

Checks if the user is on a Blackberry device.

Example:

if (editor.helpers.isBlackberry()) {

ย ย console.log('Blackberry device detected');

}

Use Case: Though Blackberry devices are rare today, this can still help in enterprise or legacy applications that must support older systems.

4. helpers.isIOS()

Detects whether the editor is running on iPhone or iPad.

Example:

if (editor.helpers.isIOS()) {

ย ย console.log('Running on iOS');

}

Use Case: Adjust touch or clipboard behaviors that behave differently in Safari on iOS.

5. helpers.isMac()

Detects if the system is macOS.

Example:

if (editor.helpers.isMac()) {

ย ย console.log('Mac detected');

}

Use Case: Use platform-specific keyboard shortcuts โ€” for example, using the Command (โŒ˜) key instead of Control.

6. helpers.isTouch()

Checks if the device supports touch input.

Example:

if (editor.helpers.isTouch()) {

ย ย console.log('Touch input detected');

}

Use Case: Switch hover interactions to tap interactions for touch screens.

7. helpers.isWindowsPhone()

Detects Windows Phone browsers.

Example:

if (editor.helpers.isWindowsPhone()) {

ย ย console.log('Windows Phone device detected');

}

Use Case: Support or test compatibility for legacy Windows Phone browsers.

๐Ÿงฉ Pro Tip: Combine these helpers for more granular targeting.

if (editor.helpers.isMobile() && editor.helpers.isIOS()) {

ย ย console.log('Optimize editor for iPhone users');

}

๐Ÿงญ Scrolling Helpers

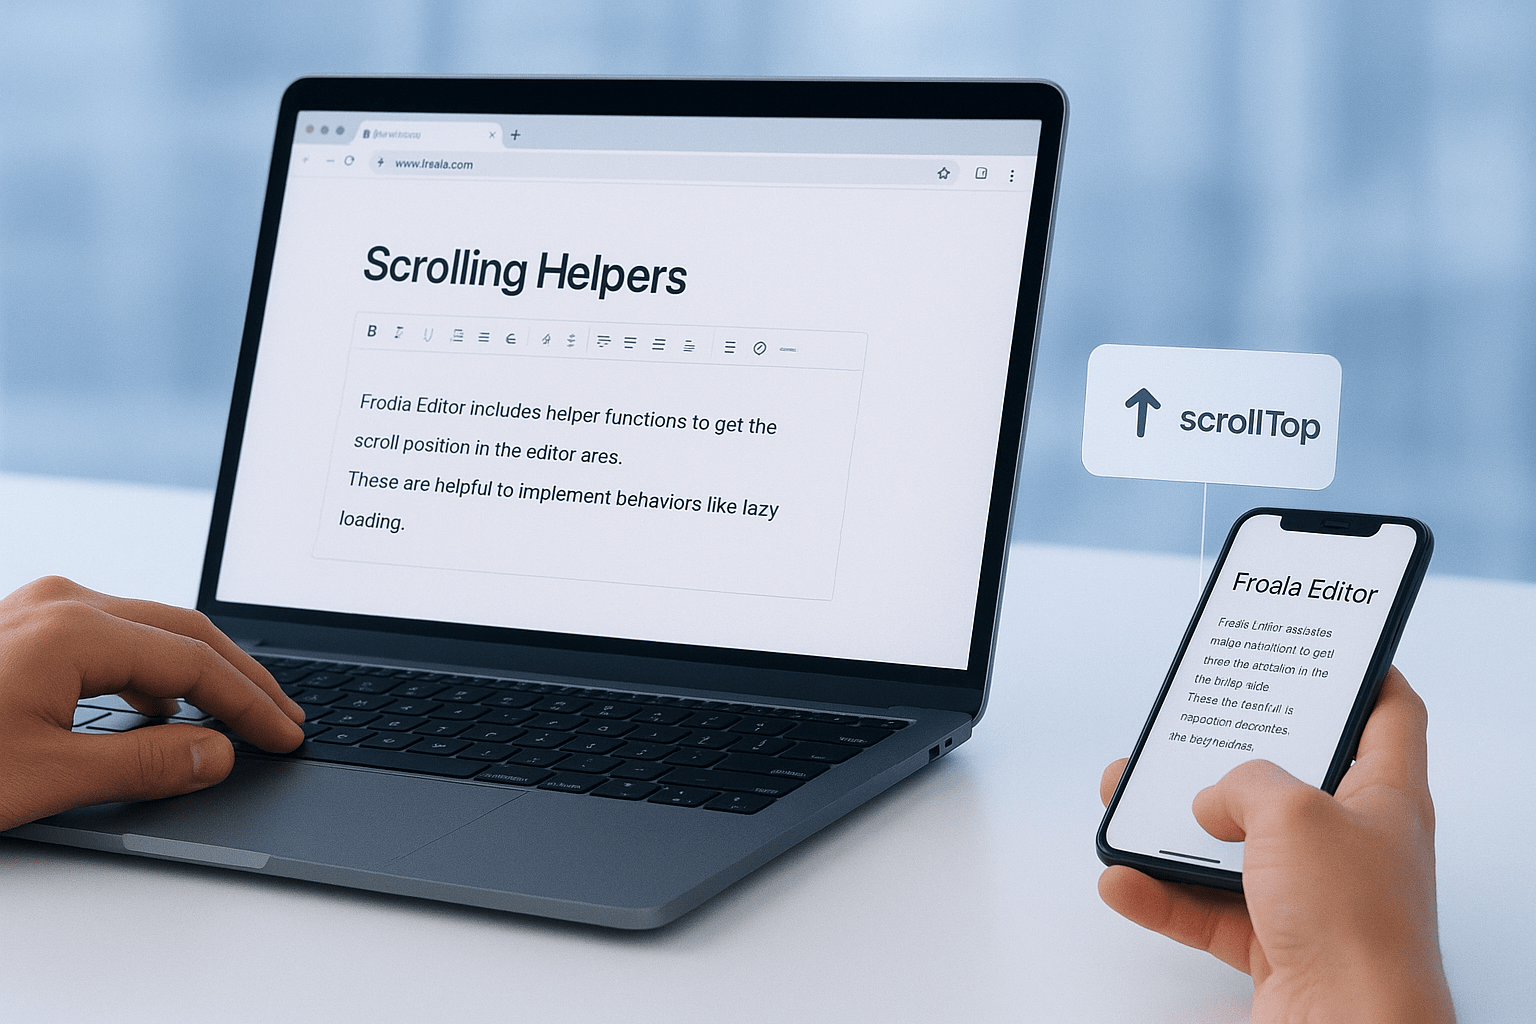
These helpers come in handy when you need to respond to the editorโ€™s scroll position โ€” for example, repositioning floating toolbars or syncing UI elements as users scroll.

scrolling helpers

8. helpers.scrollTop()

Gets the vertical scroll position.

Example:

const top = editor.helpers.scrollTop();

console.log('Scroll top:', top);

Use Case: Keep floating toolbars in view when the editor or window is scrolled.

9. helpers.scrollLeft()

Gets the horizontal scroll position.

Example:

const left = editor.helpers.scrollLeft();

console.log('Scroll left:', left);

Use Case: Useful for horizontally scrollable tables or editors embedded in side-by-side layouts where toolbar alignment matters.

๐Ÿ”’ URL Sanitization Helper

Security is a big concern in rich text editors โ€” especially when users can insert links. Thatโ€™s where Froalaโ€™s sanitizeURL() helper shines.

10. helpers.sanitizeURL(url)

Cleans a URL to ensure itโ€™s valid and safe before being inserted into the editor.

Example:

const userInputURL = "javascript:alert('xss')";

const safeURL = editor.helpers.sanitizeURL(userInputURL);

console.log(safeURL); // outputs an empty string

Use Case: Prevent users from inserting malicious or invalid links. This adds an extra layer of protection against XSS (Cross-Site Scripting) attacks and ensures that all URLs embedded in your content are safe and well-formed.

๐Ÿงฉ Putting It All Together: Real-World Scenarios

Here are a few ways you can combine helpers for practical results.

๐Ÿง  Example 1: Adaptive Toolbar for Mobile

if (editor.helpers.isMobile() || editor.helpers.isTouch()) {

ย ย editor.opts.toolbarBottom = true;

}

Move the toolbar to the bottom of the editor when users are on touch devices for better usability.

โŒจ๏ธ Example 2: Platform-Specific Shortcuts

if (editor.helpers.isMac()) {

ย ย console.log('Use โŒ˜ + B for bold');

} else {

ย ย console.log('Use Ctrl + B for bold');

}

Adjust keyboard shortcuts dynamically for macOS vs Windows.

๐Ÿ” Example 3: Safe Link Insertion

const url = editor.helpers.sanitizeURL(userInput);

if (url) {

ย ย editor.html.insert(`<a href="${url}">${url}</a>`);

}

Always sanitize URLs before inserting them into content.

๐Ÿš€ Benefits Recap

Hereโ€™s what Froala Helpers bring to your development workflow:

Benefit Description
๐Ÿง  Simpler Code No need to reimplement device or scroll detection logic.
โš™๏ธ Consistency Unified results across browsers and platforms.
๐Ÿ“ฑ Adaptability Create responsive editor experiences that adjust to devices.
๐Ÿ”’ Security Keep your content safe with sanitized URLs.
โšก Efficiency Lightweight, optimized, and built right into Froala.


๐Ÿ Conclusion

Froala Helpers may seem small, but they can make a big impact on your editor customization workflow. Whether youโ€™re optimizing for mobile users, maintaining layout stability while scrolling, or keeping your content secure โ€” these helpers make the process faster, cleaner, and more reliable.

So next time you build a Froala plugin or tweak your editor configuration, remember: ๐Ÿ‘‰ You donโ€™t have to do it alone โ€” let Froala Helpers do the heavy lifting.

โœจ Ready to Build Smarter with Froala?

Experience how Froalaโ€™s clean design, blazing-fast performance, and developer-friendly APIs make rich text editing effortless.

๐Ÿ‘‰ Download the Editor today and start creating beautiful, responsive editing experiences in minutes!

โ“ Frequently Asked Questions (FAQ)

What are Froala Helpers used for?

Froala Helpers are small utility functions that simplify common coding tasks like device detection, scroll handling, and URL sanitization when customizing the Froala Editor.

How do I access helpers in Froala?

All helpers can be accessed through your editor instance:

const editor = new FroalaEditor('#editor');

editor.helpers.isMobile();

Are Froala Helpers available in all versions of the editor?

Yes. Helpers are included in all modern Froala Editor builds and can be used without extra setup or configuration.

Can I combine multiple helpers together?

Absolutely. You can use multiple helpers to create adaptive logic, such as:

if (editor.helpers.isMobile() && editor.helpers.isIOS()) {

ย ย // Apply iPhone-specific UI tweaks

}

Why should I use sanitizeURL()?

sanitizeURL() ensures that any URL added to your editor content is valid and safe. It helps prevent XSS and other malicious code injections.

Are Froala Helpers limited to the editor area?

No. While theyโ€™re designed for editor-related tasks, helpers can be used in broader contexts โ€” for example, to detect device types before initializing Froala or to manage layout responsiveness.

Where can I learn more about Froala Helpers?

You can explore the full list of available helpers and examples in the official Froala Editor Documentation.


Why Unminified Source Code Matters in WYSIWYG Editors

A box that stores some code inside slowly opens, representing unminified source code for development.

When you view a web pageโ€™s source code, it can look either neatly formatted or crammed into one unreadable line. That difference comes down to whether itโ€™s minified or unminified source code. The former removes every unnecessary space, comment, and line break, which is ideal for production because it helps improve performance.

However, that same compactness turns into a problem during development. Developers often need to explore how tools work or adjust their behavior, and reading minified code makes this nearly impossible. By contrast, unminified source code provides clean, readable formatting that encourages experimentation and easier debugging.

This article explores why unminified source code matters, especially in integrating WYSIWYG editors. Additionally, it discusses how unminified code benefits customization, learning, and overall development clarity.

Key Takeaways

  • Unminified source code is readable, editable, and ideal for customization or debugging.
  • It allows developers to understand how tools like WYSIWYG editors work internally.
  • Using unminified code improves collaboration and learning among development teams and even solutions providers.
  • Minified code remains essential for performance in production environments.
  • Balancing both ensures better, safer development without sacrificing website performance.

What Is Unminified Source Code?

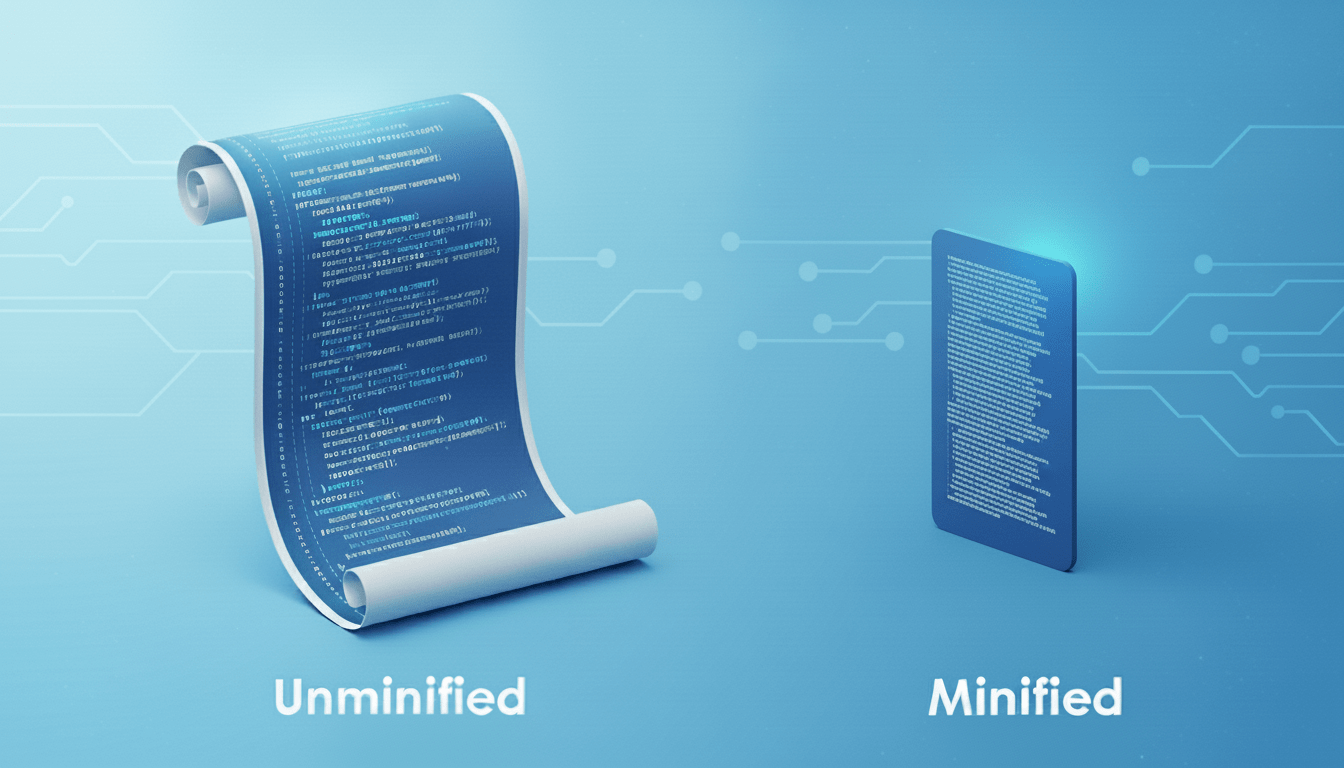
2 scrolls (unminified and minified code). The first one is long and readable (unminified), while the second one is short and barely legible (minified).

Every piece of software starts as human-readable code. This is the unminified source code, or the code that developers wrote without putting much effort into formatting or obfuscation. It includes proper indentation, comments, and spacing for better readability.

Once youโ€™re ready to deploy the software, you can then minify or uglify that code. Minification removes all unnecessary characters, such as spaces, line breaks, and comments, while keeping the program functional. This results in a smaller file that loads faster for users but is also nearly impossible for humans to read.

For example, hereโ€™s a script for generating the Fibonacci sequence using recursion:

function fibonacciRecursive(n) {
  if (n <= 1) {
    return n;
  }
  return fibonacciRecursive(n - 1) + fibonacciRecursive(n - 2);
}

// To get the sequence, you can call this in a loop
// Letโ€™s get the first 10 Fibonacci numbers
const n = 10;
const sequence = [];
for (let i = 0; i < n; i++) {
  sequence.push(fibonacciRecursive(i));
}

console.log(sequence);
// Output: [0, 1, 1, 2, 3, 5, 8, 13, 21, 34]

After minifying the code above, youโ€™ll get something like the code below, with spaces and comments removed.

function fibonacciRecursive(n){if(n<=1){return n} return fibonacciRecursive(n-1)+fibonacciRecursive(n-2)}const n=10;const sequence=[];for(let i=0;i<n;i++){sequence.push(fibonacciRecursive(i))}

Note: Minification doesnโ€™t change how a program behaves, but it does optimize the way it loads for users. It just gets rid of all the things that make the code more readable for humans, but it does keep functionality intact.

Why Is Unminified Source Code a Big Deal in WYSIWYG Editors?

WYSIWYG editors often bridge visual creativity and raw code. They help users write blog posts, create web pages, and design emails without solely relying on HTML manually. However, behind this simplicity lie scripts that format text, manage toolbars, and respond to user actions in real time.

Developers need unminified source code to adjust or understand that logic. With it, they turn a closed, opaque, and abstracted system into something adaptable. Letโ€™s explore why having readable code makes such a difference in WYSIWYG development environments.

Higher Degree of Customization

Every editor comes with its default set of tools, like font formatting, paragraph styling, image handling, and so on. But what happens when a company wants something different? For instance, a custom โ€œInsert brand page templateโ€ button or a style preset that matches its brand.

Custom plugins usually handle these features, but when even that isnโ€™t enough to accommodate deeper customization, where do you turn? With a WYSIWYG editor that allows unminified source code integration, developers can scan the structure logically. Additionally, they can pinpoint where exactly the editor defines toolbar elements, plugins, or configurations.

Readable code also reveals how features connect: how a click triggers an event, how styles apply, or how shortcuts work. This deeper visibility encourages developers to experiment and extend the editorโ€™s functionality safely.

Easier Debugging and Error Tracing

A magnifying glass over some code, representing debugging.

When a visual HTML editor stops behaving as expected, tracing the problem can prove frustrating, especially in minified code.

Unminified source code makes debugging more efficient. Developers can search for specific variables, follow function calls, and locate causes of unexpected behavior quickly. Because line numbers and descriptive variable names remain intact, tools like browser consoles and debuggers become much more useful.

In terms of integrating WYSIWYG editors, unminified codes allow developers to collaborate with WYSIWYG editor providers. They can help suggest code improvements, company-specific features that they need, and other insights for future product improvements.

Tip: Always debug using the unminified version unless testing specific production issues. Once you confirm the fix, apply it to the minified build before deployment.

Better Learning and Documentation

Readable source code can also serve as an educational tool. For new developers joining a project, unminified files serve as a living guide to how the editor operates internally.

They can observe the structure of formatting commands, how events flow between modules, and the design of UI components. This helps them learn coding patterns, naming conventions, and modular design principles more effectively than from documentation alone.

Contributors benefit even more. When a project shares its unminified codebase, it invites community collaboration. Aside from proposing improvements as stated earlier, developers can write better documentation or build compatible plugins.

Note: Transparency encourages trust. Tools that provide unminified source code access demonstrate confidence in their architecture and support developer growth.

When to Rely on Unminified Code

Choosing between unminified and minified versions is more about context rather than which is better. Both serve unique purposes within the development cycle. Chances are, youโ€™ll probably use them both in different stages of your application.

Use minified source code when youโ€™re building, debugging, or customizing an application. Itโ€™s particularly valuable when integrating a third-party WYSIWYG editor into a larger system. Some editors that come with unminified code let you understand how features fit into your project and modify them accordingly.

For instance, letโ€™s say youโ€™re developing an internal content management tool. Keeping the unminified version lets your team experiment safely before final deployment. Itโ€™s easier to explore feature dependencies, troubleshoot performance issues, or trace unexpected behaviors in this state.

A gear shift, which represents the toggle from "dev mode" to "production mode." In dev mode, you should use unminified code; on the other hand, in production, try to minify your codes for performance.

Once the system stabilizes and moves to production, you can then minify your code with a bundler or code uglifier. This reduces page load time, conserves bandwidth, and ensures a cleaner, faster experience for end users.

Tip: Treat unminified code as your workshop and minified code as your storefront. Both are necessary, but they serve different visitors. Moreover, youโ€™d want your workshop to have as many tools as possible for a higher degree of freedom. And like minified code, your storefront should look as seamless and as neat as possible for your clients.

Best Practices When Using Unminified Code

Transitioning between readable and compact code is smooth if you maintain structure. Here are some tips to keep both versions manageable.

  • Separate your environments clearly: Keep distinct folders for each version, such as /src for unminified and /dist for minified. This helps avoid confusion during deployment.
  • Use unminified source code only in safe contexts: Avoid deploying readable code to public environments if you can. It could expose proprietary logic or make files heavier to load. Instead, reserve it for development, staging, or internal testing. Of course, obfuscation isnโ€™t a solid security measure, as users can just unminify any minified code. Still, minifying code can significantly improve performance, so why not go for it?
  • Document every change: Whenever you modify unminified files, log any changes as well as the reason for those changes. This ensures that future team members understand your decisions when maintaining the minified version.
  • Automate minification: Tools like Webpack, Rollup, or Gulp can automatically generate minified builds from your readable code. Automation helps prevent accidental inconsistencies and save time during releases.

Note: The goal here isnโ€™t to choose one permanently over the other but to use both strategically. Readability speeds up development, while minification optimizes performance. Together, they form a balanced workflow thatโ€™s both developer-friendly and user-focused.

Conclusion

Unminified source code brings visibility and flexibility to development. It allows developers to study, customize, and debug the inner workings of WYSIWYG editors without wrestling with unreadable lines.

Meanwhile, minified code remains essential for fast-loading production builds. Again, the goal here isnโ€™t to pick one but to use both wisely if you need them.

Balancing readability with performance ensures a development process thatโ€™s both efficient and educational. Some modern solutions, like Froalaโ€™s Architect plan, even include unminified integration options, letting teams enjoy both speed and full control.

Froala Shortcut Secrets That Supercharge Your Productivity

shortcuts secrets

Imagine this: youโ€™re writing, editing, and formatting text โ€” all flowing smoothly โ€” when suddenly you have to grab your mouse just to make text bold or insert a link. That small break? It disrupts your rhythm.

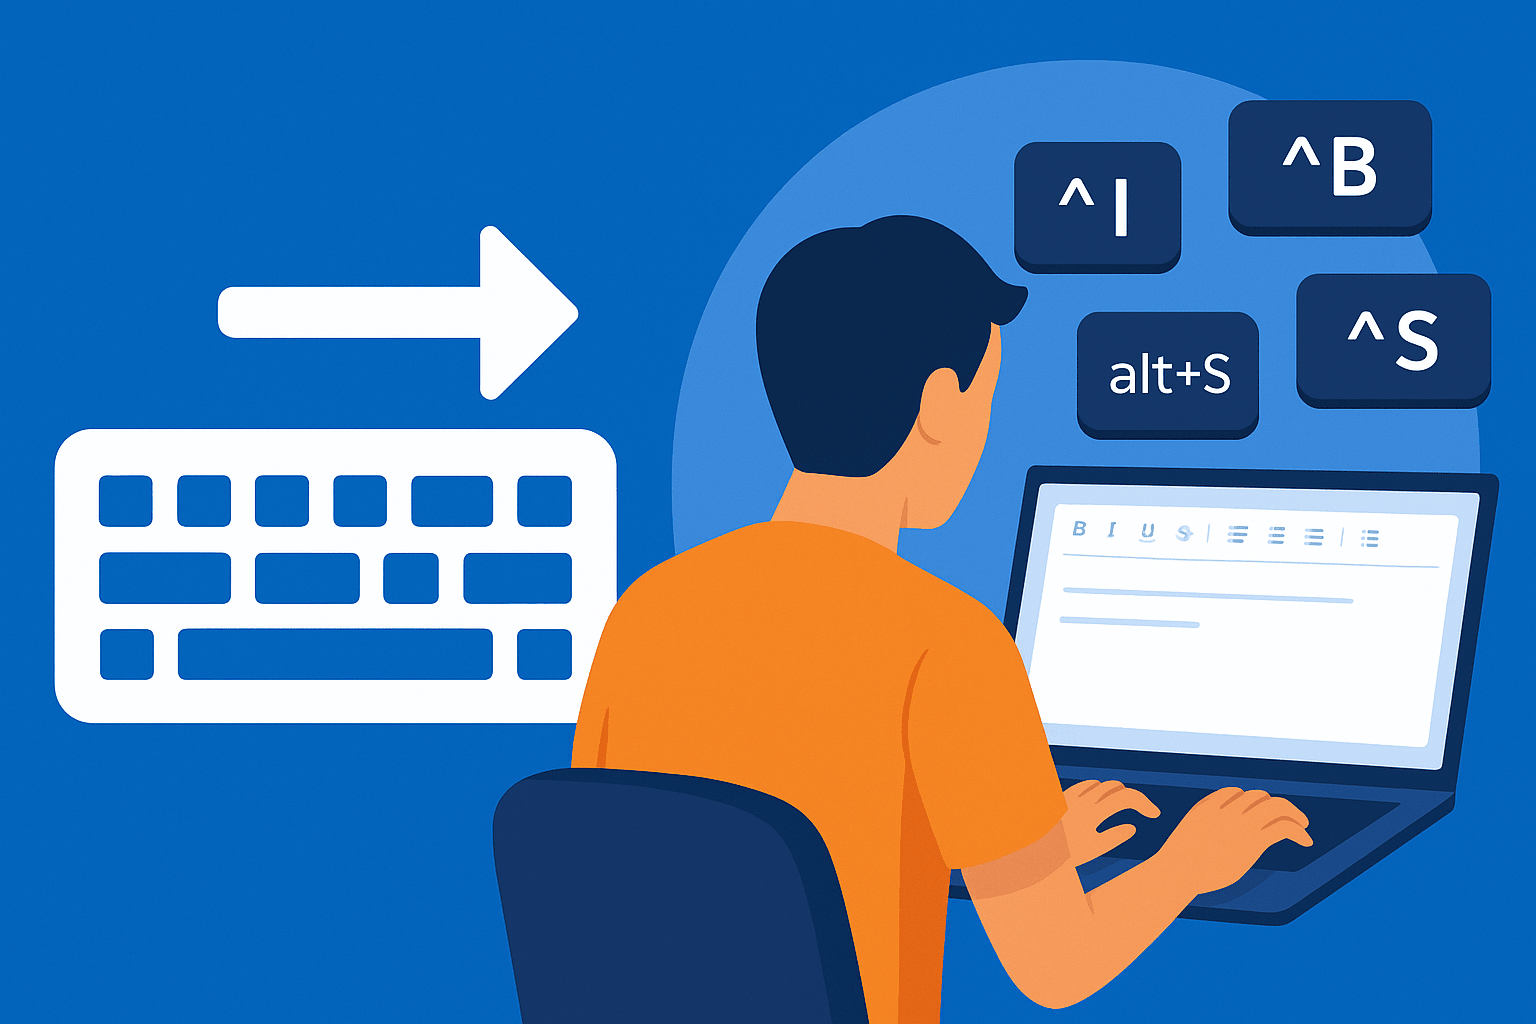
Thatโ€™s why keyboard shortcuts are pure magic. They keep users in their creative flow, transforming ordinary typing into an effortless experience. And for developers working with editors like Froala, understanding how to create and customize shortcuts can take user productivity to the next level.

This article will explore why users love shortcuts, and more importantly, how you can register and customize them in Froala Rich Text Editor to make your users feel truly intuitive and efficient.

Users love shortcuts

Why Users Love Shortcuts

The Psychology of Speed and Flow

Humans crave efficiency. Every time we remove friction between thought and action, our brains reward us with a sense of momentum. Shortcuts do exactly that โ€” they reduce micro-delays. You donโ€™t need to stop typing to click a toolbar icon. Instead, your thoughts move directly into your work.

This state is called โ€œflowโ€ โ€” that sweet spot where focus, creativity, and speed align. Keeping hands on the keyboard helps sustain that state.

Boosting Productivity and Efficiency

A few seconds saved per action might not sound like much. But multiply that by hundreds of formatting tasks a day, and youโ€™ll see why writers, coders, and designers swear by shortcuts.

Think of simple ones like:

  • Ctrl + B for bold
  • Ctrl + Z for undo
  • Ctrl + K for inserting a link

Small actions that keep you moving โ€” no pauses, no friction.

Accessibility and Inclusivity

Shortcuts arenโ€™t just about speed โ€” theyโ€™re also about accessibility. For users with motor limitations or repetitive strain injuries, relying less on mouse interactions makes writing more comfortable.

Well-designed shortcuts make the interface more inclusive, ensuring everyone can use the editor effectively โ€” regardless of how they interact with it.

Customization and User Empowerment

People love tools that adapt to them. Allowing users to customize shortcuts gives them a sense of ownership โ€” theyโ€™re not just using the tool; theyโ€™re shaping it. For developers, this translates into higher satisfaction, engagement, and loyalty.

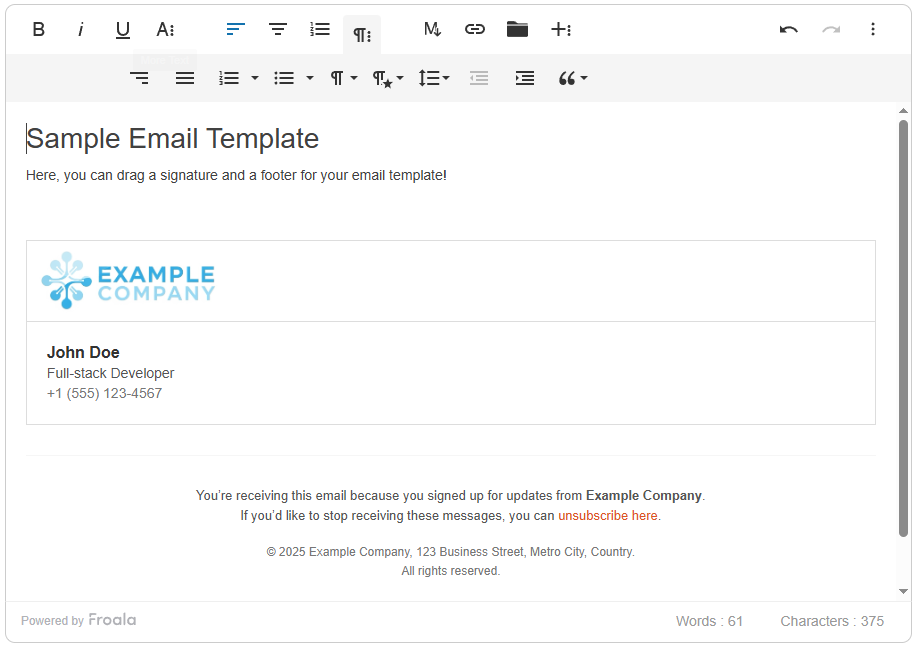
Froala shortcuts

How Froala Handles Shortcuts by Default

The Froala Rich Text Editor already includes a variety of built-in shortcuts โ€” for bold, italic, underline, undo, redo, and more. For example:

  • Ctrl + B โ†’ Bold
  • Ctrl + I โ†’ Italic
  • Ctrl + U โ†’ Underline
  • Ctrl + Z โ†’ Undo
  • Ctrl + Y โ†’ Redo

These shortcuts are intuitive, consistent across platforms, and designed to match what users expect from other editors like Word or Google Docs.

However, sometimes youโ€™ll want more โ€” a custom command, a unique formatting option, or a plugin action triggered with a keystroke.

Thatโ€™s where custom shortcut registration comes in.

How To Register Custom Shortcuts in Froala

Letโ€™s walk through how you can register your own shortcuts to make your editor truly yours.

Froala provides a powerful method FroalaEditor.RegisterShortcut() that gives you granular control over keyboard interactions. Let’s break down its parameters:

  • key: The unique decimal code identifying the keyboard button
  • cmd: The editor command to trigger (like ‘bold’, ‘italic’)
  • valโ†’ The name of the option to be triggered In case the command has more than one option.
  • letter โ†’ The character shown in tooltip hints.
  • shift โ†’ Boolean to require Shift key combination
  • option โ†’ Boolean to require Alt (โŒฅ (Option) on Mac) key combination

Practical Examples: Mastering Froala Shortcuts

Let’s explore how to create and modify shortcuts with precision.

Example of a basic shortcut: Bold Shortcut

The classic bold shortcut demonstrates the method’s simplicity:

FroalaEditor.RegisterShortcut(

ย ย FroalaEditor.KEYCODE.B,ย  // Decimal code for 'B' key

ย ย 'bold',ย  ย  ย  ย  ย  ย  ย  ย  ย  // Bold command

ย ย null,ย  ย  ย  ย  ย  ย  ย  ย  ย  ย  // No specific option

ย ย 'B', ย  ย  ย  ย  ย  ย  ย  ย  ย  ย  // Tooltip shows 'CTRL + B'

ย ย false, ย  ย  ย  ย  ย  ย  ย  ย  ย  // No Shift key required

ย ย falseย  ย  ย  ย  ย  ย  ย  ย  ย  ย  // No Alt/Option key required

)

This single line configures Ctrl + B (Windows) or Cmd + B (macOS) to instantly bold selected text.

Shortcut Variations

Want a different combination? Simply adjust the parameters:

For example, the following code makes selected text bold using the shortcut Ctrl + Shift + B (Windows) or Cmd + Shift + B (macOS).

FroalaEditor.RegisterShortcut(

ย ย FroalaEditor.KEYCODE.B,ย ย 

ย ย 'bold',ย ย ย ย ย ย ย ย ย ย ย ย ย ย ย ย ย ย 

ย ย null,ย ย ย ย ย ย ย ย ย ย ย ย ย ย ย ย ย ย ย ย 

ย ย 'B',ย ย ย ย ย ย ย ย ย ย ย ย ย ย ย ย ย ย ย ย ย 

ย ย true, ย  ย  ย  ย  ย  ย  ย  ย  ย  // Shift required

ย ย falseย ย ย ย ย ย ย ย ย ย ย ย ย ย ย ย ย ย ย 

)

While the following shortcut registration code modification changes the shortcut toย Ctrl + ALT + B (Windows) or Cmd + Option + B (macOS)

FroalaEditor.RegisterShortcut(

ย ย FroalaEditor.KEYCODE.B,ย ย 

ย ย 'bold',ย ย ย ย ย ย ย ย ย ย ย ย ย ย ย ย ย ย 

ย ย null,ย ย ย ย ย ย ย ย ย ย ย ย ย ย ย ย ย ย ย ย 

ย ย 'B',ย ย ย ย ย ย ย ย ย ย ย ย ย ย ย ย ย ย ย ย ย 

ย ย false,ย  ย  ย  ย  ย  ย  ย  ย  ย  // No Shift required

ย ย true ย  ย  ย  ย  ย  ย  ย  ย  ย  // Alt/Option required

)

If we want to use both Shift and Alt/Option, then you should modify the code to

FroalaEditor.RegisterShortcut(

ย ย FroalaEditor.KEYCODE.B,ย ย 

ย ย 'bold',ย ย ย ย ย ย ย ย ย ย ย ย ย ย ย ย ย ย 

ย ย null,ย ย ย ย ย ย ย ย ย ย ย ย ย ย ย ย ย ย ย ย 

ย ย 'B',ย ย ย ย ย ย ย ย ย ย ย ย ย ย ย ย ย ย ย ย ย 

ย ย true,ย  ย  ย  ย  ย  ย  ย  ย  ย  // Shift required

ย ย true ย  ย  ย  ย  ย  ย  ย  ย  ย  // Alt/Option required

)

This demonstrates how easily you can customize keyboard interactions. This flexibility allows developers to create intuitive, personalized editing experiences that match specific workflow needs. The ability to fine-tune shortcuts means your Froala editor can feel truly tailored, reducing cognitive load and helping users maintain their creative momentum with minimal friction between thought and action.

Shortcuts for Commands with Multiple Actions

Some commands have multiple actions. For instance, the paragraphFormat offer multiple actions such as H1 for turning the text into heading 1 and H2 for turning the text into heading 2 and so on.

To assign a shortcut for the H1 action, you need to pass H1 as the third parameter in the RegisterShortcut method.

  FroalaEditor.RegisterShortcut(
  72,                         // Decimal code for 'H' key
  'paragraphFormat',          // Command
  'H1',                       // Selected Action 
  'H',
  false,
  false
  );

The above code registers Ctrl + H (Windows) or Cmd + H (macOS) to instantly make selected text a heading paragraph.

Similarly, you can create shortcuts for other paragraph formats like H2 or H3 by adjusting the action parameter.

By mapping specific keystrokes to precise formatting actions, you can dramatically reduce the time spent navigating menus and clicking buttons, making the writing process more fluid and intuitive for users across different skill levels and editing preferences.

Disabling Shortcuts

Sometimes, you might want to disable certain default keyboard shortcuts in Froala to prevent conflicts or customize the editing experience. Froala provides a straightforward way to manage this through the shortcutsEnabled configuration option.

How to Disable Specific Shortcuts

You can disable shortcuts by removing their names from the shortcutsEnabled array.

new FroalaEditor('#editor', {

ย ย shortcutsEnabled: ['bold', 'italic'] // Only these shortcuts remain active

});

Completely Disabling Shortcuts

If you want to turn off all default shortcuts:

new FroalaEditor('#editor', {

ย ย shortcutsEnabled: [] // Disables all default shortcuts

});

Why Disable Shortcuts?

Reasons to disable shortcuts might include:

  • Preventing accidental formatting
  • Resolving conflicts with browser or system-wide keyboard commands
  • Creating a more controlled editing environment

By carefully managing shortcuts, you can create a more tailored and user-friendly editing experience.

Shortcut Hints: Guiding Users Intuitively

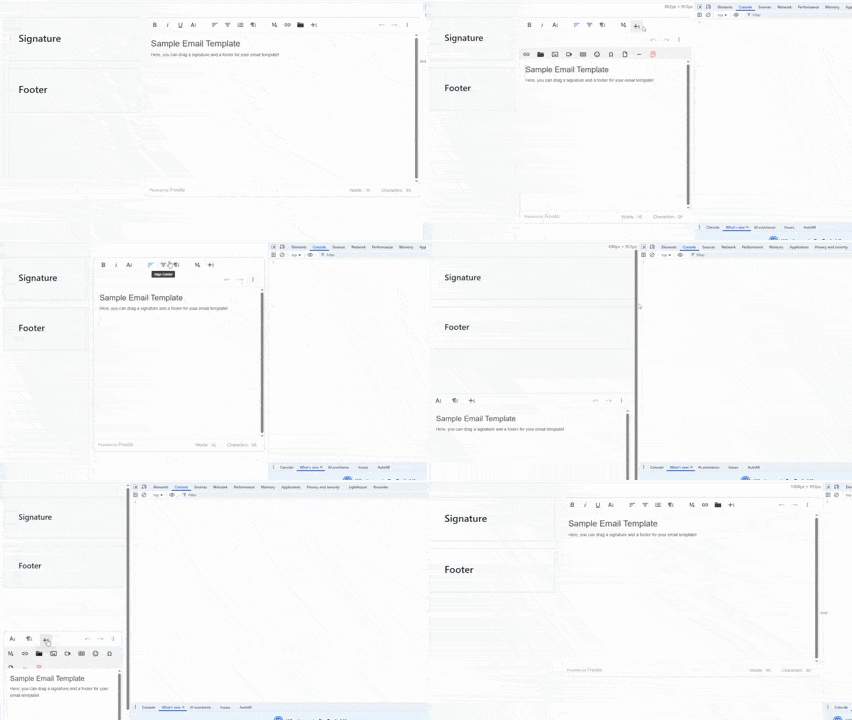
Shortcut hints

Understanding Shortcut Hints

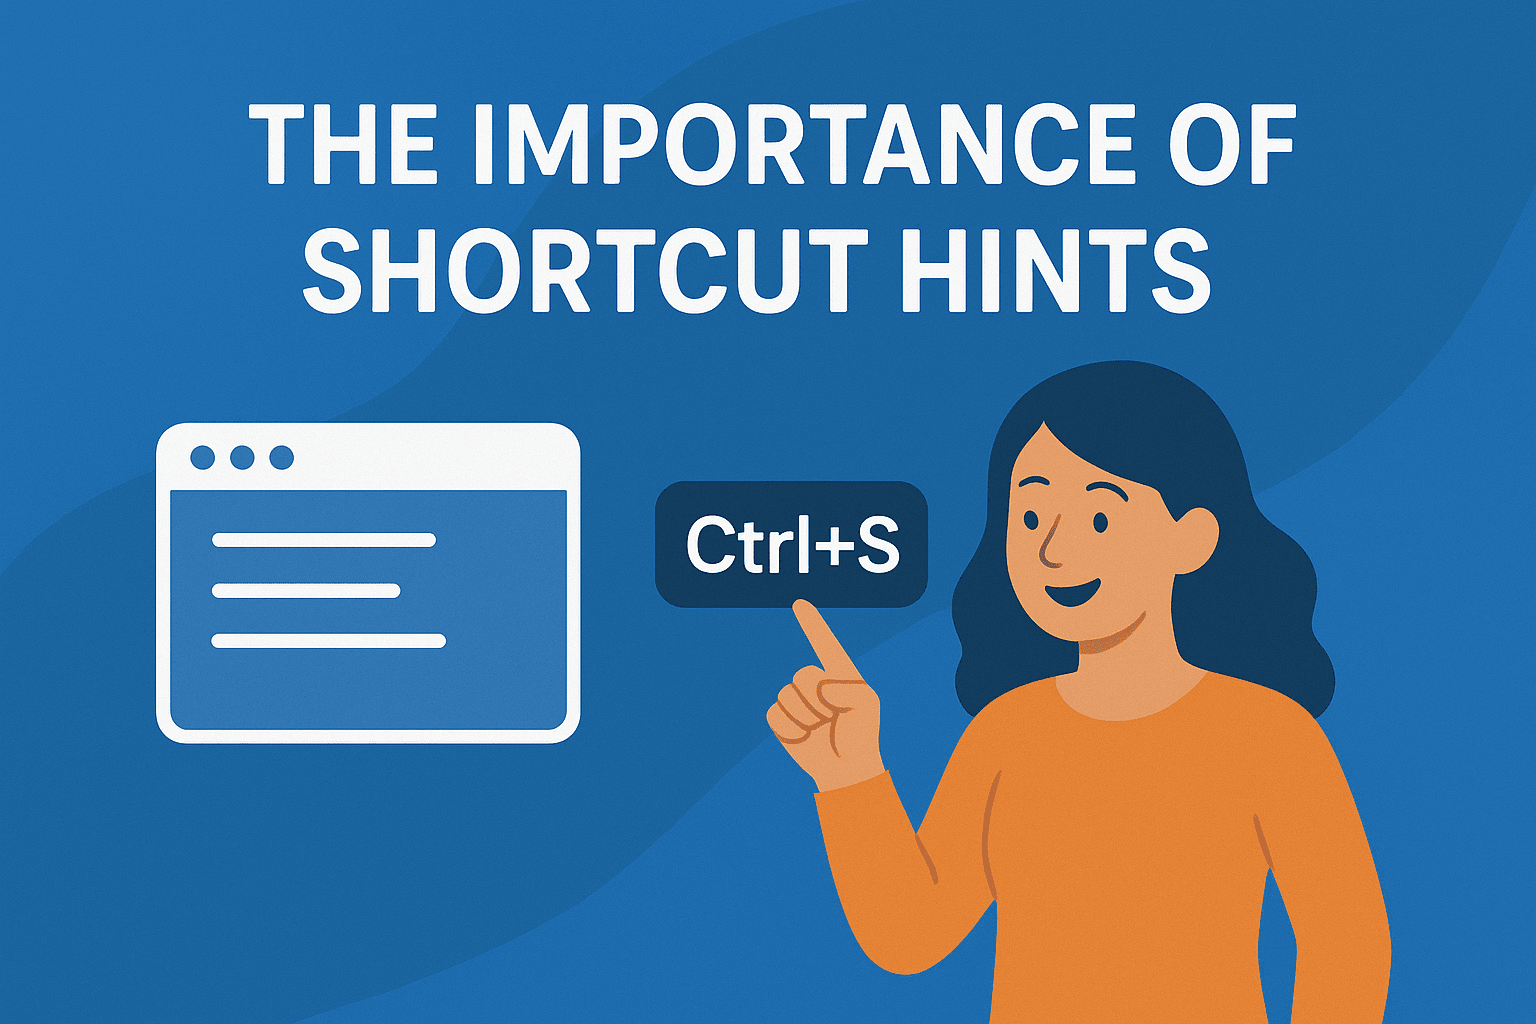
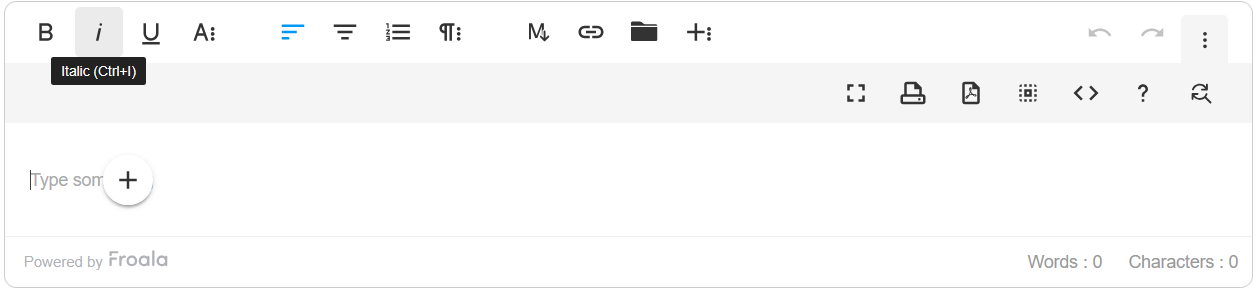
Shortcut hints are small, informative tooltips that appear when users hover over buttons in the Froala Rich Text Editor. These hints reveal the corresponding keyboard shortcut for each action, providing a quick reference that helps users discover and remember keyboard commands.

The Importance of Shortcut Hints

Shortcut hints serve multiple crucial purposes:

  • Discoverability: They introduce users to available keyboard shortcuts.
  • Learning: Help users quickly memorize keyboard commands
  • Accessibility: Provide clear guidance for users who prefer keyboard navigation.
  • Efficiency: Encourage users to adopt faster editing techniques

Configuring Shortcut Hints

Froala allows you to control shortcut hints through the shortcutsHint configuration option:

new FroalaEditor('#editor', {

ย ย shortcutsHint: trueย  // Enables shortcut hints (default)

});

Hints

To disable shortcut hints completely:

new FroalaEditor('#editor', {

ย ย shortcutsHint: falseย  // Disables all shortcut hints

});

Help Modal: Comprehensive Shortcut Reference

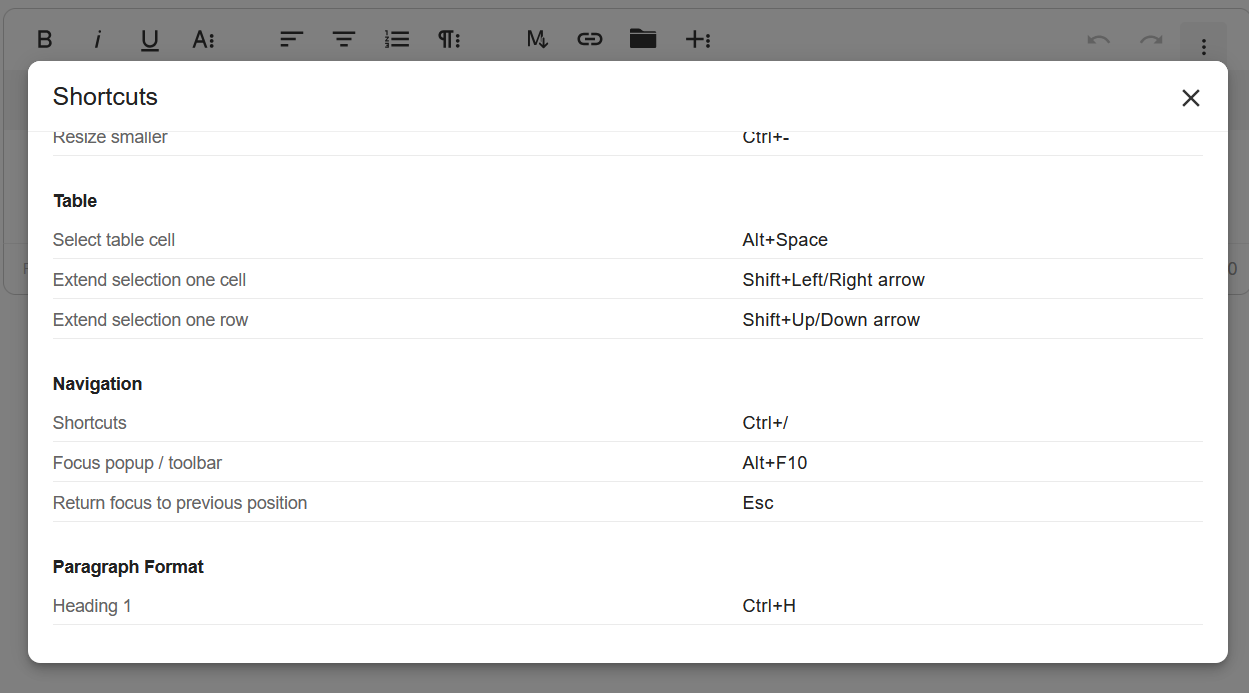
The Help plugin in Froala provides a comprehensive modal that displays all available shortcuts. This modal can be triggered by the help button and offers a complete overview of keyboard shortcuts.

Customizing the Help Modal Content

You can modify the help modal’s content to include custom shortcuts using the helpSets configuration. For example:

const editor = new FroalaEditor('#editor',{
  shortcutsHint: true, //display the shortcut code on hover over the button
}, function(){
  this.opts.helpSets.push({title: "Paragraph Format", commands: [
    {val: "OSkeyH", desc: "Heading 1"},
  ] 
  });
});

This adds a “Paragraph Format” section containing the Heading 1 item and its shortcut, CTRL+H.

Help Modal

Best Practices for Shortcut Hints

  • Keep hints clear and concise.
  • Use standard, intuitive shortcut combinations.
  • Ensure hints are visible but not intrusive.
  • Provide a way for users to view a complete shortcut list.

By thoughtfully implementing shortcut hints, you create a more intuitive, efficient editing experience that empowers users to work faster and more comfortably.

Cross-Platform Considerations

Froala’s shortcut system automatically adapts to different operating systems. The same registration works seamlessly across Windows, macOS, and Linux, handling modifier key differences behind the scenes.

Best Practices for Designing Shortcuts

Handle Shortcut Conflicts

Sometimes, shortcuts can overlap with browser or OS defaults. For instance, Ctrl + S usually saves the page. To avoid confusion:

  • Use combinations less likely to conflict (e.g., Alt + Shift + number keys).
  • Test across Windows, macOS, and Linux, as key modifiers differ (Ctrl vs Cmd).

Keep It Logical and Memorable

If a shortcutโ€™s meaning is obvious, users will remember it.

  • โ€œBโ€ for Bold.
  • โ€œIโ€ for Italic.
  • โ€œLโ€ for Link.

Avoid random or multi-layered key combinations unless absolutely necessary.

Conclusion

Keyboard shortcuts may seem small, but theyโ€™re the silent heroes of productivity. They reduce friction, keep users in flow, and turn routine editing into instinctive action.

For developers, Froalaโ€™s API makes implementing and customizing shortcuts straightforward โ€” giving you the power to create a truly fluid, user-friendly editing experience.

๐Ÿš€ Start Free Trial and explore Froalaโ€™s full set of customization and productivity tools.

๐Ÿ’ก Try it yourself: Experiment with a Froala JSFiddle demo or your local setup.

โœจ Final Thought

In the end, shortcuts arenโ€™t just about key combinations โ€” theyโ€™re about designing efficiency, empowerment, and joy into the user experience. And with Froala, you can deliver exactly that.

Shortcuts means efficiency, empowerment, and joy

Why Your Drag-and-Drop Editor Feels Clunky

A block of content being dragged by a cursor from mud. The mud represents clunky editor UX.

Have you ever had users or even testers tell you that your drag-and-drop editor sometimes feels slow, heavy, or clunky? Such editors are popular tools that make web content creation faster and easier through a visual interface. Without them, people would have a tougher experience using website builders, content management systems (CMS), email builders, and similar platforms.

However, despite its convenience, a drag-and-drop visual HTML editor can sometimes feel more like a burden than a benefit. Complex code, excessive features, or poor optimization often cause it to slow down or feel unresponsive. Instead of empowering users like it should, it may create frustration and interrupt the usersโ€™ creative flow.

In this article, weโ€™ll cover the common reasons a drag-and-drop editor feels clunky. Additionally, youโ€™ll learn about when to worry about clunkiness and when itโ€™s okay to overlook it. Weโ€™ll also discuss some tips that could help you with addressing editor clunkiness.

Key Takeaways

  • Drag-and-drop editors speed up design and content creation, but clunkiness often comes from hasty technical or UX decisions.
  • Knowing when to worry about performance depends on your goals: quick prototypes or full-scale products.
  • You can solve most performance issues with code optimization, modernization, and smarter UX patterns.
  • Analyze your bundles and test your editor across different environments to spot potential problems.
  • Find the right balance between robustness and simplicity. Extra features might mean little if they slow down the userโ€™s workflow.

Should You Worry about Drag-and-Drop Editor Clunkiness?

The short answer here is โ€œit depends,โ€ but in most cases, you should. Not every performance hiccup warrants a high-level alarm. Minor lag, for instance, might not matter when a casual user builds a simple newsletter.

A half-second delay in moving an element could annoy some, but it might not affect the end result too much. But if it starts affecting the entire workflow, clunkiness could cost you.

A timer set to "00:00:01" overlooks a mountain of other timers, which represents how many small, clunky experiences can lead to more serious problems in the long run.

For example, a marketing team building dozens of landing pages will get more poor experiences with a clunky editor. Every small lag, difficulty finding specific buttons, and unresponsiveness add up, creating a mountain of slow processes and reducing efficiency. Worse, users may lose patience and turn to alternatives.

So, what does this tell you? If your drag-and-drop editor is vital for your full application, you should worry about clunkiness and prioritize optimizing it. Otherwise, you can put optimization on hold in favor of other features (but you should get back to it nonetheless).

Furthermore, knowing whether clunkiness is a deal-breaker depends on your goals. If youโ€™re only building a quick prototype, then you donโ€™t need to worry about it. Otherwise, regardless of the editorโ€™s role, you should always strive to improve its performance.

Why Does Your Drag-and-Drop Editor Feel Clunky?

There are many reasons an editor feels slow or unpolished. Some are purely technical, while others come from UX choices that amplify tiny frictions. In this section, youโ€™ll learn some of the usual suspects for this problem.

Too Much Code Running behind the Scenes

When a user drags an element, dozens of scripts can wake up at once. Event listeners, layout calculations, and other mechanisms all run together.

If you rely on multiple libraries, each action might trigger redundant work. This results in higher CPU usage and delayed frame updates.

Note: If you want to try this out, open Chrome DevTools (F12 or right-click, then โ€œInspectโ€). Afterwards, go to the โ€œPerformanceโ€ tab and record a drag interaction. Look for long tasks and repetitive script evaluations. If there are any functions that run many times per interaction, thatโ€™s your smoke signal.

Heavy Use of <iframes> or Layers

The <iframe> element provides isolation and safety. However, isolation could cost you performance, as each <iframe> hosts a separate browsing context.

The browser must paint and combine the context of each <iframe> and the main page independently. When you nest many of these elements, every interaction can force multiple reflows and repaints. As a result, your users might get a laggy or unresponsive experience, especially on low-end devices.

Tip: Letโ€™s say you canโ€™t reduce the number of <iframe> elements and that their content has similar structure and purpose. You can then reuse one instance and swap its content instead of creating and destroying many iframes.

Poor Handling of Responsiveness

Dragging elements on desktop doesnโ€™t guarantee correct layout on mobile. If your editor relies on absolute positioning, elements might snap unexpectedly at different breakpoints. This could cause users to manually adjust layouts per device.

A responsive visual HTML editor design requires adaptive rules. This means fluid grids, percentage widths, and component-first layouts. Editors that treat every element as absolutely positioned can break easily on different screen sizes.

A GIF of a drag-and-drop editor that showcases responsiveness for both the editor and the dropped contents.

Figure 1: An example of a responsive drag-and-drop editor

Tip: If you want to start learning responsive design, MDNโ€™s responsiveness documentation and W3Schoolsโ€™ quick guide might help. You can also opt for third-party responsive design frameworks such as Bootstrap or Tailwind. Finally, you can integrate a drag-and-drop editor thatโ€™s already responsive.

Presence of Legacy Code

Legacy code refers to that which developers wrote for older browsers, frameworks, or libraries. Teams often layer patches on top of it. Each patch, however, could increase complexity and risk of conflicts, causing the dependent application to turn fragile and slow down.

Legacy problems show up as inconsistent behavior between browsers, especially in recent versions. They also limit modern optimizations like passive event listeners or CSS containment.

Think of legacy code as an old house that still serves its main purpose. You shouldnโ€™t demolish it at once; instead, you reinforce and refurbish each room or wing until everything feels sturdy and new. The same thing applies to code.

Overloaded with Features

Having plenty of features is nice for power users who need as many editing and website-building capabilities as they can. But usually, when you add a lot of features to an editor, it could crowd the interface and slow down the platform. This leads to frustration and confusion for users.

Each feature could mean an extra script to load and more background work and events that fire even when the user never touches it. Make sure to minify your bundles as much as you can and remove features or plugins that youโ€™re sure your users wonโ€™t use. Additionally, you can lazy load heavy features by dynamic import, i.e., only when the user needs them, for example:

button.addEventListener('click', async () => {
  const module = await import('./sample-heavy-feature.js');
  module.open();
});

In terms of interface overload, you should categorize your editorโ€™s features according to their purpose. For example, gather all rich text formatting together or combine file upload processes through dropdown elements and separators.

An image that shows ideal toolbar organization for editors. In the image, each paragraph function is consolidated in a "More Paragraph" dropdown button, which reveals a paragraph menu when opened.

Figure 2: An editor that has toolbar organization, putting all paragraph-related features together

If youโ€™re using a third-party drag-and-drop editor, ensure that it has the ability to load and remove features via plugins. This aligns with modular architecture (plugin-based architecture), where different codes are encapsulated in smaller modules that represent a functionality. A plugin-based WYSIWYG editor allows you to load only the features that users need instead of loading everything every time.

Bad Feedback Loops

Letโ€™s say that you already minified your editor scripts, loaded only the necessary plugins, and made everything responsive. If your users or testers still experience slowness, it could stem from poor feedback instead of actual slowness.

If the UI gives no immediate hint, users might think that the app lags. For example, a user drops an element onto the editing space after dragging it from the toolbar or menu. If the editor doesnโ€™t show smooth dragging animations or visual cues (like spinners), the user might hesitate or feel confused.

Here are some quick fixes for improving your editorโ€™s feedback loops:

  • Add snapping markers, loading spinners, and a brief scale or shadow animation on element drop.
  • Use placeholders for slower content.
  • Add a lightweight ghost preview at mouse down. Afterwards, update its position continuously to follow the cursor.

Ignoring Small UX Details

Small UX annoyances can pile up, making the editor feel clumsy overall. For example, a draggable elementโ€™s grab handles might seem too small or hard to find. In this case, users might doubt whether the element is truly draggable or not.

Moreover, some important features might not appear too prominently because theyโ€™re too hidden or their icons are confusing. As a result, users would pause and spend more time hunting for the features they need, scanning every button icon.

Thankfully, design fixes are low effort but high impact:

  • Enlarge drag handles for draggable objects or enclose them in draggable cards. Donโ€™t forget to test these! Making drag handles too big could cause overlapping or the inability to drag adjacent elements.
  • Provide visible drag handles or visuals, tooltip text, and keyboard shortcuts for better accessibility.
  • Use consistent iconography and place common or essential features in more prominent spots.

A GIF that demonstrates a drag-and-drop editor in action. In the GIF, the user clicks and drags both an email signature (logo, name, title, number) and a footer onto the editor.

Figure 3: Seamless drag and drop in action

The GIF above contains a drag-and-drop editor example that demonstrates how it should work in email builders. In the example, users can click and drag an email signature or footer and drop it onto the editing space. To get started with this type of setup, or to see how drag-and-drop editors generally work, visit the demoโ€™s GitHub repository.

Extra Tips to Make Your Drag-and-Drop Editor Less Clunky

Weโ€™ve already discussed some ways to help with clunkiness earlier, but before you go, here are some more practical actions you can take.

Simplify the Codebase

  • Audit bundles with a bundle analyzer like webpack-bundle-analyzer. After an analysis, youโ€™ll find out what your bundle contains, which modules take up the most space, and whether there are any modules that shouldnโ€™t be there.
  • Replace heavy libraries with smaller alternatives if you can.
  • Implement tree-shaking on your bundle to remove any unused code. Some bundlers, like Webpack, automatically use tree-shaking.

Keep Testing

  • Run Google Lighthouse audits and fix long tasks.
  • Test your platform and drag-and-drop editor on low-end mobile devices, older browser versions, and different browsers to help ensure consistency.
  • Benchmark early versions of your editor and compare new builds against the old benchmarks to assess improvements.

Integrate Readily Available Editors

  • If youโ€™re pressed for time, prefer a head start, or want to experiment with drag-and-drop editor features, consider using a readily available editor.
  • Most of these editors have already addressed clunkiness before and continue to improve still.
  • The task of developing and maintaining a polished, complex drag-and-drop functionality will dissipate into simple integration and regular updates.

Conclusion

Drag-and-drop editor clunkiness comes from an accumulation of technical debt, UX friction, and unmeasured features. Thankfully, most problems have concrete fixes. Assess the drag-and-drop feedback loop, remove or lazy load heavy modules, add immediate visual feedback, and tune responsiveness.

A fast visual HTML editor comes from small, consistent improvements. Optimize the render path, clean the codebase, and design for real user flows. When you balance power with simplicity, your editor will feel smoother, more predictable, and very usable.

It might sound like a lot of work. But addressing these clunkiness issues as soon as possible can go a long way towards smoother editing experiences. Or, you can also call it a day and integrate a tried-and-tested drag-and-drop editor. In the end, the choice will depend on your preference, user requirements, and project timeline.

Extending Froala with an APA Website Citation Tool

APA Website Citation Tool

Imagine typing a paragraph, the cursor blinking as you search for the perfect source. You pull up a webpage, draft your sentence, and then hit a wall: you need an APA citation, fast. You donโ€™t want to leave your writing window or disrupt your flow. What if you could summon a perfect APA citation with a single click, right inside your editor?

In this tutorial, youโ€™ll learn how to extend Froala with a lightweight, reusable citation feature. Build a custom toolbar button that opens a popup, collect author/date/title/URL details, and insert a polished APA website citation exactly where youโ€™re writing.

Along the way, youโ€™ll quickly grasp what citations are, why APA matters, and how Froalaโ€™s flexibility makes this tool fit real writing workflows.

By the end, youโ€™ll see that Froala isnโ€™t just a text editorโ€”itโ€™s a powerful tool you can shape to fit specialized workflows, whether youโ€™re supporting academic writing, content publishing, or collaborative editing. Get ready to add a professional-grade citation tool to Froala and give your users a smoother, smarter writing experience.

APA Citation Style

Understanding Citations

A citation gives credit to the source of information you use in your work. It helps readers verify facts, find more information, and ensures you avoid plagiarism. Citations apply whether you quote someone directly or paraphrase their ideas.

By contrast, a quotation is when you copy the exact words from a source. Quotations must always be followed by a citation. In short: quotations are the borrowed words, citations are the credit.

Citations appear in academic papers, blogs, reports, and any content where proper credit matters.

What is APA Citation Style?

The American Psychological Association (APA) style is one of the most widely used citation formats, especially in the social sciences.

A typical APA website citation includes:

  1. Author (person or organization)
  2. Date (year, month, and day if available)
  3. Title of the webpage (italicized)
  4. Website name (if different from the author)
  5. URL

Examples:

  • Individual author: Smith, J. (2023, May 10). How to write a research paper. Writing Guide. https://www.writingguide.org/research-paper
  • Organization author: World Health Organization. (2022, March 14). COVID-19 advice for the public. https://www.who.int/emergencies/diseases/novel-coronavirus-2019/advice-for-public

This structure ensures consistency and clarity for readers.

Why Extend Froala Editor with a Citation Feature?

Froala is more than a text editorโ€”itโ€™s a tool that developers can adapt to almost any content workflow. Writers, students, and professionals often need to insert citations, yet most editors donโ€™t include citation tools by default.

Adding a custom citation button saves time, reduces formatting errors, and improves user experience. It also demonstrates how easily Froala can be tailored for specialized tasks. For example, to work as knowledge publishing or academic writing tool.

Citation Popup

Step-by-Step Guide For Adding A Citation Feature

We will create a custom plugin named โ€œCitationโ€œ. This plugin will register a new toolbar button to open the citation popup. The popup collects the citation details. Youโ€™ll need form fields for author, date, title, website name, and URL.

On submit, format the input as an APA website citation and insert it at the current cursor position.

Creating the Custom Citation Plugin

Define the popup template and the show/hide popup methods.

// Define popup template.
Object.assign(FroalaEditor.POPUP_TEMPLATES, {
  "citationPlugin.popup": "[_BUTTONS_][_CUSTOM_LAYER_][_CBUTTONS_]",
});

// Define popup buttons.
Object.assign(FroalaEditor.DEFAULTS, {
  citationPopupTopButtons: ["popupClose", "|"],
  citationPopupBottomButtons: ["citationSubmit", "|"],
});

// The custom popup is defined inside a plugin (new or existing).
FroalaEditor.PLUGINS.citationPlugin = function (editor) {
  // Create custom popup.
  function initPopup() {
    // Load popup template.
    var template = FroalaEditor.POPUP_TEMPLATES["citationPlugin.popup"];
    if (typeof template == "function") template = template.apply(editor);

    // Popup buttons.
    var citation_popup_top_buttons = "";

    // Create the list of buttons.
    if (editor.opts.citationPopupTopButtons.length > 1) {
      citation_popup_top_buttons += '<div class="fr-buttons">';
      citation_popup_top_buttons += editor.button.buildList(
        editor.opts.citationPopupTopButtons,
      );
      citation_popup_top_buttons += "</div>";
    }

    var citation_popup_bottom_buttons = "";

    // Create the list of buttons.
    if (editor.opts.citationPopupBottomButtons.length > 1) {
      citation_popup_bottom_buttons += '<div class="fr-buttons">';
      citation_popup_bottom_buttons += editor.button.buildList(
        editor.opts.citationPopupBottomButtons,
      );
      citation_popup_bottom_buttons += "</div>";
    }

    var citationPopupTemplate = `
    <div class="fr-citation-popup">
      <div class="fr-citation-input"> <label>Author:</label><input type="text" id="citation-author"></div>
      <div class="fr-citation-input"> <label>Date:</label><input type="text" id="citation-date"></div>
      <div class="fr-citation-input"> <label>Title:</label><input type="text" id="citation-title"></div>
      <div class="fr-citation-input"> <label>Website:</label><input type="text" id="citation-website"></div>
      <div class="fr-citation-input"> <label>URL:</label><input type="text" id="citation-url"></div>
    </div>`;
    // Load popup template.
    var template = {
      buttons: citation_popup_top_buttons,
      custom_layer: citationPopupTemplate,
      cbuttons: citation_popup_bottom_buttons,
    };

    // Create popup.
    var $popup = editor.popups.create("citationPlugin.popup", template);

    return $popup;
  }

  // Show the popup
  function showPopup() {
    // Get the popup object defined above.
    var $popup = editor.popups.get("citationPlugin.popup");

    // If popup doesn't exist then create it.
    // To improve performance it is best to create the popup when it is first needed
    // and not when the editor is initialized.
    if (!$popup) $popup = initPopup();

    // Set the editor toolbar as the popup's container.
    editor.popups.setContainer("citationPlugin.popup", editor.$tb);

    // If the editor is not displayed when a toolbar button is pressed, then set BODY as the popup's container.
    // editor.popups.setContainer('citationPlugin.popup', $('body'));

    // Trigger refresh for the popup.
    // editor.popups.refresh('citationPlugin.popup');

    // This custom popup is opened by pressing a button from the editor's toolbar.
    // Get the button's object in order to place the popup relative to it.
    var $btn = editor.$tb.find('.fr-command[data-cmd="citation"]');

    // Compute the popup's position.
    var left = $btn.offset().left + $btn.outerWidth() / 2;
    var top =
      $btn.offset().top +
      (editor.opts.toolbarBottom ? 10 : $btn.outerHeight() - 10);

    // Show the custom popup.
    // The button's outerHeight is required in case the popup needs to be displayed above it.
    editor.popups.show("citationPlugin.popup", left, top, $btn.outerHeight());
  }

  // Hide the custom popup.
  function hidePopup() {
    editor.popups.hide("citationPlugin.popup");
  }

  // Methods visible outside the plugin.
  return {
    showPopup: showPopup,
    hidePopup: hidePopup,
  };
};

This popup provides a simple input form for the citation.

Note: The code structure is designed to keep the popup creation lazy (only when needed) for performance.

Add a custom button to open the popup

Register a new command named โ€œcitationโ€ and connect it to the plugin. The button lives on the Froala toolbar and triggers the popup when pressed. If the popup is already visible, it hides it.

// Add custom citation button
FroalaEditor.DefineIcon("citation", {
  template: "svgMultiplePath",
  PATHS: `<g id="SVGRepo_bgCarrier" stroke-width="0"></g><g id="SVGRepo_tracerCarrier" stroke-linecap="round" stroke-linejoin="round"></g><g id="SVGRepo_iconCarrier"> <g id="network"></g> <g id="connection"></g> <g id="page"></g> <g id="support"></g> <g id="configuration"></g> <g id="cloud_storage"></g> <g id="password"></g> <g id="search_engine"></g> <g id="history"></g> <g id="SEO"></g> <g id="optimization"></g> <g id="backlink"></g> <g id="performance"></g> <g id="analytics"></g> <g id="security"></g> <g id="dark_web"></g> <g id="video_player"></g> <g id="upload_download"></g> <g id="incognito_tab"></g> <g id="bookmark"> <g> <path d="M88.1,55l7.9-19.6c0.1-0.3,0.1-0.7-0.1-0.9C95.6,34.2,95.3,34,95,34h-7V17c0-2.8-2.2-5-5-5H17c-2.8,0-5,2.2-5,5v17H5 c-0.3,0-0.6,0.2-0.8,0.4c-0.2,0.3-0.2,0.6-0.1,0.9L11.9,55L4.1,74.6c-0.1,0.3-0.1,0.7,0.1,0.9C4.4,75.8,4.7,76,5,76h7v7 c0,2.8,2.2,5,5,5h66c2.8,0,5-2.2,5-5v-7h7c0.3,0,0.6-0.2,0.8-0.4c0.2-0.3,0.2-0.6,0.1-0.9L88.1,55z M17,14h66c1.7,0,3,1.3,3,3v5 H14v-5C14,15.3,15.3,14,17,14z M14,24h72v10H14V24z M86,83c0,1.7-1.3,3-3,3H17c-1.7,0-3-1.3-3-3v-7h72V83z M6.5,74l7.5-18.6 c0.1-0.2,0.1-0.5,0-0.7L6.5,36h87l-7.5,18.6c-0.1,0.2-0.1,0.5,0,0.7L93.5,74H6.5z"></path> <circle cx="80" cy="18" r="2"></circle> <circle cx="74" cy="18" r="2"></circle> <circle cx="68" cy="18" r="2"></circle> <path d="M65.5,50H54.4L51,39.4c-0.1-0.4-0.5-0.7-1-0.7s-0.8,0.3-1,0.7L45.6,50H34.5c-0.4,0-0.8,0.3-1,0.7c-0.1,0.4,0,0.9,0.4,1.1 l9,6.5l-3.4,10.6c-0.1,0.4,0,0.9,0.4,1.1c0.4,0.3,0.8,0.3,1.2,0l9-6.5l9,6.5c0.2,0.1,0.4,0.2,0.6,0.2s0.4-0.1,0.6-0.2 c0.4-0.3,0.5-0.7,0.4-1.1l-3.4-10.6l9-6.5c0.4-0.3,0.5-0.7,0.4-1.1C66.3,50.3,65.9,50,65.5,50z M55.3,57.1 c-0.4,0.3-0.5,0.7-0.4,1.1l2.7,8.3l-7.1-5.1c-0.2-0.1-0.4-0.2-0.6-0.2s-0.4,0.1-0.6,0.2l-7.1,5.1l2.7-8.3c0.1-0.4,0-0.9-0.4-1.1 L37.6,52h8.8c0.4,0,0.8-0.3,1-0.7L50,43l2.7,8.3c0.1,0.4,0.5,0.7,1,0.7h8.8L55.3,57.1z">
</path> </g> </g> </g>`,
  VIEWBOX: "0 0 100 100",
});

FroalaEditor.RegisterCommand("citation", {
  title: "Insert Citation",
  undo: false,
  focus: false,
  popup: true,
  // Buttons which are included in the editor toolbar should have the plugin property set.
  plugin: "citationPlugin",
  callback: function () {
    if (!this.popups.isVisible("citationPlugin.popup")) {
      this.citationPlugin.showPopup();
    } else {
      if (this.$el.find(".fr-marker")) {
        this.events.disableBlur();
        this.selection.restore();
      }
      this.popups.hide("citationPlugin.popup");
    }
  },
});

Here, we define a new icon and tell Froala what to do when the user clicks it.

Add a close button for the popup

Define a close icon (popupClose) and wire it to hide the popup.

This button allows users to close the popup without inserting a citation.

// Define custom popup close button icon and command.
FroalaEditor.DefineIcon("popupClose", { SVG_KEY: "back" });
FroalaEditor.RegisterCommand("popupClose", {
  title: "Close",
  undo: false,
  focus: false,
  callback: function () {
    this.citationPlugin.hidePopup();
  },
});

Handle form submission (APA formatting)

Add a new button (citationSubmit). When clicked, it triggers the following actions:

  • Read the form fields.
  • Build the APA website citation string.
  • Insert the citation into the editor at the cursor position.
  • Close the popup afterward.
// Define custom popup close button icon and command.
FroalaEditor.DefineIcon("citationSubmit", {
  template: "svgMultiplePath",
  PATHS: `<g id="SVGRepo_bgCarrier" stroke-width="0"></g><g id="SVGRepo_tracerCarrier" stroke-linecap="round" stroke-linejoin="round"></g><g id="SVGRepo_iconCarrier"><path d="M905.92 237.76a32 32 0 0 0-52.48 36.48A416 416 0 1 1 96 512a418.56 418.56 0 0 1 297.28-398.72 32 32 0 1 0-18.24-61.44A480 480 0 1 0 992 512a477.12 477.12 0 0 0-86.08-274.24z" fill="#231815"></path><path d="M630.72 113.28A413.76 413.76 0 0 1 768 185.28a32 32 0 0 0 39.68-50.24 476.8 476.8 0 0 0-160-83.2 32 32 0 0 0-18.24 61.44zM489.28 86.72a36.8 36.8 0 0 0 10.56 6.72 30.08 30.08 0 0 0 24.32 0 37.12 37.12 0 0 0 10.56-6.72A32 32 0 0 0 544 64a33.6 33.6 0 0 0-9.28-22.72A32 32 0 0 0 505.6 32a20.8 20.8 0 0 0-5.76 1.92 23.68 23.68 0 0 0-5.76 2.88l-4.8 3.84a32 32 0 0 0-6.72 10.56A32 32 0 0 0 480 64a32 32 0 0 0 2.56 12.16 37.12 37.12 0 0 0 6.72 10.56zM230.08 467.84a36.48 36.48 0 0 0 0 51.84L413.12 704a36.48 36.48 0 0 0 51.84 0l328.96-330.56A36.48 36.48 0 0 0 742.08 320l-303.36 303.36-156.8-155.52a36.8 36.8 0 0 0-51.84 0z" fill="#231815"></path></g>`,
  VIEWBOX: "0 0 1024 1024",
});

FroalaEditor.RegisterCommand("citationSubmit", {
  title: "Close",
  undo: false,
  focus: false,
  callback: function () {
    //Read values from inputs: citation-author, citation-date, citation-title, citation-website, citation-url
    var author = document.getElementById('citation-author').value;
    var date = document.getElementById('citation-date').value;
    var title = document.getElementById('citation-title').value;
    var website = document.getElementById('citation-website').value;
    var url = document.getElementById('citation-url').value;
    
    //Build APA string
    var citation = `<p>${author}. (${date}). <cite>${title}</cite>. ${website}. ${url}</p>`;

    // Insert into Froala editor
    this.html.insert(citation);
    // close the popup 
    this.citationPlugin.hidePopup();
  },
});

Optional: style the inserted citation

You can also wrap citations in a consistent container for styling โ€”for example, wrapping it in a <p class="citation">

.citation {
ย ย font-size: 0.9em;
ย ย color: #555;
}

Style the form (popup)

Add basic layout/styling for the form inside the popup.

Example CSS:

.fr-citation-popup {

ย ย padding: 10px;

}

.fr-citation-popup label{

ย ย width: 75px;

ย ย display: inline-block;

}

.fr-citation-popup input{

ย ย padding: 5px;

ย ย margin-bottom: 5px;

ย ย border-radius: 7px !important;

ย ย border: 1px solid #333 !important;

}

Initialize the editor with the new button

Include the citation button in the Froala toolbar.

const editor = new FroalaEditor("#editor", {

ย ย toolbarButtons: [

ย ย ย ย ["bold", "italic", "underline", "fontSize", "lineHeight"],

ย ย ย ย ["alignLeft", "alignCenter", "alignRight"],

ย ย ย ย ["citation", "textColor", "backgroundColor"],

ย ย ย ย ["insertLink", "html"],

ย ย ],

});

After you follow our step-by-step guide, youโ€™ll end up with:

  • A single, reusable plugin named โ€œCitationโ€
  • A toolbar button labeled Citation
  • A popup form to collect author, date, title, website name, and URL
  • APA-formatted website citations inserted at the cursor position
  • Optional styling hooks to ensure consistent appearance

Enhancements and Tips

  • Validation: Require fields like Author and Title to prevent incomplete citations.
  • Support Multiple Citation Formats: Add options for MLA or Chicago to support more audiences.
  • Links: Make URLs clickable so readers can follow sources directly.
  • Citation Block: Insert citations in a styled container for better readability.

Takeaways

  • You can extend Froala with a lightweight, reusable citation tool that inserts APA website citations directly at the cursor.
  • The approach emphasizes a clean, lazy-loaded popup to minimize performance impact.
  • You can adapt the UI and formatter to support additional citation styles and branding requirements.

Conclusion

We started with the basics of citations and APA style, then walked through creating a custom button, building a popup, handling input, and inserting formatted citations. This small feature demonstrates how powerful and customizable Froala really is.

With just a few lines of JavaScript, you transformed Froala into an academic-friendly writing tool. Now, you can extend this feature furtherโ€”support more citation styles, build citation libraries, or connect to external reference managers.

Froala gives you the building blocks; your creativity defines whatโ€™s possible.

Try adding this citation button to your own Froala editor setup. Explore Froalaโ€™s documentation to see what else you can customize, and consider expanding the feature to support your usersโ€™ unique workflows. With Froala, the editor grows with your needs.

5 Signs You Need AI Functionality in Your HTML Code Writer

An exclamation point along with a symbol for AI, representing the 5 signs you need AI functionality in your WYSIWYG editors.

An HTML code writer is a must for applications that let users create content without touching raw code. With such a tool, marketers can build landing pages, bloggers can draft articles, and educators can create digital learning experiences. The tool empowers many users, but recurring problems remain, such as repetitive formatting, moderation backlogs, and other manual processes.

As developers, the burden of addressing these user pain points falls to us. Thankfully, a modern HTML code writer or WYSIWYG HTML editor can come equipped with artificial intelligence (AI) functionality. This helps remove repetitive tasks, suggest improvements on the go, and allow humans to focus on higher-level work.

But ask yourself, โ€œDo I really need AI in my editor, or is it just the hype talking?โ€ Sometimes, extending the basics is enough, but other times, smart features make all the difference. Knowing the signals should help you decide.

This guide highlights five signs that show when AI can positively transform an HTML code writer. Additionally, it explains how AI tackles common bottlenecks, how to test readiness, and how to adopt it safely and responsibly.

Key Takeaways

  • Repetitive formatting and file processing bottlenecks are strong signs that AI can boost efficiency in your HTML code writer.
  • AI can auto-generate metadata like alt text or image tags, saving manual effort and improving accessibility.
  • Content moderation blockers decrease when AI handles the automatic filtering for inappropriate content.
  • Multilingual support becomes more feasible when AI suggests translations and localized phrasing.
  • User demand for smart features, like summarization and code refactoring, points to the need for AI-driven tools.

5 Signs You Should Add AI to Your HTML Code Writer

Before diving into each signal, letโ€™s establish one thing: AI is not necessarily all about automating every decision and feature. Instead, itโ€™s about reducing repetitive, mechanical work so your team can focus on strategy, creativity, or compliance. If the following scenarios sound familiar, AI will likely make a difference in your applications.

Sign #1: End Users Constantly Repeat the Same Formatting Tasks

When teams repeatedly apply identical layouts, CSS classes, or inline formatting, they might end up wasting time or producing inconsistencies. For example, a marketing team might need to insert the same call to action banner across dozens of pages. Doing this manually, even with copy-paste shortcuts, can lead to errors.

AI can observe the patterns and suggest templates, reusable components, or even nearly complete content. Think of how Googleโ€™s Smart Compose, which uses AI, offers sentence completion based on what youโ€™ve typed before.

An example that shows Google's Smart Compose feature. In the GIF, the user types an email, and Google automatically suggests what to type next, including the phrases "...this week?" and "Please let me know."

Googleโ€™s Smart Compose in Gmail

The same principles apply to HTML editors. Instead of starting with a blank space, the editor could suggest relevant elements based on what youโ€™ve been creating.

Tip: Begin with a โ€œsuggest templateโ€ feature instead of forcing automatic changes. This approach helps build trust and avoids giving users unwanted surprises or irritation. Ask permission from the user before generating content right away.

Sign #2: You Need Better File Metadata Processing but Lack the Resources

Accessibility, SEO, and usability depend on accurate metadata. Alt text helps screen readers describe images for visually impaired users. File tags and captions, on the other hand, make media libraries searchable.

However, writing these manually for every upload is tedious, and skipping them hurts both usability and page ranking.

AI can instantly generate alt text based on image recognition, extract visible text using OCR (optical character recognition), and propose descriptive captions. For instance, uploading a product image of a cat could automatically yield metadata like

  • Alt text: โ€œOrange domestic shorthair cat lying down on a tableโ€
  • Suggested tags: โ€œcats, pets, animalsโ€

A GIF of an HTML code writer with AI and file upload features. Here, the user uploads a picture of a cat, which the AI correctly identifies.

The GIF above demonstrates how an HTML code writer can use AI to recognize images and provide descriptive tags. In this setup, the user uploads an image of an orange cat on a table. Afterwards, the AI features of the file picker generated a few related tags, which included โ€œcat: 95โ€ and โ€œanimal: 95.โ€

This means that the AI is positive that the image contains a cat. The organization can then use this to organize the files based on the generated tags.

Tip: Always present AI-generated metadata as editable suggestions. Human oversight helps ensure accuracy and prevent mistakes (e.g., tagging the orange cat as a โ€œcroissantโ€).

Sign #3: Youโ€™re Relying Solely on Manual Moderation or Safety Checks for Uploads

If your application contains user-generated content, especially media, manual moderation is probably slowing down workflows. Checking each image, video, or snippet of HTML for inappropriate or unsafe material is not scalable. This could lead to delays or, worse, errors in moderating content, potentially harming users or the platform.

AI-powered content safety models can act as a preventive layer. They quickly flag NSFW or risky uploads, block obvious violations, and route borderline cases to human moderators.

A 2025 study by Dr. Neha Khushal Gadhvi et al. states that AI flags unsafe content significantly faster than humans. It recalls how Facebookโ€™s AI was able to flag more than 99% of hate speech before users were able to report it.

Note: In the same study above, the researchers found that AI isnโ€™t completely safe from bias or false results. Thus, when implementing AI in your HTML code writer, take your time in developing or improving your modelโ€™s training data. Additionally, use AI as a filtering layer, not as the final decision-maker, by keeping humans in the loop.

Sign #4: You Serve a Multilingual Audience and Find It Tough to Localize

Expanding to foreign markets usually requires translating UI language and allowing their users to type in their own languages. Hiring professional translators for every update is expensive and slow. Worse, inconsistent translations might hurt credibility and user trust.

Thankfully, you can now have AI-driven translation and localization features inside an HTML code writer. These can suggest translations, adjust phrasing to fit cultural norms, and even handle pluralization rules. For example, you can set your editorโ€™s AI to suggest translating text if a user types in another language.

An image that shows 2 people speaking different languages. There's a robot between them that translates their languages so they can communicate better. This signifies how HTML code writers with AI functionality can incorporate multilingual support easily.

Note: Like with everything AI, AI translation is not foolproof. Always urge users to review what they type before publishing it.

Sign #5: Users Request Smart Features from You

Sometimes, the clearest signal comes directly from your users. If they ask for summarization tools, grammar checks, or smarter formatting, theyโ€™re telling you they want more efficiency.

AI can enable features like

  • Summarizing long text blocks into concise snippets in one button click
  • Automatically generating content like images, table data (like in Canva Sheets), or even videos and audio
  • Checking content grammar and quality and providing improvement tips
  • Suggesting headings and other elements
  • Optimizing and reformatting code

Imagine a knowledge base article written in plain HTML from an old site. AI could generate a clean, up-to-date outline with <h2> and <h3> tags, summarize key sections, and even highlight accessibility issues. This significantly reduces manual editing and improves readability.

How AI Eases Common but Tough HTML Code Writer Problems

Aside from solving isolated issues, adding AI to HTML code writers can also smooth out systemic bottlenecks across multiple areas of content creation or coding.

File and Media Handling

End users juggle resizing images, converting file formats, checking for unsafe content, and scanning for any malware, among other tasks. Doing this manually creates scattered workflows, slows publishing, and increases the risk of mistakes.

An HTML code writer with AI functionality could centralize all these tasks. For example, in one workflow, it could automatically compress a file, convert PNGs into WebP for faster page loads, and flag NSFW material.

Instead of juggling five different tools, users get a streamlined upload process that produces smaller and safer files by default.

Advanced Styling and Templates

Teams without design backgrounds often create mismatched pages. Fonts appear inconsistent, color palettes drift, and layouts ignore brand guidelines. This could result in a site that feels unprofessional and disjointed.

AI can function like brand police. It could analyze the companyโ€™s design system and recommend templates that keep content within those boundaries. For example, when someone creates a new product page, the AI might suggest a pre-styled component that aligns with the companyโ€™s typography and palette.

Instead of design reviews catching inconsistencies at the end, content starts off polished and on-brand. This reduces back-and-forth with designers and helps non-designers produce professional-quality work.

Spelling, Grammar, and Style Checks

A laptop with two words hovering in front of it: "speelingg," which is highlighted in red, and "spelling," which is highlighted in blue and with a check mark. This demonstrates how editors with AI can detect spelling and grammar errors or even style inconsistencies or poor practices.

Maintaining consistent tone and perfect syntax and spelling across pages, languages, and authors is difficult. One contributor writes casually, another writes in formal business language, and yet another introduces grammar mistakes that slip through review.

As briefly stated earlier, an in-editor AI co-writer can function like a real-time writing assistant. It can help flag typos, correct grammar, improve writing, and suggest rewrites that match the organizationโ€™s preferred style. With multilingual support, AI can even maintain consistency when translating across regions.

As a result, content is more consistent and readable. And even if multiple people contribute to the same content, it could seem as though one person wrote it.

Code Review and Refactoring

Over time, websites and web applications accumulate unused or unnecessary code. Multiple editors leave behind redundant <div> wrappers, inline styles, or outdated practices. The result is bloated, inconsistent markup that can potentially hurt performance, accessibility, or maintenance.

An HTML code writer with AI features could act like a live code reviewer. It can improve code by recommending replacing generic <div> tags with semantic ones like <header> or <article>. It could also suggest stripping out duplicate CSS or highlight accessibility issues such as missing alt text.

Instead of gradually drifting toward messy, unmaintainable code, teams can leverage AI to get a cleaner, more semantic, and accessible codebase. This can help improve load times, search rankings, and scalability.

How to Evaluate for AI-Readiness

Before adding AI, test whether your team and workflows are ready. Check to see if you have:

  • A Clear User Problem: Can you pinpoint measurable friction like time lost in manual processes, errors encountered, or repeated support tickets?
  • Sufficient Data: Do you have real or synthetic samples from which AI can learn?
  • Privacy and Compliance Requirements: Will processing content via AI meet data protection laws?
  • Success Metrics: Define measurable goals like acceptance rate of AI suggestions or reduced moderation time. If, in closed test runs, you see users not using the AI at all, think about your requirements again.
  • A Fallback Plan: Ensure the editor still functions if the integrated AI fails or is unavailable.

Low-Risk Ways to Introduce AI in an HTML Code Writer

Donโ€™t rush when adopting AI. Start small, like:

  • Offering AI suggestions instead of generating automatically and making changes right away, as stated earlier. Let users confirm any changes from the AI before applying them.
  • Keeping humans in the loop for sensitive tasks (e.g., false positives or bias in content moderation, code review).
  • Using feature flags and gradual rollout. Donโ€™t launch every AI functionality at once; instead, enable features in stages or for select user groups. This helps you compare adoption rates, gather feedback, and make adjustments before scaling up.
  • Running A/B tests to track real impact before expanding further.

AI Risks and Red Flags (and How to Mitigate Them)

A digital circuit "storm" that symbolizes AI hallucinations or how AI can go haywire sometimes, even in HTML code writer setups.

AI is powerful, but it can introduce risks. In fact, rushing into it without safeguards can create the opposite of the desired effect, potentially destroying user trust. By anticipating risks, you can build in defenses that keep the technology helpful rather than harmful.

  • Hallucinations: AI sometimes invents details or produces misleading suggestions. Use guardrails and require human review to reduce the chance of bad outputs slipping through.
  • Privacy leaks: If content includes names, addresses, or confidential data (PII), sending it to a third-party API without protection creates compliance problems. Encrypt sensitive data, strip unnecessary personal information, and consider running AI locally when possible.
  • Over-automation: Donโ€™t auto-publish AI content without human confirmation. While this obviously saves time, it can lead to more exhausting work in the future. Keeping humans in control ensures AI remains a powerful support tool, not a counterproductive part of the workflow.
  • Cost creep: Track usage carefully and limit expensive features to where they add value.

By addressing these risks early, teams can have confidence in introducing AI while keeping quality, compliance, and costs under control.

Conclusion

AI goes well with an HTML code writer, providing strategic upgrades when teams face formatting, moderation, or multilingual support bottlenecks. The key is to add it where it solves measurable problems, not where it creates new risks. You should also check first if you really need AI or not.

With platforms like Froala, teams can start with low-risk features such as image tagging suggestions or layout helpers, then grow into moderation or code refactoring as confidence builds. Always keep human oversight, privacy compliance, AI ethics, and cost management in mind.

6 Features You Can Deliver Instantly with HTML Editor Software

An HTML editor software at the middle. Around it are icons for emojis, tables, spell checks, and file uploads, representing some of the tricky features that you can instantly implement using the editor.

HTML editor software resides in most web applications and websites nowadays. Blogs need it for copywriting, email platforms need it for campaigns, ecommerce apps use it for product descriptions, and so on. Because of the efficient way it allows users to edit content, it has become a staple in development workflows.

Itโ€™s easy to make basic editing features like font formatting and text alignment by yourself. However, these simple features just wonโ€™t cut it when it comes to modern user needs.

Users expect smooth uploads, easy table editing, and even real-time collaboration, which are significantly tricky to build from scratch. Adding upload functionality sounds simple, until you realize you also need validation, security and content safety checks, and automatic resizing.

This is why HTML editor software exists. Instead of building many features over a long period of time, developers can rely on tested, prebuilt modules that integrate directly into their app. This helps save time, gives users what they need instantly, and points the product growth in the right direction.

Key Takeaways

  • Many important features that look simple (like tables and uploads) hide deep technical challenges.
  • The speed of delivering features matters more than perfection in competitive environments.
  • Good HTML editor software turns months of development and testing into minutes or hours of integration.
  • Real-time editing, grammar checks, different initialization methods, advanced file handling, and rich content have become baseline expectations shaped by popular tools. Meeting them keeps your product innovative and competitive.
  • Choose editor features based on real user needs.

Why Fast HTML Editor Software Feature Delivery Matters for Developers

As you might have experienced, speed is survival nowadays. Teams canโ€™t afford to spend months rebuilding, testing, refining, and maintaining HTML editor software from the ground up. Every week they spend on reinventing formatting or tables is a week not spent on core product innovation.

Two sides of the image show the difference in feature delivery. At the left side, a conveyor belt fast-tracks the deployment of several features, representing HTML editor software. At the other side, many developers write HTML to accommodate these requirements, building slower.

By adopting HTML editor software, teams:

  • Shorten development cycles: Features that once took months can now take days or even minutes to integrate. For modern HTML editors, developers need only add or remove features, encapsulated in plugins, in their setup.
  • Stay focused on their value proposition: Developers work on the parts that make their web application unique instead of rebuilding existing technology.
  • Deliver consistent experiences: Users see polished, professional editors that work reliably across different devices, platforms, or even user bases.

Note: Itโ€™s alright to take your time and develop your own HTML editor. However, end users might prefer having all editing features available and working right away instead of having to wait. So, consider your project needs, project timeline, and resources before you decide.

6 Features HTML Editor Software Instantly Gives You

A modern WYSIWYG HTML editor usually comes with most of the necessary features your users need. Some even include advanced or novel features like real-time collaboration, autosaving, and artificial intelligence (AI). Here are six hard-to-implement but nice-to-have features that you can instantly obtain with HTML editor software.

Advanced File and Media Handling

If thereโ€™s one feature that almost every user asks for, itโ€™s file uploads. From images in blog posts to videos in course material or PDFs in knowledge bases, people crave media. The problem is that file handling is more than just picking a file and sending it to a server.

Today, file handling encompasses the following chain of responsibilities:

  • Security: Uploaded files can potentially harm your infrastructure. Malicious scripts can hide inside images, or large files can cause denial-of-service (DoS) attacks. For every upload, ensure the implementation of validation (size and type checks), virus detection checks, and content safety checks (NSFW).
  • Performance: Large images or videos can slow down your app. If you donโ€™t compress or resize them, youโ€™ll frustrate users on slower networks.
  • Format compatibility: Not every browser or device can play every video codec or handle every image form. Developers must either convert formats or block unsupported ones.
  • Processing: File handling doesnโ€™t end after the upload. Sometimes, applications enhance or transform uploaded files to suit platform standards.

This is a lot to build on your own, which is where HTML editor software comes in. The best WYSIWYG editors provide built-in file pickers with configurable upload and post-upload rules. You can set file size limits and even automate transformations and processing like image resizing, video conversion, or image recognition.

A GIF that showcases file upload and image cropping in HTML editor software.

The GIF above demonstrates a file upload wherein users can transform the file without needing to leave the editor. In this implementation, you can even scan the uploaded image for viruses or unsafe content or automate other processing tasks.

Further Reading: To align your file upload security with industry best practices, read this blog by OWASP (Open Web Application Security Project). It concisely lists down three security risks for file uploads, along with the prevention methods.

Real-Time Editing

Collaboration is now a baseline expectation, with tools like Google Docs and Canva Teams in widespread adoption. Teams want to work on the same content at the same time while keeping track of changes. But real-time collaboration is technically demanding; for instance, you need to manage:

  • Low-latency synchronization: Each keystroke must appear almost instantly across all active users. Otherwise, the editor would feel laggy and frustrating to use.
  • Conflict resolution: What happens if two people edit the same word at the same time? You need a consistent way to merge changes without corrupting the document.
  • User presence and identity: Users expect to see who else is editing, where their cursor is, and when they join or leave. To take it further, they also expect to see some sort of version history, showing who edited what at a given time.

These challenges usually require WebSocket connections, a protocol for real-time communication, and CRDTs (conflict-free replicated data types) or similar algorithms.

HTML editor software removes much of the burden by offering real-time collaboration plugins. Developers can integrate with existing sync services or, in some cases, use the editorโ€™s built-in backend. Mentions and change tracking are sometimes included and give users the ability to tag teammates or roll back edits.

Note: Mentions are more than just โ€œ@someoneโ€ commands. They often tie into a user directory, autocomplete, and notifications. Good editor software makes integrating this feature seamless.

Robust Table Editing

Tables are powerful for presenting data, but they can sometimes cause headaches, as this accessibility guide from Stanford University shows. For instance, adding or resizing columns often breaks the layout, especially in mobile views. Additionally, including support for accessibility (e.g., screen readers) adds another layer of complexity.

Developers who try to build editors that support tables usually run into these common problems:

  • Resizing and alignment: Simple drag-to-resize sounds easy, but aligning cells consistently and keeping all elements intact across devices is tough.
  • Responsive design: Tables that look neat on desktop can sometimes seem unreadable on smaller screens. Without responsive wrapping, mobile users have difficulty navigating them.
  • User experience: Non-technical end users often struggle with raw HTML tables. They expect drag handles, dropdown menus for table options, and quick insert for cells and other table elements.

HTML editor software solves these issues by bundling in table functionality. These range from drag handles to responsive templates and even custom table styling and media-in-cell support.

Multiple Initialization Modes

Sometimes, youโ€™ll want full-page editing for a blog post. Other times, youโ€™ll need a document-ready editor for Google Docs-like apps.

Building multiple modes has its complexities, because each requires different CSS and JavaScript handling:

  • Inline mode allows users to edit content through an inline toolbar by clicking on an element. This is similar to link editing in Google Docs or WordPress or some grammar checkers.
  • Full-page editing includes the usage of <html>, <head>, and <body> tags as well as the <!DOCTYPE> declaration. This is useful for a complete page editing experience, such as in content management systems (CMS).
  • Document-ready mode presents optimal editing options for creating online documents, containing โ€œprintโ€ or โ€œexport to PDFโ€ buttons, among many others. Think of it like any word processor, such as MS Word or Google Docs.
  • A full-featured mode contains as many features as possible to support as many requirements as it can. However, be careful when using this, since having many features might slow down the editor or overwhelm the user. Because of this, you should consider toolbar organization and using a lightweight WYSIWYG editor.
  • The iframe mode places the editorโ€™s content in an isolated iframe. This prevents potential conflicts with the main pageโ€™s styles and scripts.
  • Popup or modal mode separates the content view from the editing process. It does so by opening a modal popup containing the editor once the user clicks a button.

Modern HTML editor software has to support most of these initialization modes out of the box to accommodate different use cases.

This GIF demo shows a document processor powered by HTML editor software. The user first inserts an image, then highlights a sentence, and lastly, clicks the print button.

For instance, in this GIF demo, an HTML editor appears akin to a full document processor. Here, the user inserts an image, highlights a sentence, and clicks the print button. Editors like this one allow you to build robust document editors without needing too much effort.

Spelling and Grammar Checking

Checking for spelling and grammar correctness is important for most editors, especially in professional setups. Writers, learners, and professionals expect at least some sort of help when typing, since catching typos manually is inefficient. However, adding spelling and grammar checking is not that straightforward normally.

Hereโ€™s whatโ€™s usually involved when implementing your own spelling and grammar checking:

  • Spell checks highlight misspelled words against a dictionary. While basic, they prevent obvious credibility issues. But what if you need to support multiple languages or technical vocabularies?
  • Grammar checks go beyond spelling by analyzing sentence structure. They flag subject-verb agreement errors, missing punctuation, or awkward phrasing. Implementing this requires integration with advanced language models or APIs.
  • Style checking addresses tone, clarity, and readability. For example, a style checker might highlight passive voice, long sentences, or jargon, similar to how WordPress analyzes content readability. This goes a step beyond correctness to improve communication.

The best WYSIWYG HTML editor should have a prebuilt spelling and grammar checker. By doing so, it consolidates all editing features in the editor. In turn, you wonโ€™t have to worry about integrating other spelling and grammar checking services separately.

Rich Content (Emojis, Embeds, Code Blocks, Math)

Text rarely tells the full story, as modern users rely heavily on emojis and Markdown to communicate better. Similarly, developers need code blocks to create web content using an environment in which theyโ€™re more comfortable.

If your end users want the ability to express themselves more freely, you have to implement a combination of the following, depending on the use case:

  • Emoji: These symbols add emotion and tone; for instance, a simple thumbs up can replace a sentence of approval. However, emojis need standard rendering across platforms.
  • Embeds: Let authors drop in YouTube videos, X tweets, or interactive maps. The challenge here is security, as malicious code from untrusted domain embeds could run in your app.
  • Code Blocks: Use syntax highlighting to make programming languages readable. This also allows developers to switch between a WYSIWYG (live preview) and HTML mode.
  • Math editing: Allows educators or learners in scientific fields to write mathematical expressions easily on the web. However, itโ€™s difficult to enable LaTeX input (a math markup language) from scratch, especially when it comes to higher math.

This GIF shows a user adding various rich content into the editor. The user adds an emoji, a table, and a horizontal line. The user also browsers through several tabs of special characters and symbols.

Capable HTML editor software possesses all or most of these rich content features. For instance, it can allow users to include math expressions through simple WYSIWYG equation builders. Additionally, it can escape special characters automatically to prevent injection attacks in embedded code.

Conclusion

Delivering advanced editing features quickly isnโ€™t about showing off. Itโ€™s about removing friction for users, speeding up your developer workflow, and simplifying maintenance.

Spelling and grammar checks improve clarity. Advanced file handling satiates the primal gravitation towards media content and processing. Rich content features make documents more expressive and versatile.

The key here is balance. Give users enough power to get creative without overwhelming them or bloating your app or making them wait too long. Every feature should justify itself with measurable impact, such as faster workflows, fewer errors, or higher user satisfaction.

The best HTML editor software turns these once-complex features into plug-and-play modules. This lets your team ship faster and focus where it matters, building the unique values of your product.

That said, always assess your usersโ€™ requirements first. Never give features they wonโ€™t use, and prioritize what they need most. And if you can roll these out quickly or at the same time, youโ€™ll earn trust and enthusiasm faster than any marketing campaign could.

Note: If you want to see some of these features in action, visit this GitHub repository. It demonstrates the file upload, document-ready, and rich content functionalities using a WYSIWYG editor.