
How to transform your LMS with a React WYSIWYG HTML editor, Part 3

Editing existing content ensures that an application or its users accurately reflect any updates or modifications. This makes it a vital feature in any application, including the simple LMS that we’ve been building. In this final part of our React WYSIWYG HTML editor-powered LMS tutorial, we’ll focus on enabling content editing for a chapter. We’ll guide you through using Froala’s editing interface to save changes seamlessly, modifying our React components, and setting up the backend for saving changes in a chapter. By the end of this tutorial, you’ll have a simple and robust LMS where users can create, read, and update chapters. Plus, you’ll learn how to edit images uploaded via Filestack—all within an intuitive editing environment. Let’s get started!
Key takeaways
- Understand how to save edited content from Froala to SQL Server
- Learn about editing images uploaded through Filestack within the editor
- Ensure seamless content updates in the React frontend
- Handle potential issues properly in both the frontend and backend
- Experiment more with Filestack and Froala to implement more functionality
Recap and objectives
This tutorial is the final one of a three-part series. In Part 1, we created our React LMS, which allowed users to load and save courses and chapters. For the latter, we used Froala to create the chapter’s contents. Moreover, to upload documents and images, we used Filestack, which is natively integrated into Froala. On the other hand, Part 2 explored how we can read or load a chapter’s contents back to the UI and the editor. We were able to display the contents accurately and as they were entered. If you missed any of the previous articles, click on the links below:
- Part 1 (Saving content from the React WYSIWYG HTML editor to the database)
- Part 2 (Loading content from the database back to the editor)
- Creating a free Filestack account
In Part 3, we’ll modify our codes to allow users to update content. For simplicity, we’ll only allow updates for a chapter’s title, description, and contents. To accomplish this, we’ll edit the “details” view of a chapter and include an “Edit” button. Clicking the button should replace the text with input fields and add two new buttons: one for saving and one for canceling. Additionally, clicking the edit button should allow the user to modify content within Froala. Afterwards, we’ll send the updated contents to the backend for saving.
Setting up update operations for the React WYSIWYG HTML editor
Edit the Froala component
Let’s start off by modifying our Froala component so that it now checks when the user is in “editing” mode. We also need to ensure that we set the chapter contents every time a user changes something within the editor. Replace our initial code for FroalaComponent.jsx with:
import React, { useEffect } from 'react';
import 'froala-editor/css/froala_style.min.css';
import 'froala-editor/css/froala_editor.pkgd.min.css';
import FroalaEditorComponent from 'react-froala-wysiwyg';
import 'froala-editor/js/plugins.pkgd.min.js';

function FroalaComponent({ setChapterContent, setChapterImage, initialContent, isEditing}) {
  const config = {
    readonly: !isEditing,
    filestackOptions: {
      uploadToFilestackOnly: true,
      filestackAPI: 'yourFilestackAPIKey',
    },
    events: {
      'contentChanged': function () {
        if(isEditing){
          const updatedContent = this.html.get();
          setChapterContent(updatedContent);
        }
      },
      'filestack.uploadedToFilestack': function (response) {
        if (response && response.filesUploaded[0].url) {
          setChapterImage(response.filesUploaded[0].url); // Set the image URL in the parent state
        }
        else{
          console.error("Image upload failed, no URL found in response", response);
        }
      }
},
  };

  useEffect(() => {
    const filestackScript1 = document.createElement('script');
        filestackScript1.src = 'https://static.filestackapi.com/filestack-js/3.32.0/filestack.min.js';
        filestackScript1.async = true;
        document.body.appendChild(filestackScript1);

        const filestackScript2 = document.createElement('script');
        filestackScript2.src = 'https://static.filestackapi.com/filestack-drag-and-drop-js/1.1.1/filestack-drag-and-drop.min.js';
        filestackScript2.async = true;
        document.body.appendChild(filestackScript2);

        const filestackScript3 = document.createElement('script');
        filestackScript3.src = 'https://static.filestackapi.com/transforms-ui/2.x.x/transforms.umd.min.js';
        filestackScript3.async = true;
        document.body.appendChild(filestackScript3);

        const filestackStylesheet = document.createElement('link');
        filestackStylesheet.rel = 'stylesheet';
        filestackStylesheet.href = 'https://static.filestackapi.com/transforms-ui/2.x.x/transforms.css';
        document.head.appendChild(filestackStylesheet);

    return () => {
      document.body.removeChild(filestackScript1);
      document.body.removeChild(filestackScript2);
      document.body.removeChild(filestackScript3);
      document.head.removeChild(filestackStylesheet);
    };
  }, []);

  return (
    <div className="editor">
      <FroalaEditorComponent tag='textarea' config={config} model={initialContent} onModelChange={(content) => setChapterContent(content)}/>
    </div>
  );
}

export default FroalaComponent;
Note that we added a new parameter called “isEditing” to the FroalaComponent function. This determines whether a user is in read mode or edit mode. We’ll only allow any changes if the user is editing. Lastly, we added an onModelChange property to the FroalaEditorComponent to set the chapter’s contents every time the user modifies the editor’s contents. After updating our FroalaComponent, we’ll update the “chapter details” screen.
Update the form and the React WYSIWYG HTML editor
Now, we’ll add the “Edit,” “Save,” and “Cancel” buttons to the ChapterDetails component. Replace your ChapterDetails.jsx code with:
import React, { useState, useEffect } from 'react';
import { useParams, Link } from 'react-router-dom';
import FroalaComponent from './FroalaComponent';

function ChapterDetails() {
  const { courseId, chapterId } = useParams();
  const [chapter, setChapter] = useState(null);
  const [isEditing, setIsEditing] = useState(false);
  const [editedChapter, setEditedChapter] = useState({});
  const [chapterImage, setChapterImage] = useState('');

  const fetchChapterDetails = async () => {
    const response = await fetch(`path-to-backend/getChapterById.php?chapterId=${chapterId}`);
    const data = await response.json();
    setChapter(data);
    setEditedChapter({
      ...data,
      chapter_id: chapterId
    });
  };

  useEffect(() => {
    fetchChapterDetails();
  }, [chapterId]);

  if (!chapter) {
    return <p>Loading chapter details...</p>;
  }

  const handleSetChapterContent = (content) => {
    console.log("Updated chapter content:", content);
    setEditedChapter((prev) => ({
      ...prev,
      chapter_content: content,
    }));
  };

  const handleEditChapter = () => {
    setIsEditing(true);
  };

  const handleCancelEdit = () => {
    setIsEditing(false);
    setEditedChapter(chapter);
  };

  const handleSaveEdit = async (event) => {
    event.preventDefault();
    const response = await fetch('path-to-backend/updateChapter.php', {
      method: 'POST',
      headers: {
        'Content-Type': 'application/json',
      },
      body: JSON.stringify(editedChapter)
    });

    if(response.ok){
      setChapter(editedChapter);
      setIsEditing(false);
    }
    else{
      console.error('Failed to save chapter.');
    }
  }

  const handleInputChange = (e) => {
    const {name, value} = e.target;
    setEditedChapter({
      ...editedChapter,
      [name]: value
    })
  }

  return (
    <div>
      <form onSubmit={handleSaveEdit}>
        <h1>Chapter Details</h1>
        <div>
          <Link to={`/chapters/${courseId}`}>
            <button>Back to Chapters</button>
          </Link>
        </div>
        {isEditing ? (
          <>
            <button type="submit">Save</button>
            <button type="button" onClick={handleCancelEdit}>Cancel</button>
          </>
        ) : (
          <button type="button" onClick={handleEditChapter}>Edit</button>
        )}

        <div>
            <div className="chapter-card">
              <h3>
                {isEditing ? (
                  <input
                    type="text"
                    name="chapter_title"
                    value={editedChapter.chapter_title}
                    onChange={handleInputChange}
                  />
                ) : (
                  chapter.chapter_title
                )}
              </h3>
              <p>
                {isEditing ? (
                  <textarea
                    name="chapter_description"
                    value={editedChapter.chapter_description}
                    onChange={handleInputChange}
                  />
                ) : (
                  chapter.chapter_description
                )}
              </p>
              <FroalaComponent
                initialContent={isEditing ? editedChapter.chapter_content : chapter.chapter_content}
                setChapterContent={handleSetChapterContent}
                setChapterImage={setChapterImage}
                isEditing={isEditing}
              />
              <p>This is how the Filestack URL will appear if stored separately in the database: <a href={chapter.chapter_img_url}>{chapter.chapter_img_url}</a></p>
              <p>Date Published: {chapter.date_published ? new Date(chapter.date_published.date).toLocaleDateString() : 'N/A'}</p>
            </div>
        </div>
      </form>
    </div>
  );
}

export default ChapterDetails;
This is similar to our old code, except that it now checks whether the user is editing or just viewing. We also added a few new functions for setting the editing mode and updating the chapter contents. To check whether the user is in editing mode or not, we added some conditional statements in the DOM that check the value of isEditing, which is set to false by default. Depending on its value, we either load the text or input fields for the chapter title and description. For saving the contents, we declare a new function called handleSaveEdit, which sends the data to an endpoint called updateChapter.php. Once the server returns a response, we set the modified content as the new content of the fields and the React WYSIWYG HTML editor. Now that we’ve finished the front-end part of the LMS, let’s deal with the backend.
Save the changes in the database
Create a new PHP file (updateChapter.php in our case). Afterwards, insert the following code:
<?php
    header('Access-Control-Allow-Origin: http://localhost:3000');
    header("Access-Control-Allow-Methods: GET, POST, OPTIONS");
    header("Access-Control-Allow-Headers: Content-Type, Authorization");
    header("Content-Type: application/json");
    if ($_SERVER['REQUEST_METHOD'] === 'OPTIONS') {
        header("HTTP/1.1 200 OK");
        exit();
    }
    include "connection.php";

    $input = json_decode(file_get_contents("php://input"), true);

    $chapter_id = $input["chapter_id"];
    $chapter_title = $input["chapter_title"];
    $chapter_description = $input["chapter_description"];
    $chapter_content = $input["chapter_content"];

    $query = "
        UPDATE chapter SET
        chapter_title = ?,
        chapter_description = ?,
        chapter_content = ?
        WHERE chapter_id = ?
    ";

    $params = array($chapter_title, $chapter_description, $chapter_content, $chapter_id);
    $result = sqlsrv_query($conn, $query, $params);

    if($result===false){
        echo json_encode(["error" => "Failed to save chapter"]);
    }
    else{
        echo 1;
    }
    sqlsrv_close($conn);
?>
The file starts by first establishing a connection to the database and then getting the contents from our React application. Afterwards, we initialize and run a query that updates the title, description, and contents of a chapter. And that’s the last step, at least in this tutorial. Next up, we’ll run and test the application.
Run the application
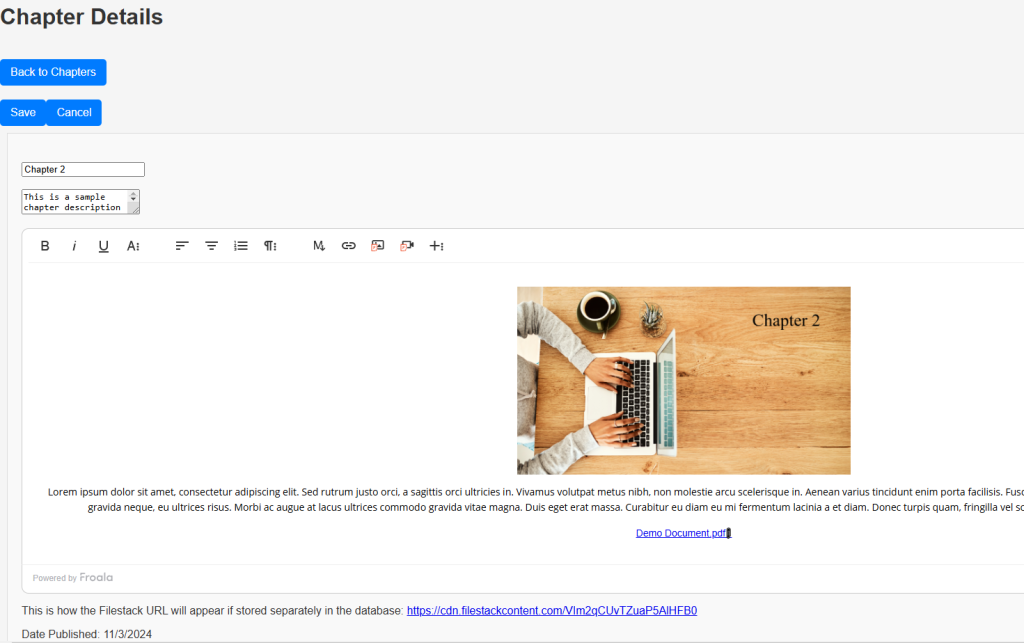
After running the application, we should see the same “Courses” screen that we already had before. Click “View Course” on any of the courses, and you should see the list of chapters within the course. Let’s click the “Details” button. The application will take us to the screen that we made in Part 2. However, we now have the “Edit” button. Click on it, and you’ll see the following screen:
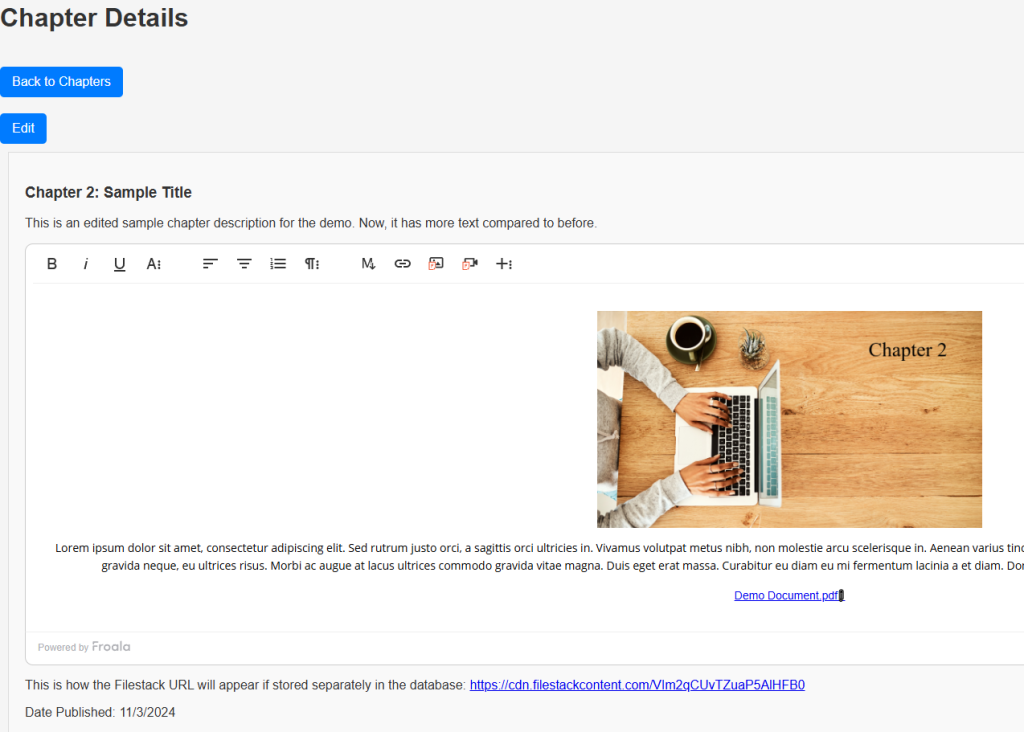
The “Save” and “Cancel” buttons have now replaced the edit button. Also, the title and description labels now changed into editable input fields. Let’s try changing only the title and the description fields and clicking the save button. We should have something like:
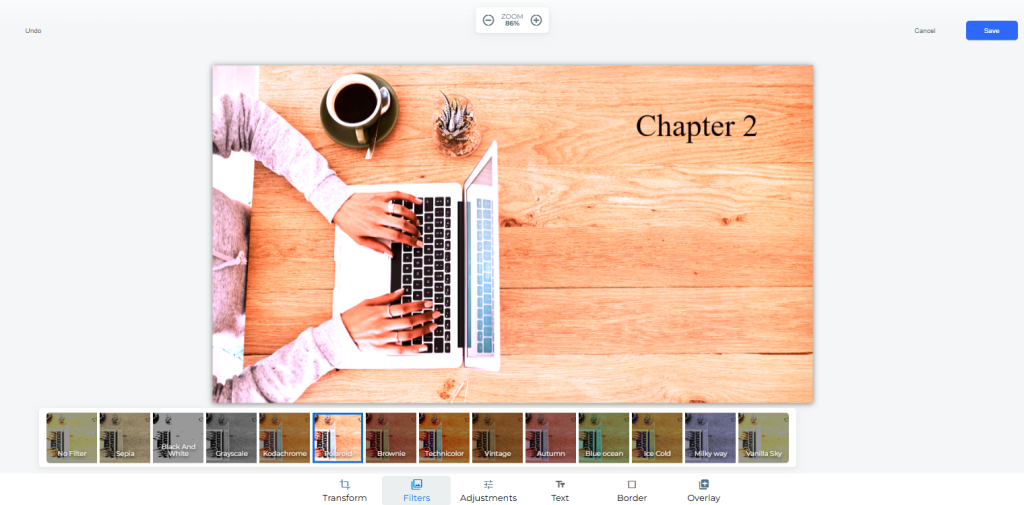
Now, let’s click “Edit” again and click on the image. We should see the Filestack transformation button. Let’s click it and apply a Polaroid filter.
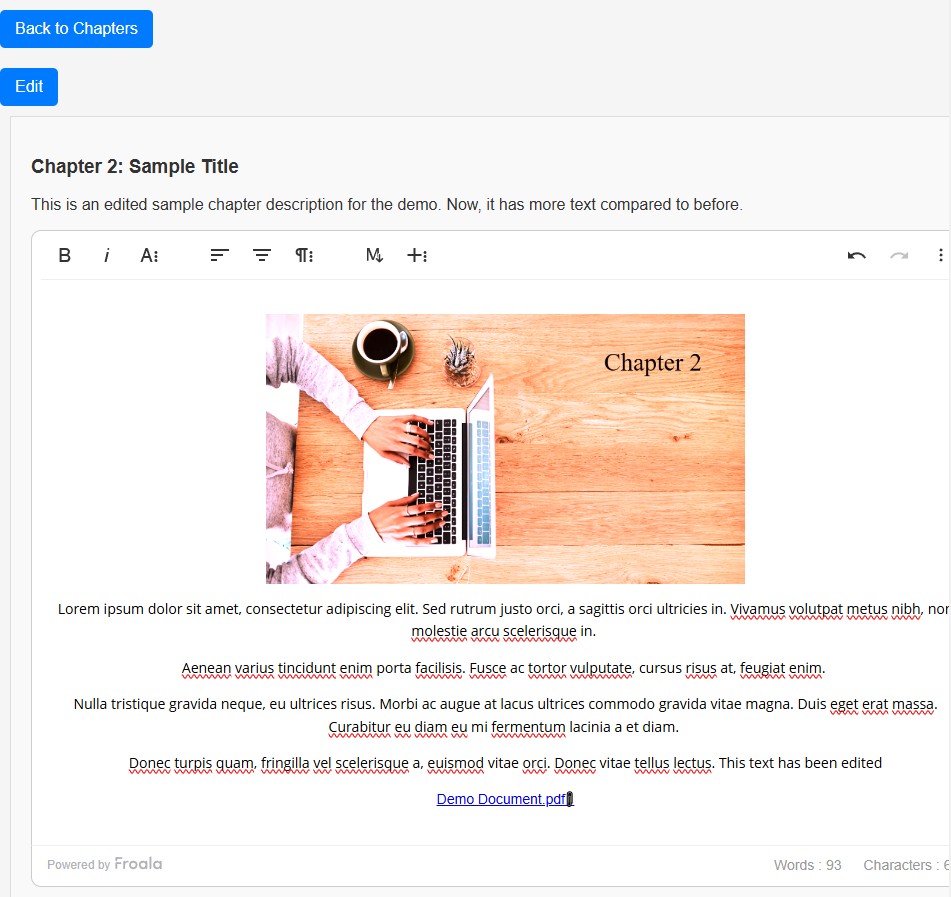
After clicking “Save” within the file picker, let’s also add line breaks and a sentence to the text in the editor. And then, let’s click the outer “Save” button on the chapter screen. We should get something similar to this screen:
Finally, let’s check our database and Filestack account for updated content:


From the images above, it seems that we successfully changed the contents of our chapter_title, chapter_description, and chapter_content fields. Furthermore, we have an updated file on the Filestack dashboard. Downloading it will yield the following image:

And that’s where our 3-part series about reinforcing your React LMS’ content editing with Froala and Filestack ends. Note that this is just a tutorial on making React, Froala, and Filestack work together to form a reliable and powerful LMS. If you want to create an LMS or similar application, you should consider significantly more factors, such as security, optimization, best practices, and more. For example, you should always trim input on the back end and check them for errors or vulnerabilities. Additionally, you should parameterize queries, prevent duplicates, commit or rollback transactions, and more. You can also explore the more advanced features of Filestack, such as OCR and object recognition. To get started more easily, check out the repository for this demo.
Conclusion
By now, you’ve built a simple yet multi-featured LMS with advanced React WYSIWYG HTML editor capabilities. You’ve gone from saving content for a course to loading it back to the frontend and editing it. As you continue developing, always remember that you can implement complex functionality by doing things one step at a time and by relying on tools that are already there. Add more interactive elements, such as chat or study groups. Expand with and learn new tools. Refine the UI, UX, and security of your application. You might still have plenty to do, but hopefully with this tutorial, you’re already on your way to building something remarkable. Enjoy and good luck!
Get your Filestack API here for free.


No comment yet, add your voice below!